

It’s something we’ve all run into, crappy generic photos that have nothing to do with your blog being forced onto your page.
Images have an incredible power to inspire. The right image before your article can set the tone for the whole blog.
So why would you leave this critical element up to default?
I’m going to show you how to take control of the featured image by learning how to hide images that don’t help you.
There are two easy ways to do that, using CSS and plugins.
I am gonna show you how to do both, right now.
Let’s jump in.
Why You Should Hide The Featured Image
On some WordPress themes, the first image is selected automatically as a Featured Image.
That image has nothing to do with your article.
Worse, that image may get repeated for multiple articles.
Another thing that happens, a lot, is that the image isn’t formatted for mobile!
Which means that when a visitor is on their phone a giant picture will take up their whole screen before they see one word you’ve written. That’s not cool.
Let’s hide that image and take control of your website.
How To Hide Featured Image Using Plugins
Install Hide Featured image plugin on WordPress.
You can install the plugin directly from the dashboard.
Go to plugin >> Add New >> search the plugin >> click install >> activate it
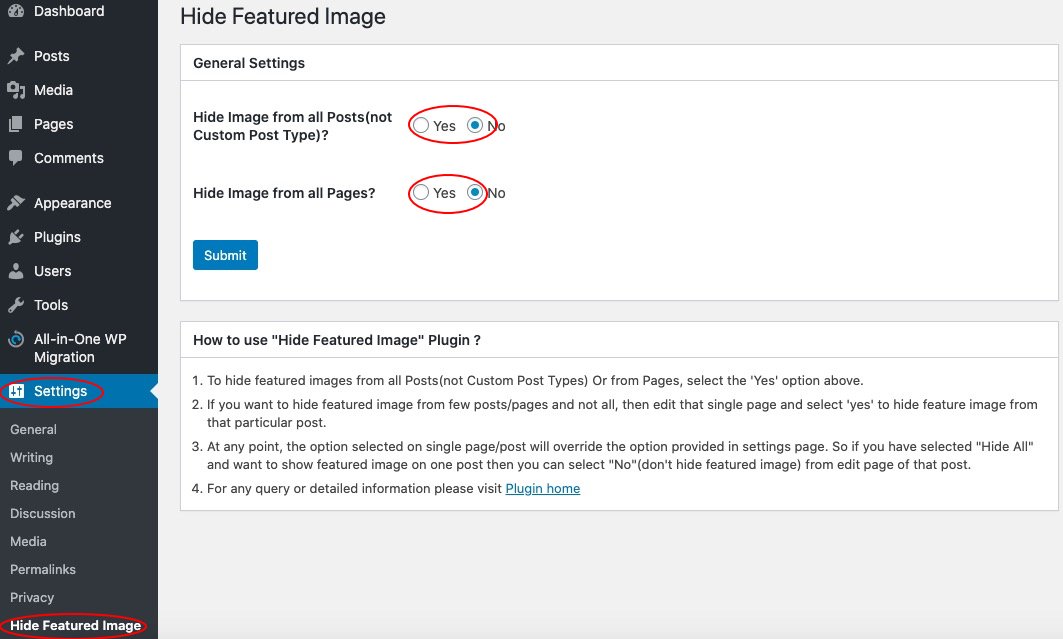
After activating the plugin, you will notice the “Hide Featured Image” menu under the settings section.
Click it. If you want to hide the image for all posts and pages, click on the “Yes” redo button for both posts and pages, and click on Save.
If you want to hide the featured image for a specific post, then click edit on the post where you want to hide the image.
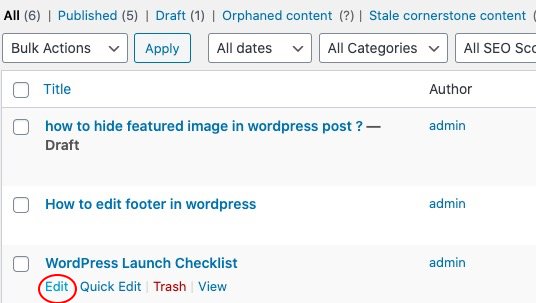
On the right side options, scroll down and click the “Yes” redo button under the “Hide Featured Image” section and click Update.
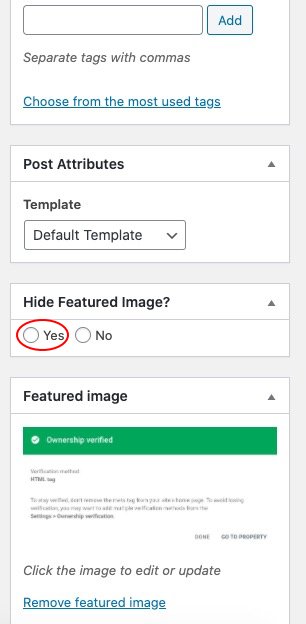
Note: This plugin will hide the image from appearing at the frontend. It won’t delete the image. If you ever want the image back just click on the “No” redo button to retrieve the image.
How to Bulk Edit Featured Image
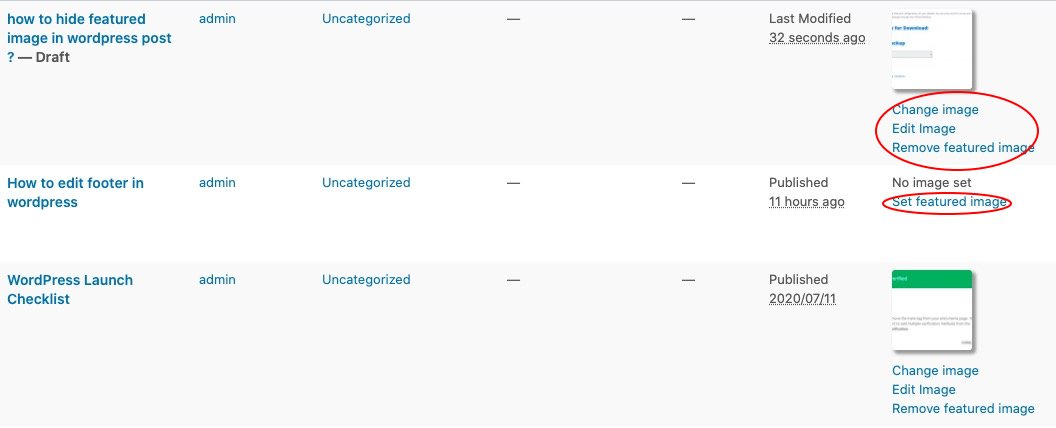
If you want to add, remove, or replace the featured image from the post dashboard, install the Quick Featured image plugin.
After installing and activating the plugin, you will notice an additional column with an image section on the post dashboard.
Insert or remove the feature image directly from the post dashboard.
How To Hide Featured Image Using CSS
To hide it on the Twenty-twenty theme, go to
Appearance >> Customize >> Additional CSS >> Paste the following CSS code and click publish.
.featured-media{
display: none;
}
Note: it will hide the image of all the posts including on the homepage.
To hide the image on other themes, find out the CSS class or ID of that image and replace “featured-media” in the above code with the respective class or ID.
To find out the CSS class or ID, use the inspect element on your browser.
The reason for using CSS code instead of a plugin, is that the CSS code won’t consume as much CPU as the plugin.
So it won’t affect the website loading time.
When It Comes To The Featured Image
The Featured Image can be meaningful for your website but not if it doesn’t fit your design.
It’s worth disabling them until you can add the image you choose.
You can disable it using either the plugin or through CSS.
If you don’t know how to use CSS code, use the plugin for ease.
Now you know how to set yourself up for success or you can leave it up to the website default.
The choice is yours.
Slug: how-hide-featured-image-wordpress-post
Meta description: If featured image is annoying to your website design, it’s better to hide them for proper user experience. Learn how to hide Featured image without coding.