
How To Install WordPress
You want to get busy building your website and have decided to use WordPress.
Great choice!
Since WordPress is the most popular platform, there are plenty of ways to go about it.
Whether you are experienced in coding or not, by the time you are done reading this you are going to be able to install WordPress!
In this post, you are going to learn how to install WordPress through auto-installers.
You will also learn how to install it manually.
Or you could go a different route, and get an inexpensive web hosting provider that offers you pre-installed WordPress packages.
Let’s dive in.
WordPress Installation Overview
To make things easier for you, these WordPress-installation methods have been grouped from the easiest to the rather challenging method in a descending order. Here’s a quick overview of what you are going to learn:
In This Article:
- How to install WordPress using auto-installers.
- How to install WordPress manually.
- Best Cheap WordPress Hosts that Install WordPress for You
Installing WordPress Using Auto-installers
Many hosting companies on the web offer you auto-installers that allow you to install WordPress in a matter of minutes.
So how do you get your hands on an auto-installer? Well, auto-installers are accessible on the C-Panel of your website.
Step 1: Access Your C-Panel
Simply put, a C-Panel is a dashboard interface that helps you manage various elements on your website.
Not to mention, this is where you find a WordPress auto-installer.
Examples of such auto-installers include MOJO Marketplace, Quick Installer, and Softaculous.
While these auto-installers might have different user interfaces, they work in the same way.
In this installation process, you are going to learn how to install WordPress using Softaculous.
However, the steps are similar even if you are using other auto-installers.
To install WordPress using an auto-installer, you must create a hosting account with a company that offers you domain hosting.
You can either create a hosting account using Siteground or Bluehost. Those are two of the best hosting providers out there.
Once you create a hosting account and purchase a domain name, log into your C-Panel by adding a “/c-panel” after your domain name.
You should get something that looks like this: “yoursite.com/c-panel”.
Enter your username and password in the text boxes provided below.
Basically, they should be the same credentials you used while signing up for website hosting services.
(You can contact your hosting provider if you don’t remember the details.)
Head over to the Softaculous Apps Installer section and choose the WordPress auto-installer option.
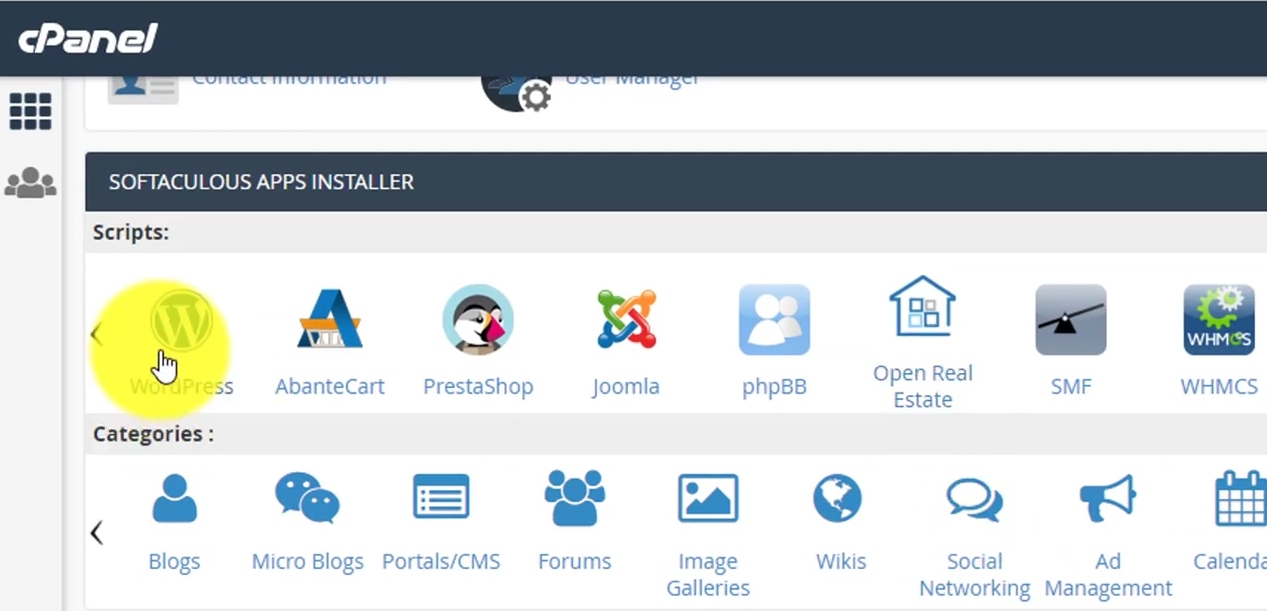
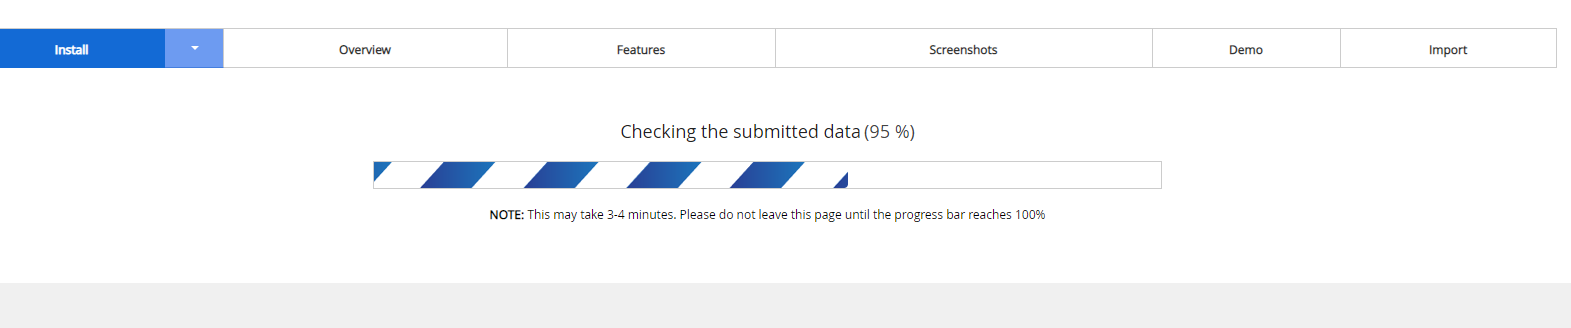
You will be redirected to a page that will ask for your site’s information.
Don’t worry if this process takes a few minutes!
Step 2: Fill In Your Site’s Information
Choose the protocol that suits your site under the protocol section. Since you are installing WordPress for the first time, choose the HTTP:// option.
You can install an SSL (secure socket layer) certificate after you finish the WordPress installation process.
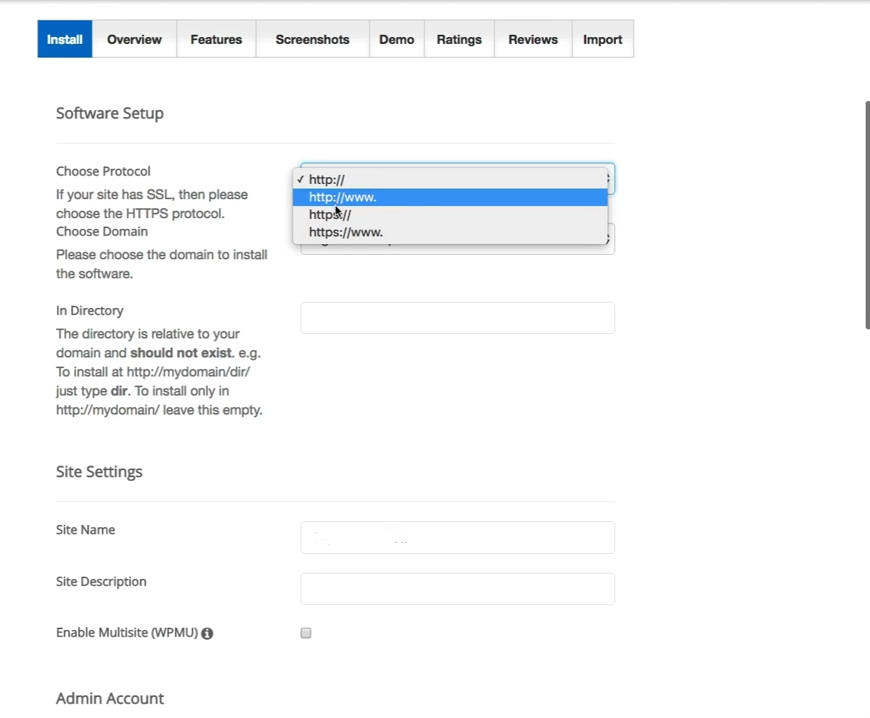
Select the domain where you want to install the WordPress application.
Leave the directory section blank. This will trigger the auto-installer to install WordPress on your main domain.
Go to the Next section, then add the name and the description of your website.
Step 3: Key In Your Login Credentials
Login credentials will give you access to your WordPress site. You can create login credentials on the Site Settings section.
Examples of such credentials include the Admin Username, the Admin Password, and the Admin Email account.
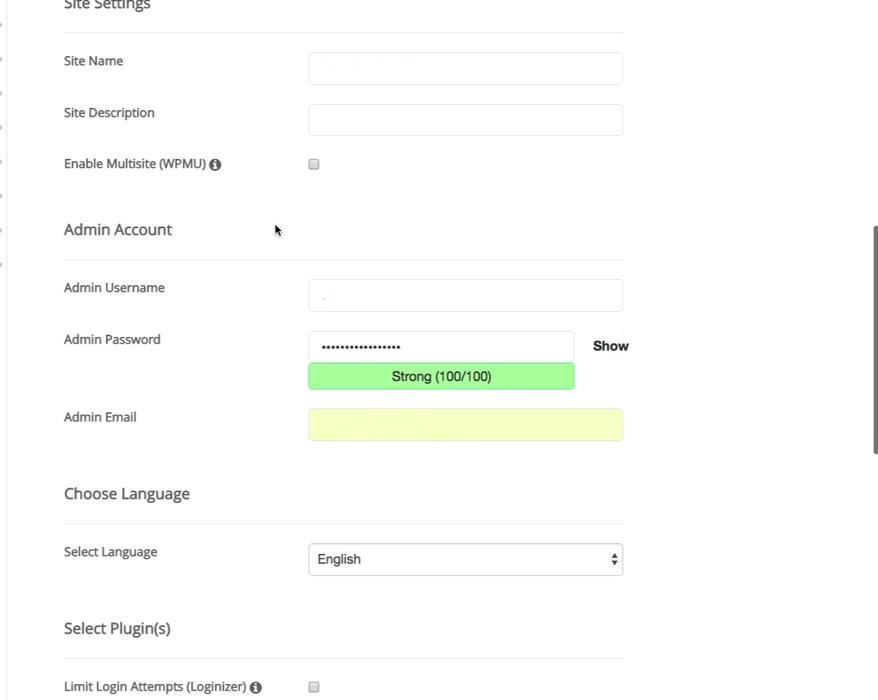
Finish the setup process by clicking the Install button on the bottom part of the page.
While some auto-installers might have additional sections, these are optional settings that can be left blank.
Some auto installers might ask you to choose the plugins/themes that you want to install on your WordPress website.
- Pass on installing additional plugins for now!
Step4: Install An SSL Certificate
Installing an SSL certificate on your site can help it rank higher in search engines.
It also gives your site a secure connection, making it possible for visitors to share personal information without getting hacked.
To do this your will need to first go back to your Cpanel, you can do this quickly by clicking the CP logo here –
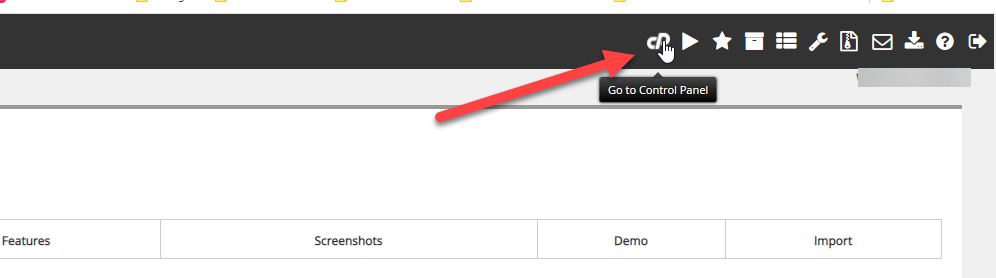
Access your C-Panel, then scroll down to the bottom part of the page. Click the Let’s Encrypt SSL option.

Under the Issue A New Certificate section, select the site you just created, then click the Issue button.

Check the different boxes to include different domains, then issue the SSL certificate.
Log into your WordPress backend, here’s how.
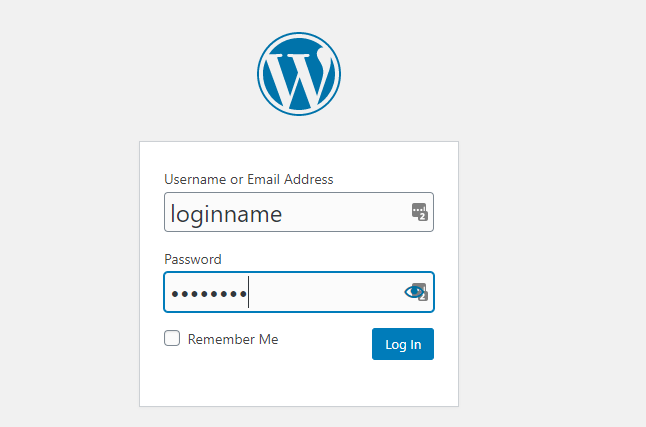
How to login to your new WordPress Site
To access your new WordPress website you can do this easily in one of two ways.
One, the most common, typing your domain address followed by /wp-admin/ and entering your login information.
Ex. example.com/wp-admin/
Then enter your website login credentials created earlier.
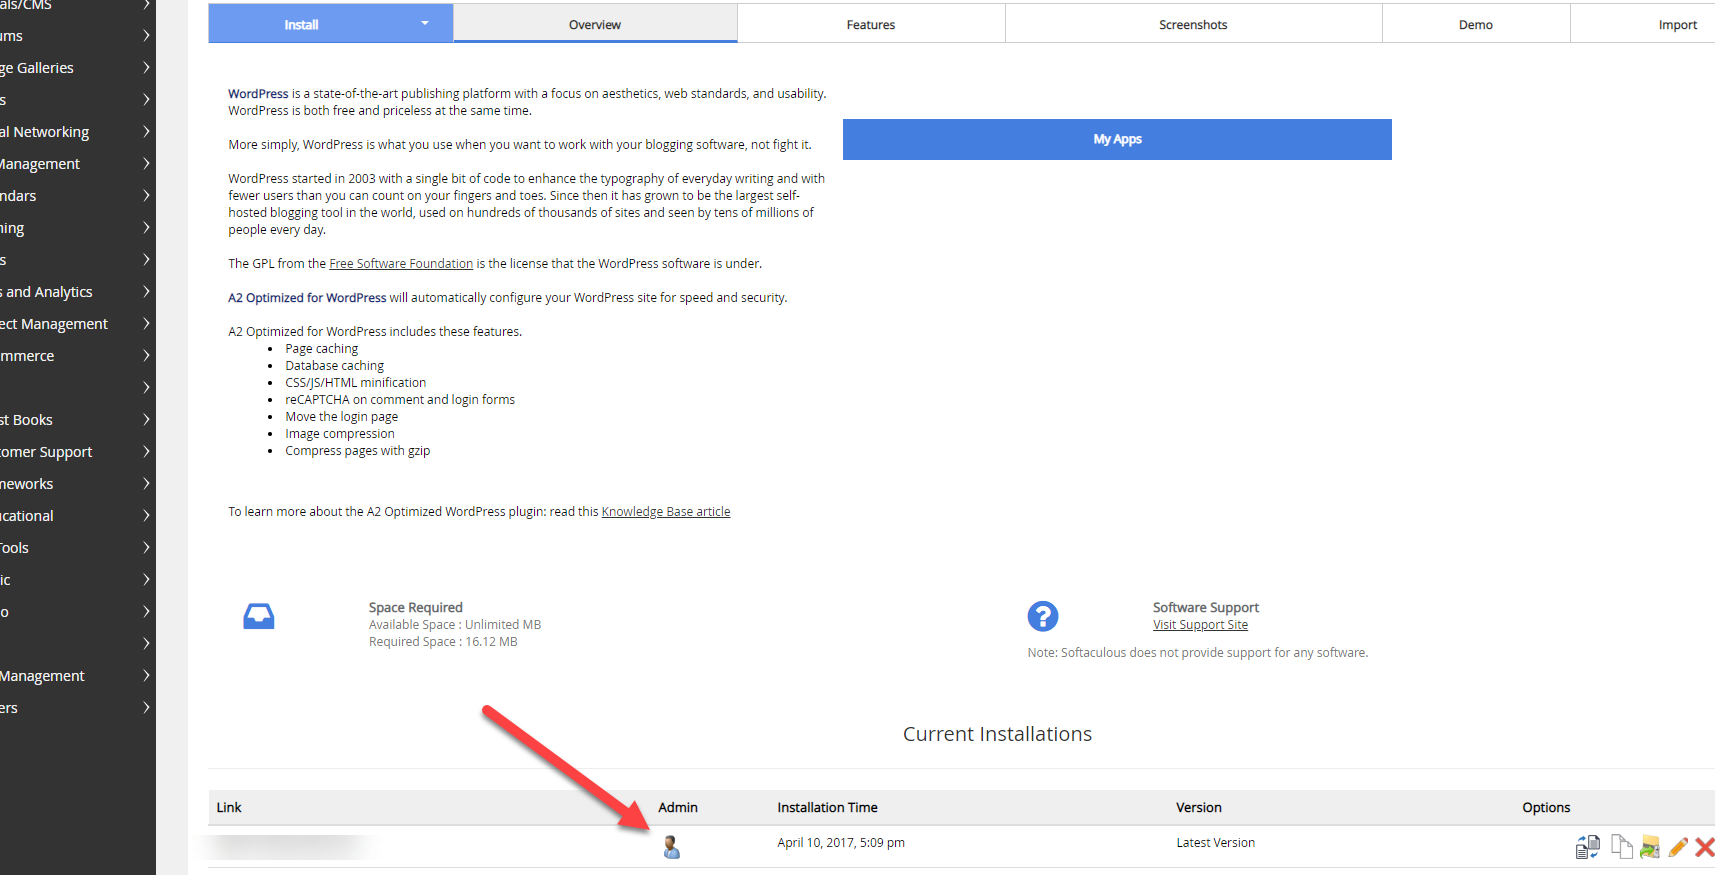
If this doesn’t work for any reason, you can simply go back to the softaculous installer and below the install section you will now see your current installations.
Simply click the person icon and you will be able to enter WordPress from here.
Once inside WordPress you will activate your websites SSL with a free SEO plugin.
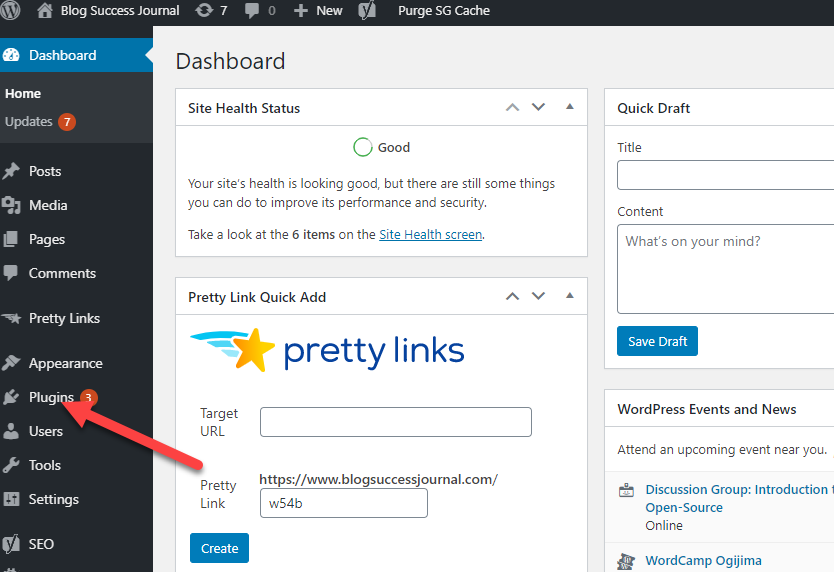
To do this, go to the plugin section of your website.
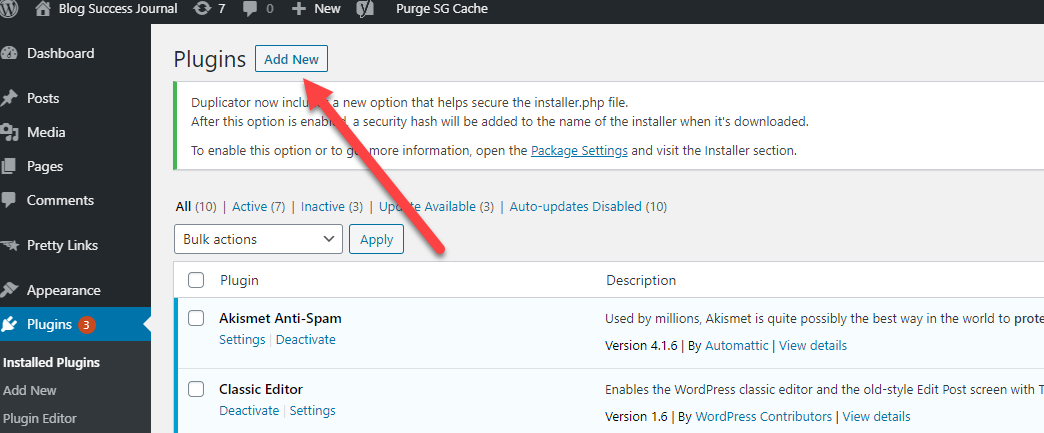
Click the add new button
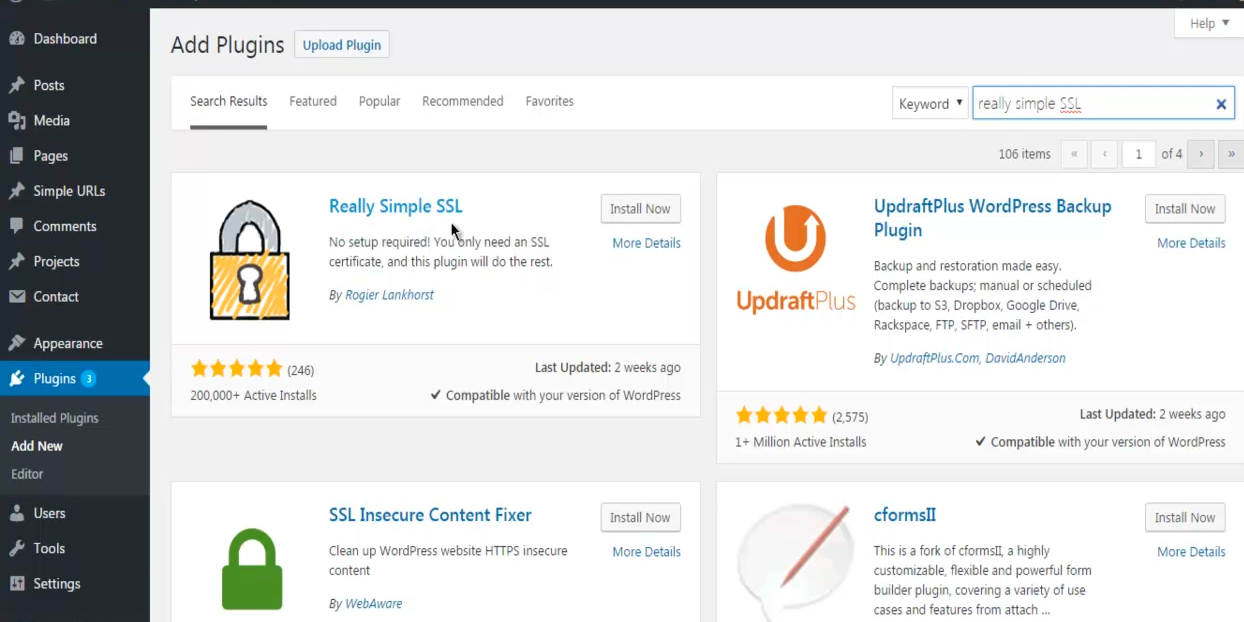
and enter Really Simple SSL and click Install.
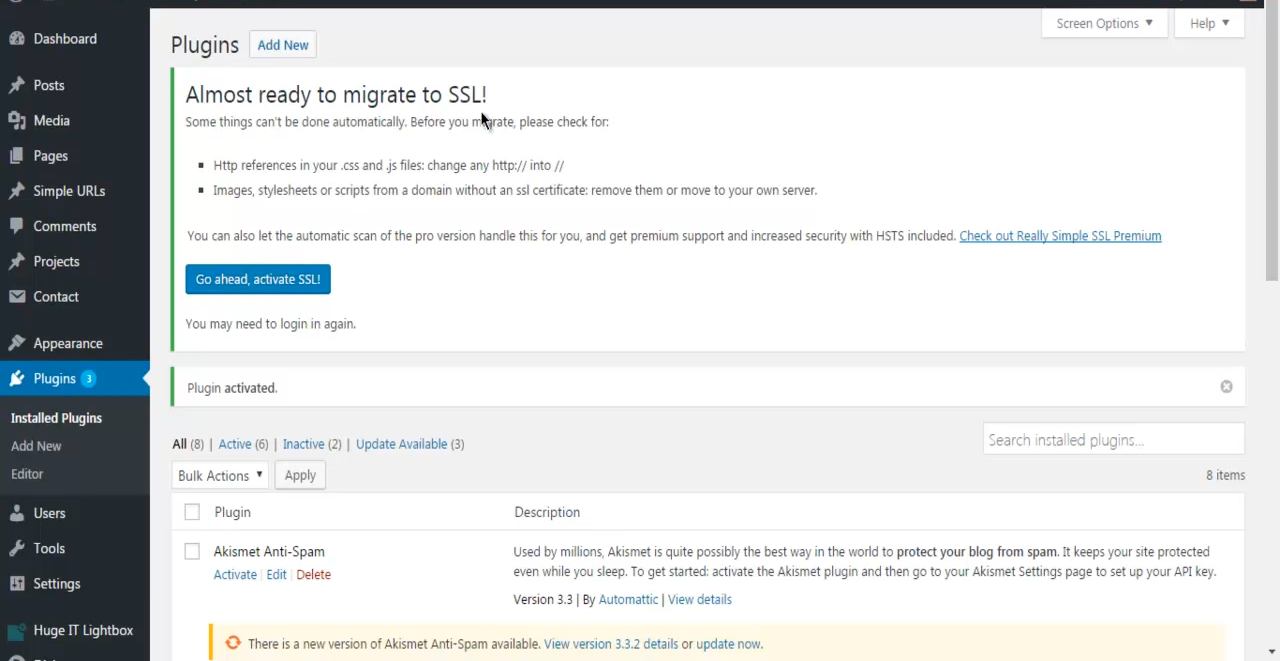
Once you activate it, it will ask you if you are ready to migrate SSL. Click the Go Ahead, Activate SSL button.
The plugin will log you out of the HTTP version of your website.
Type in your login credentials again to log into the secure version of your website.
Head over to the general settings section, then click the SSL option to confirm that everything has been configured correctly.
That’s it! You have successfully used the auto installer.
If you are up and running via the auto installer, then get busy with your website.
Check out this article for next WordPress plugins to connect your new website.
If you encountered any hurdles, here’s how to do each step manually to get your website rocking.
How To Install WordPress Manually
Since auto-installers have become so popular, this WordPress-installation method is rarely used.
However, you can use this method if you want to learn something new and develop your technical skills.
To start this process, you must have an FTP (file transfer protocol) application.
The FTP will help you upload files to an online web server.
One of the best FTP (file transfer protocol) software out there is FileZilla.
Step 1: Install And Set Up FileZilla
Visit the FileZilla official website, then click the Download FileZilla Client button.

Once you finish downloading the files, click the Run button on your computer to initiate the installation process.
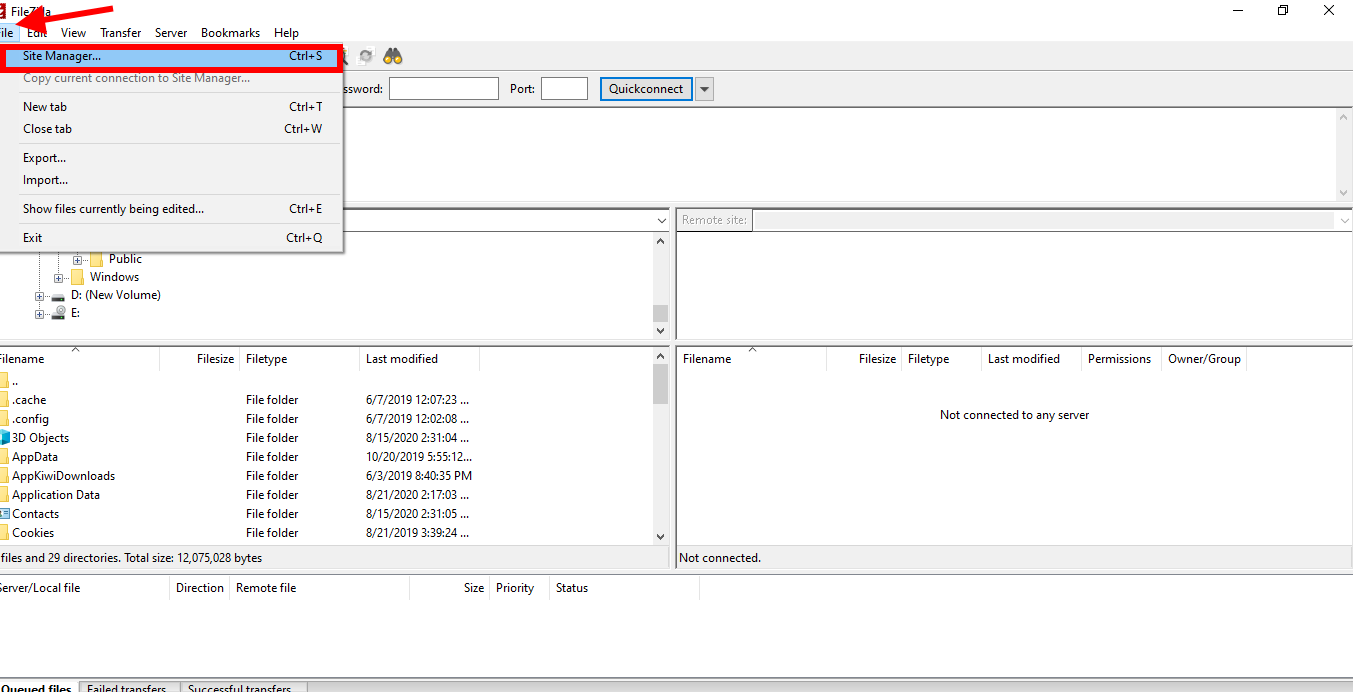
Open the FileZilla application and click the File button on the top menu bar and select the Site Manager option.
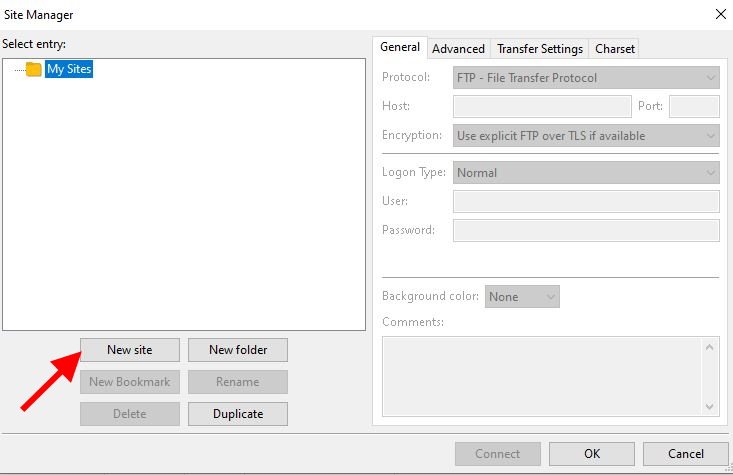
Click the New Site button.
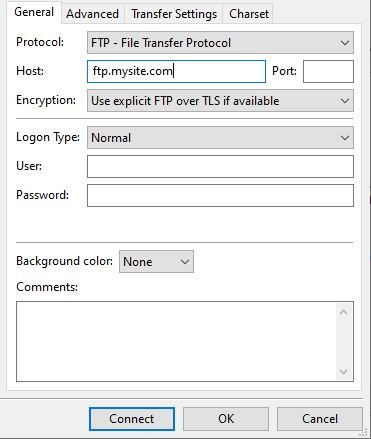
Enter “ftp.yourdomainname.com” in the Host field (yourdomainname.com should be substituted with the name of your website).
Add your username and password in the User and Password textboxes.
Finish off by clicking the Connect button.
Step 2: Download The Latest Version of WordPress
Once you install FileZilla on your computer, visit the WordPress official site and download the WordPress files.

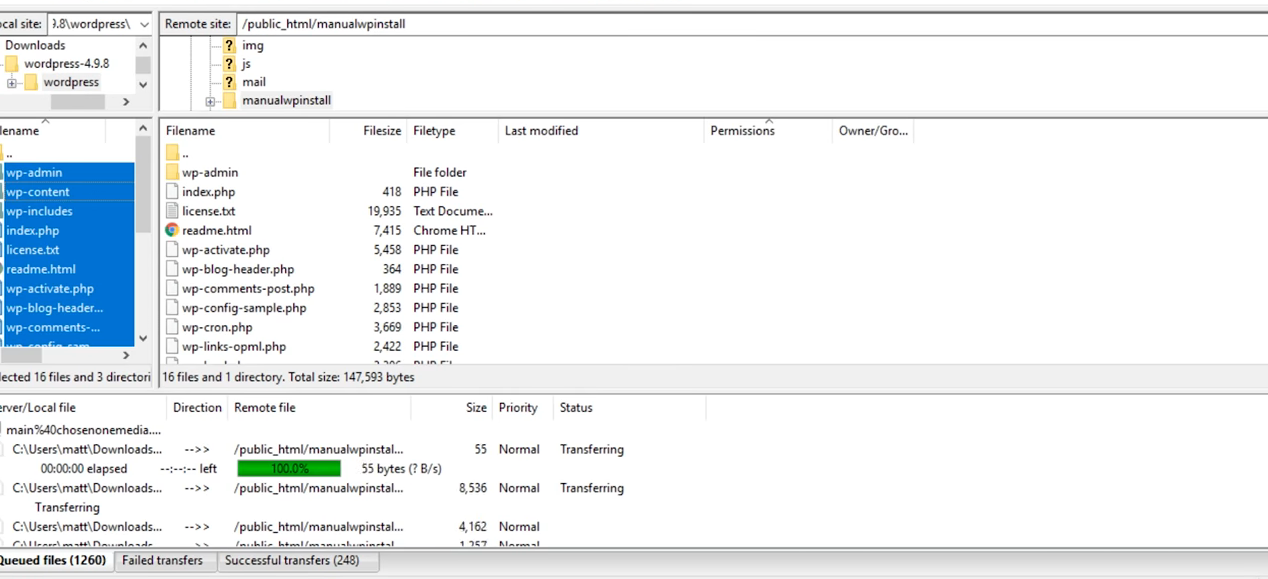
Extract the WordPress files from the zipped folder, then use FileZilla to upload the files to your website’s server.
You should upload them to the Public_html directory of your website.
Step 3: Create A Database for The Installation
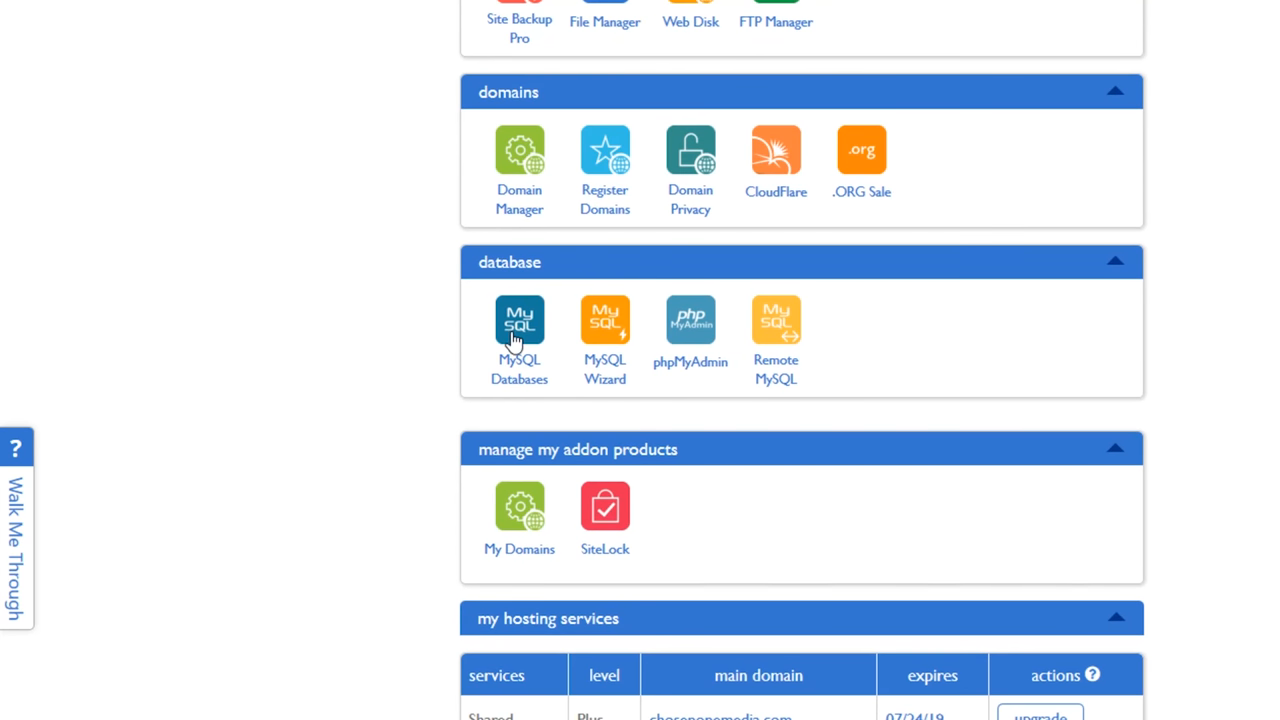
Log in to your C-Panel. Head over to the Database section, then select the MySQL database option.
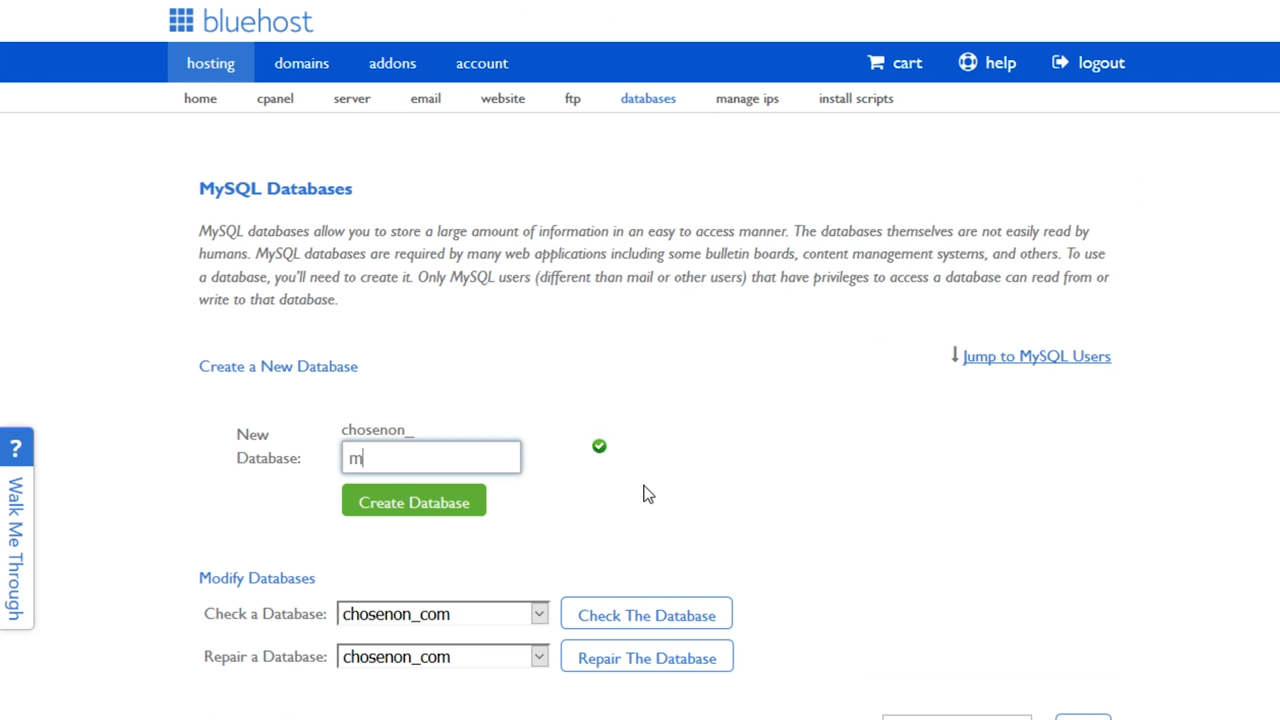
Create a new database and name it.
Make it a simple name, since you’ll be using the name again.
Then write it down so that you won’t forget it.
Afterward, scroll down to the MySQL Users section.
Now create a new account.
Make sure that you come up with a suitable username and a strong password.
Scroll down to the next section and add the user to the new MySQL database.
In the next step, give the new user account all the privileges to perform superior functionalities in the MySQL database.
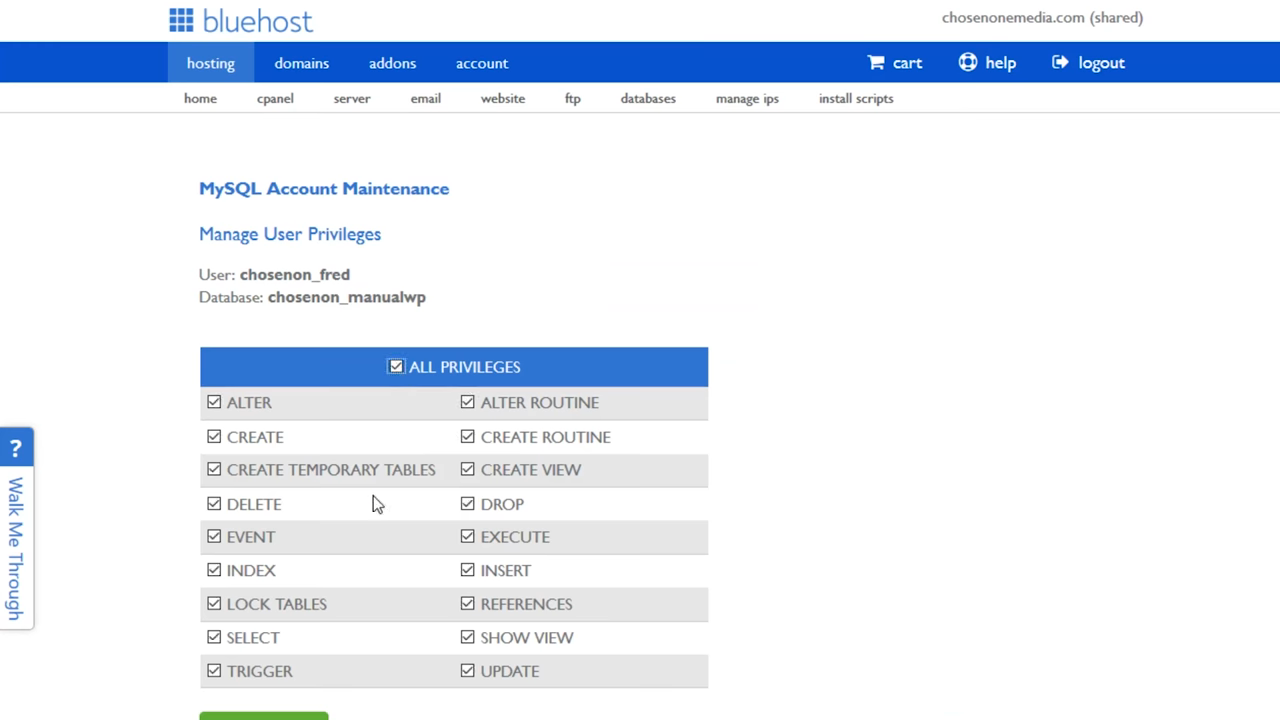
Click the Make Changes button at the bottom part of the page to apply the changes in the database and user account.
Step 4: Visit Your Domain Name on A Web Browser
Open your browser and type in your domain name.
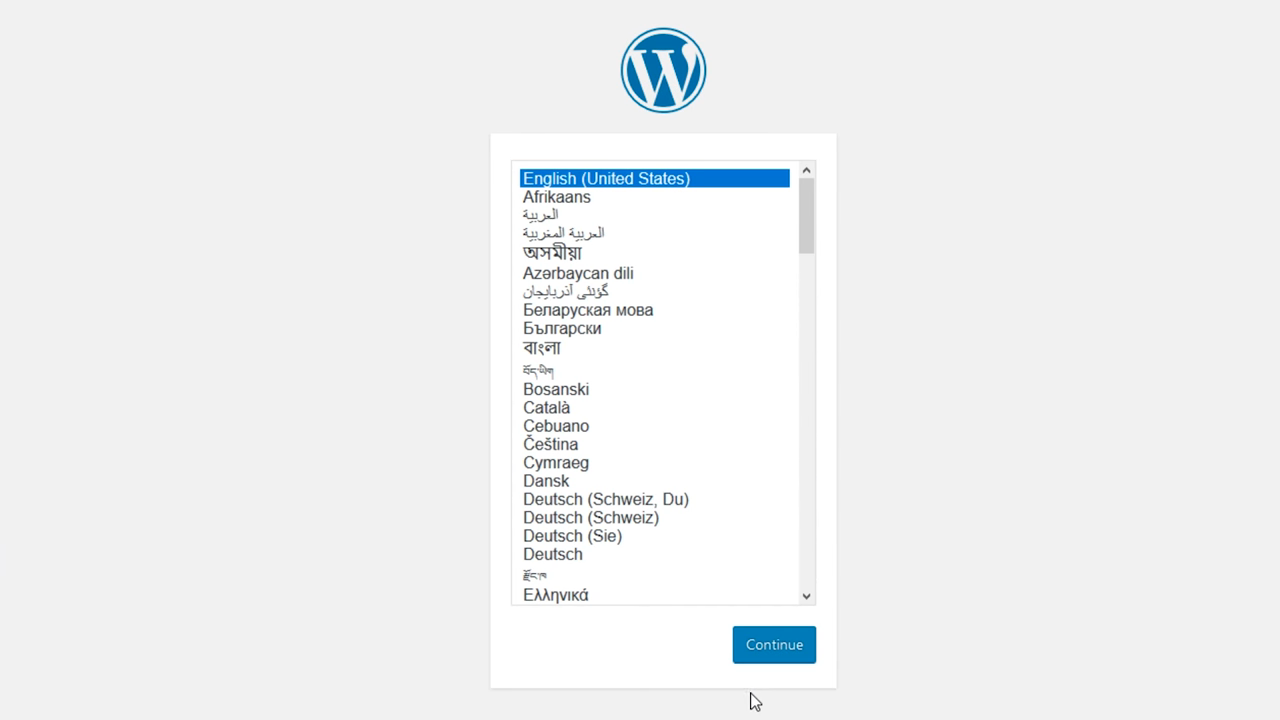
You will find a WordPress Installation Wizard on your site.
Choose the most suitable language for your site.
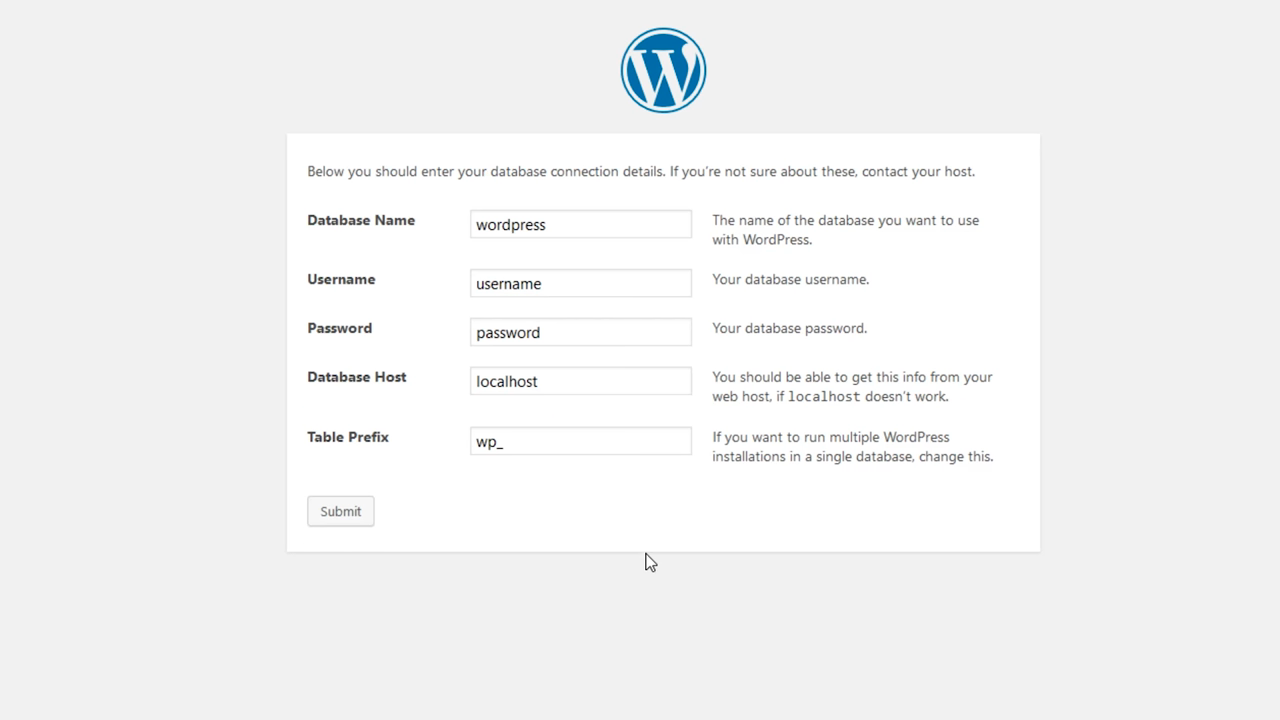
Now you need to add in the information you created earlier.
Enter the MySQL Database Name, the Username, the database password, the Database Host, and the Table Prefix.
Click the Submit button to proceed to the next section.
In the next section you will set up WordPress on your newly-created MySQL Database.
Create the login credentials that will help you log into your site: WP Admin Username, Admin Password, and Your Email address.
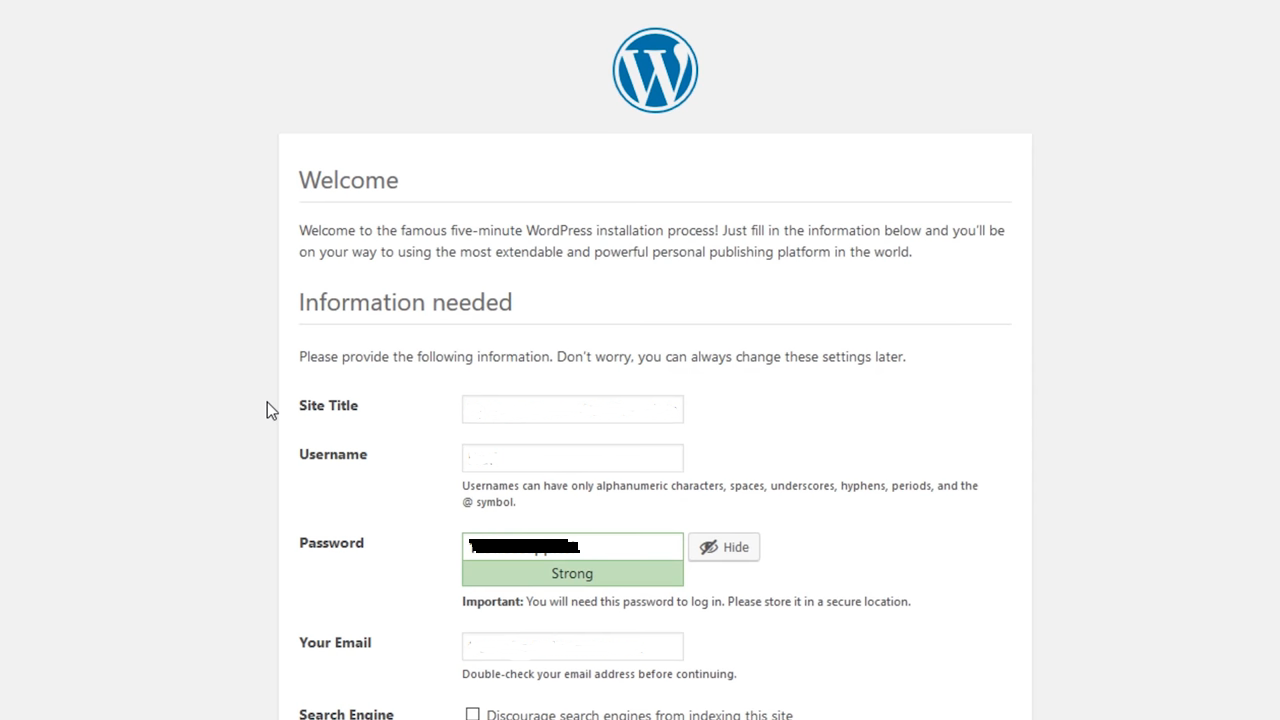
Finish off by clicking the Install WordPress button.
And you are set! You have just installed WordPress manually.
Your next step is to get busy building your website.
You can find the best plugins to use right here.
Best Cheap Hosts That Installs WordPress For You
Various web hosting services offer you different plans that come with pre-installed WordPress.
Some of these companies will even go further and offer you managed WordPress hosting.
This means that WordPress updates, daily backups, and the security of your CMS (content management system) will be handled by the company that is hosting your WordPress site.
If installing WordPress by yourself is be out of the picture, these are two of the best web hosting services that offer pre-installed WordPress packages:
- Siteground- It packs multiple WordPress-related features.
- Bluehost- Powerful, affordable, and features different WordPress plans.
Now It’s Up To You
If you are not experienced in using WordPress, you can use the auto-installer method to install WordPress.
If you want to make it even easier you can pay a hosting provider that will pre-install WordPress.
If you are looking for a new WordPress installation experience or to improve your technical skills, the manual installation process might just be for you.
All you have to do is download the WordPress files and upload them to a web server.
No matter what you do, make sure that you install an SSL certificate on your site.
This will give your site a secure connection, which might increase the traffic to your WordPress site.
So what are you waiting for? Go on and make your website awesome!