
So you want to create and publish blog posts on your WordPress website…
Great frickin’ idea! 👍🙌
It’s a fantastic time to start blogging and building your online business!
But as always, the question is, ‘How do I get started on my dream?’
Using WordPress’s backend editor can be seriously intimidating, especially if you’re a beginner or not gifted with technology.
But don’t let that scare you away from blogging or using WordPress…
This article will show you all the secrets behind correctly adding a new post to your website!
Just open up your own backend editor in a separate tab and follow our step-by-step guide. You won’t need anything else, as this guide will walk you through the whole posting process.
By the way, you’ll also develop a ton of good habits and become a self-sufficient pro in no time!
So — How do I publish a post on WordPress? Or how do you publish a post on WordPress?
Let’s get cracking and find out!!
Step 1: Create a New Post on WordPress
So, where do posts go on WordPress?
Great question… let’s show you!
You have two options to add a new post:
A. Look at the left-hand menu bar and find the ‘Posts’ category. Hover over it and then click the ‘Add New’ post option.
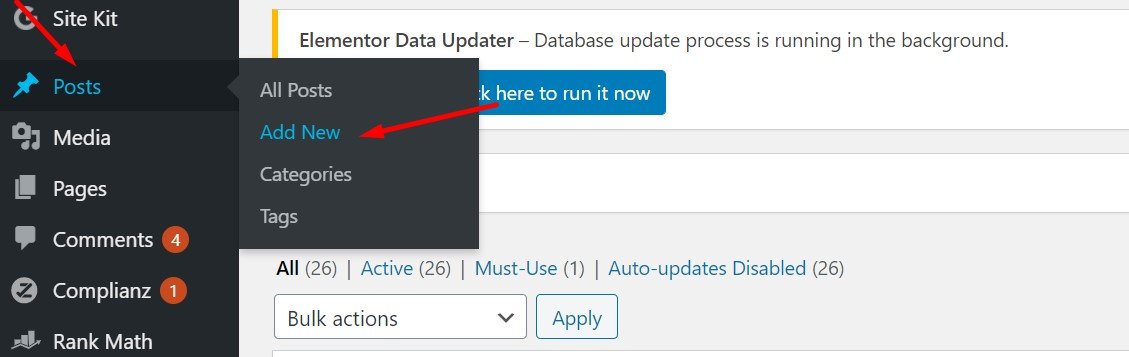
B. Head over to the main ‘Posts’ page and look at the top left corner of the screen. Here you’ll see an ‘Add New’ post button; click it.

Both options redirect you to the draft editor… and look at that — you’re off to a great start! 🎉
Now what?
Your very first action on the WordPress post editor should be to update the screen options (if necessary).
This will make all the necessary sections show up on this new page.
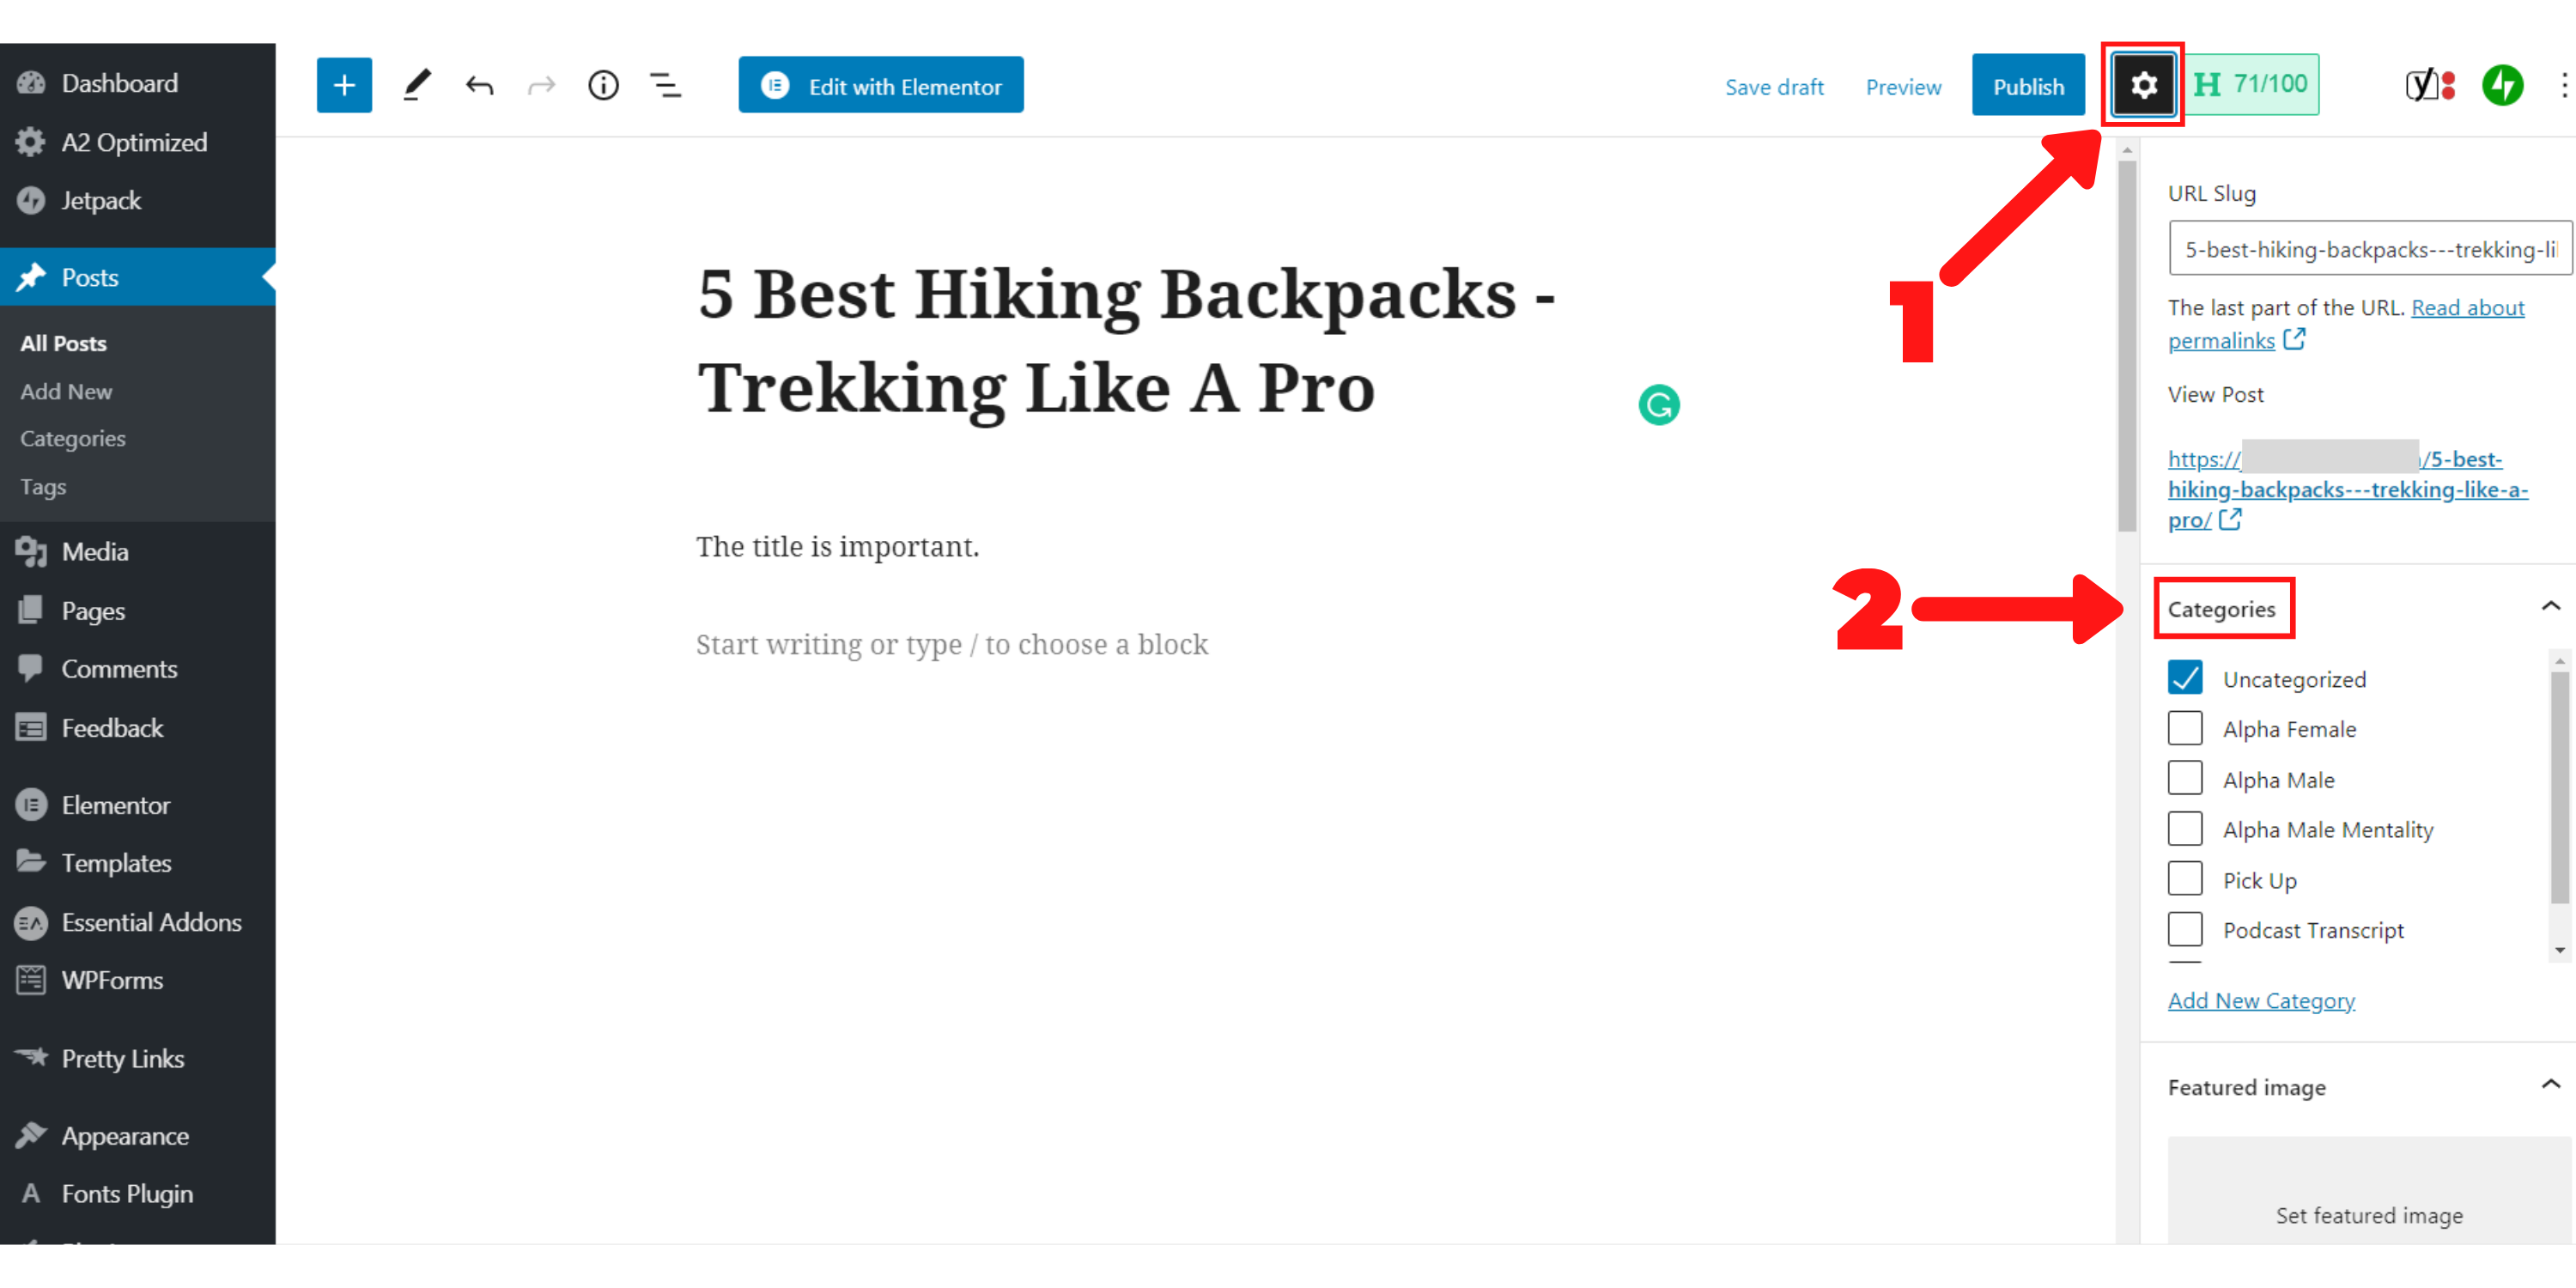
Look for a small tab on the top right that looks like a gear wheel. Click it to reveal the post settings. Here you’ll see the default WordPress options already ticked, and you can make sure that they’re all correct.
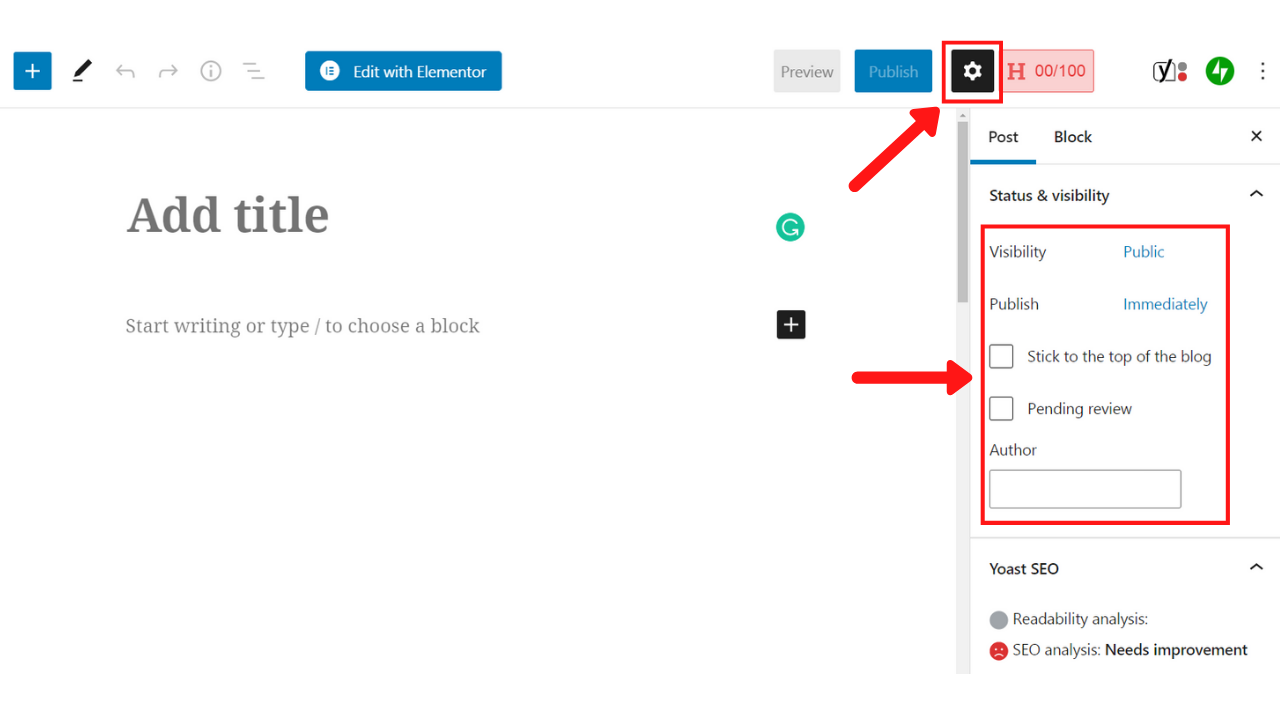
I recommend the following:
- Visibility: Public
- Publish: Immediately
- Leave ‘Stick to the top of blog’ unticked
- Leave ‘Pending review’ unticked
- Select the appropriate Author Name
Now scroll down. There are a couple more settings to check under the ‘Settings’ icon.
![]()
- Tick ‘Allow Comments’ if you want comments
- Untick ‘Allow pingbacks & trackbacks’ (They’re mainly used for spam)
- Under ‘Post Attributes’ select ‘Default Template’ (Assuming you have a template for your blog in place. If not, a viable alternative is to select ‘Theme.’).
Now minimize this section; you’re ready to make your post’s focus keyword the temporary post title!
Write it here:
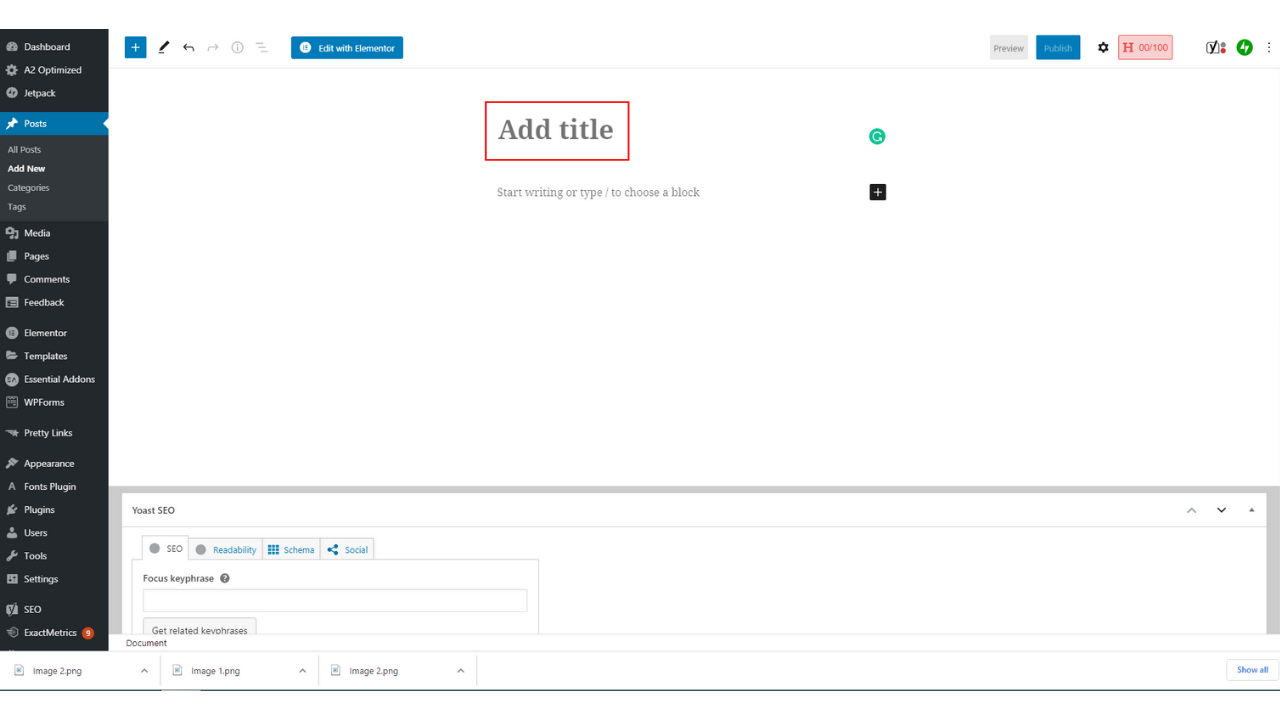
Now, fill this same keyword into the spaces for ‘Focus Keyword’ and ‘Slug’ (if you’re using Yoast SEO).
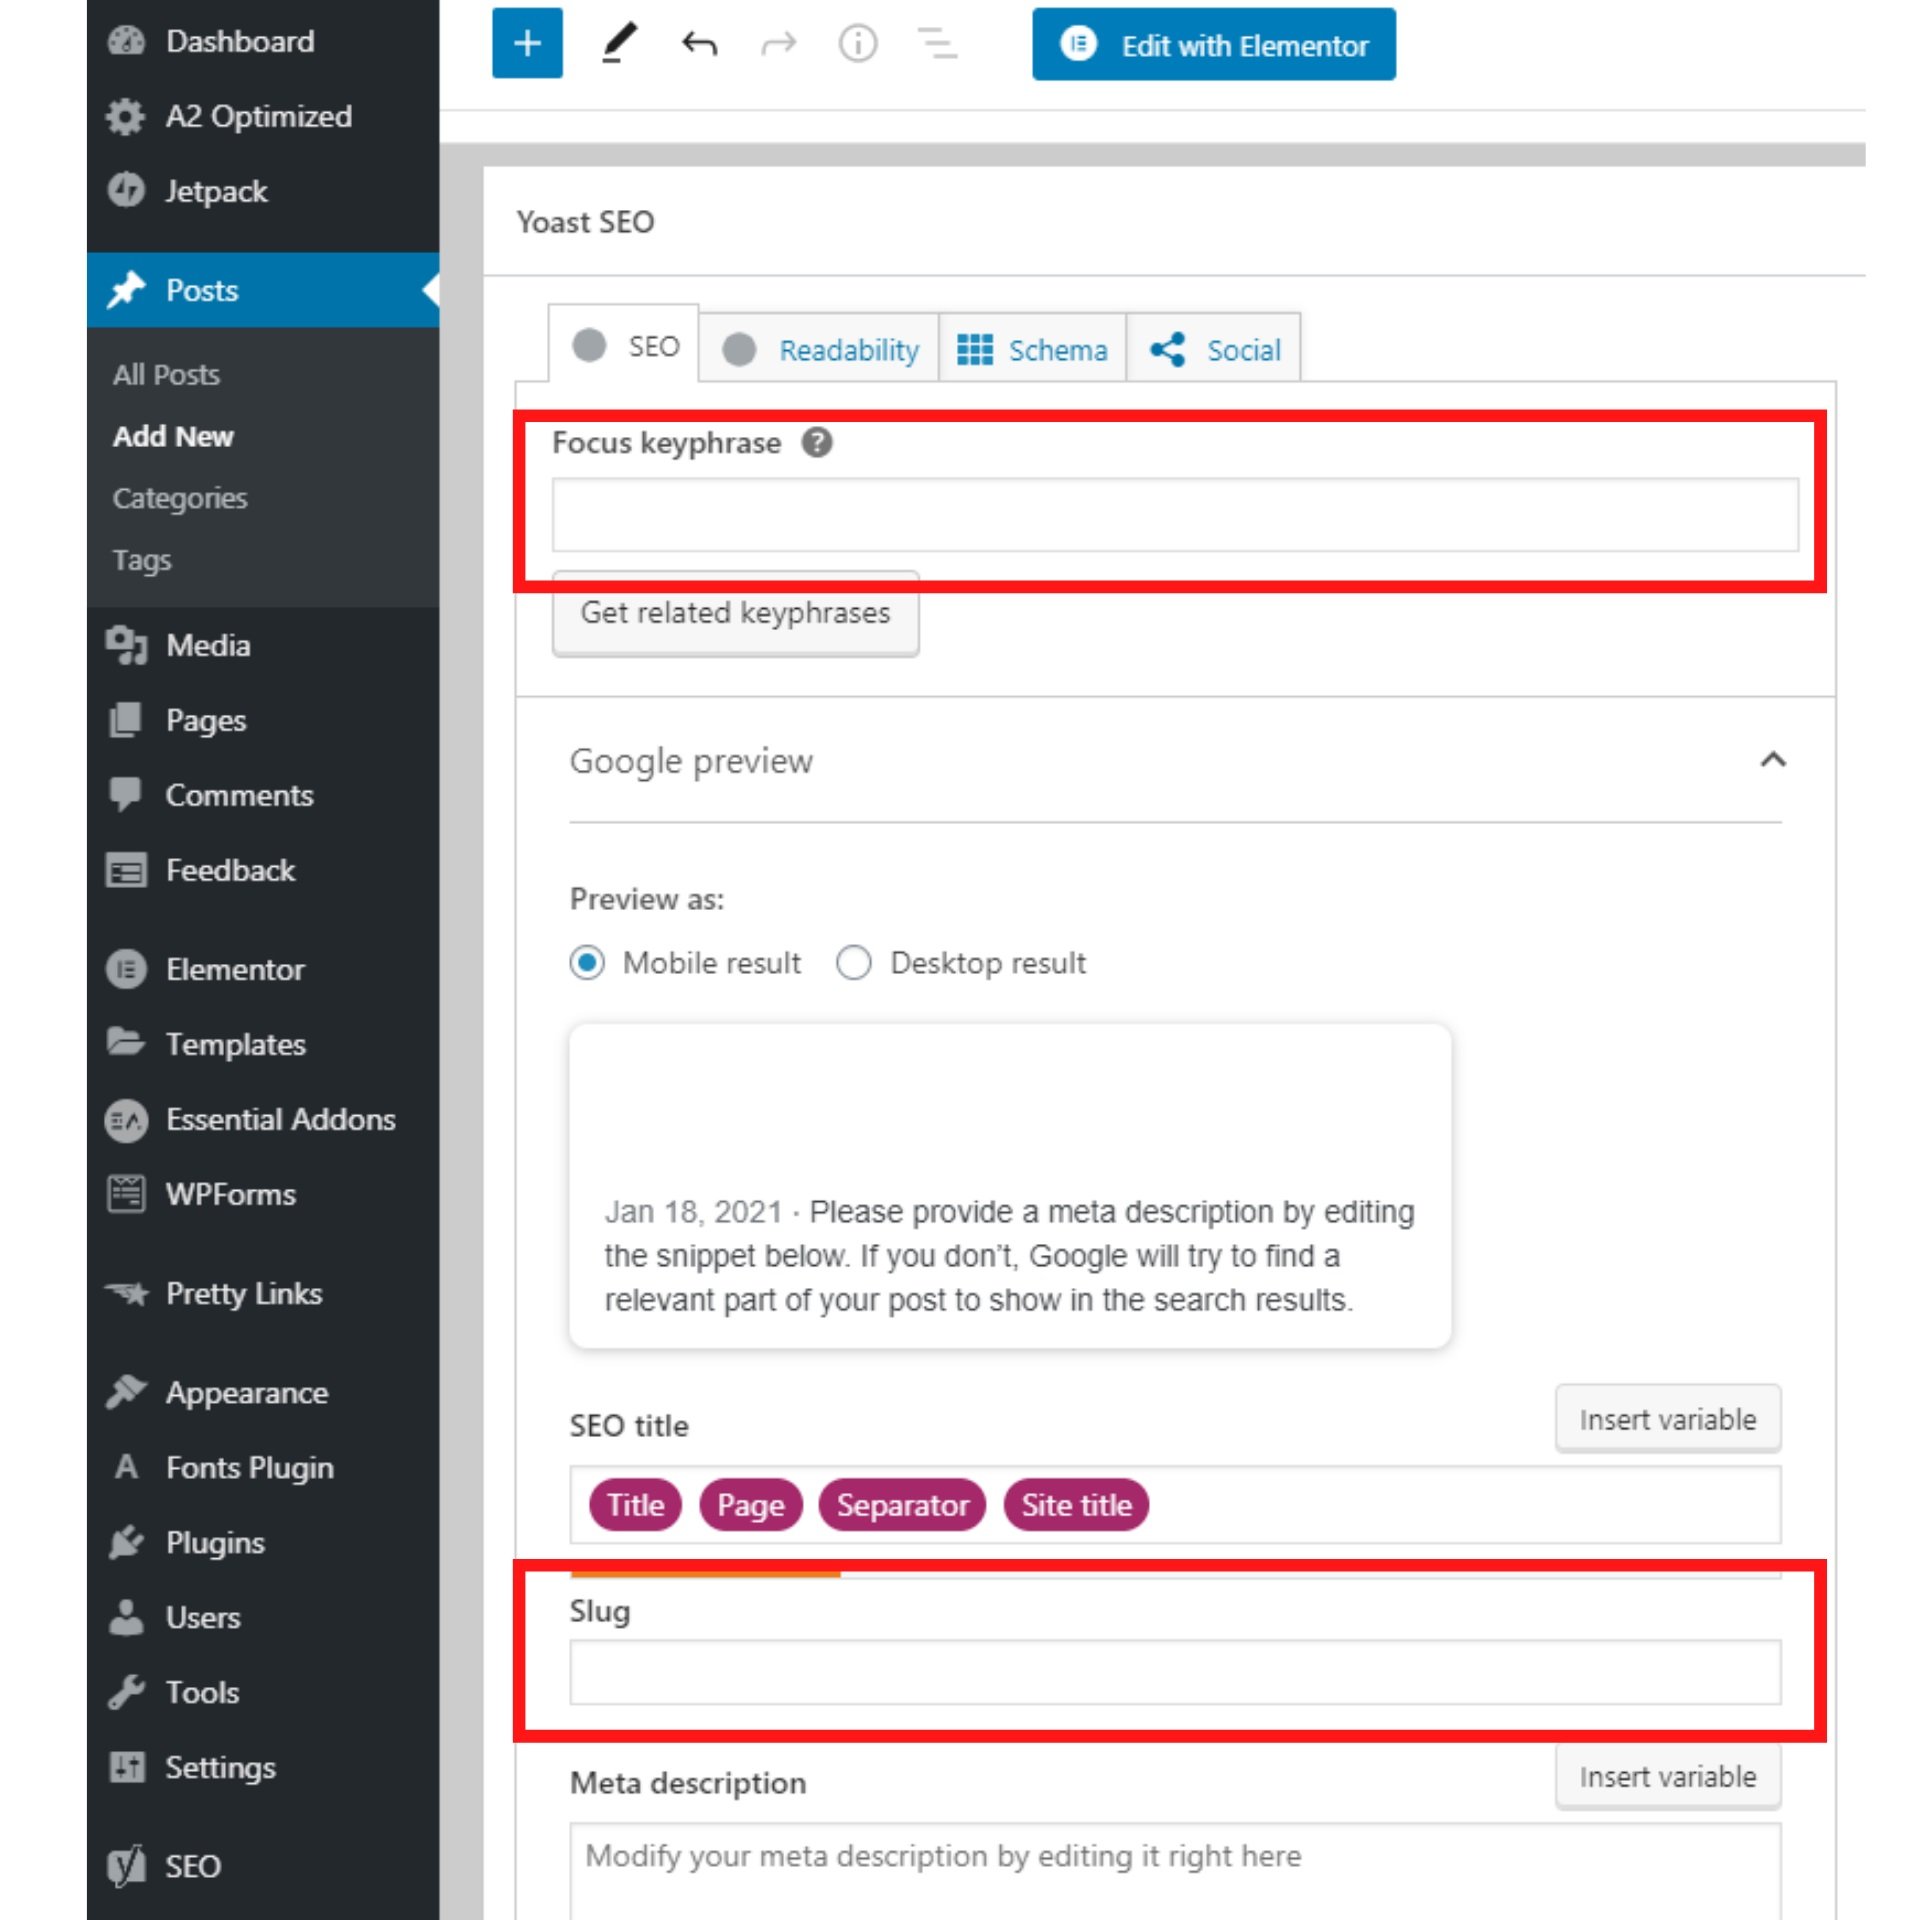
Now click the ‘Save Draft’ button:
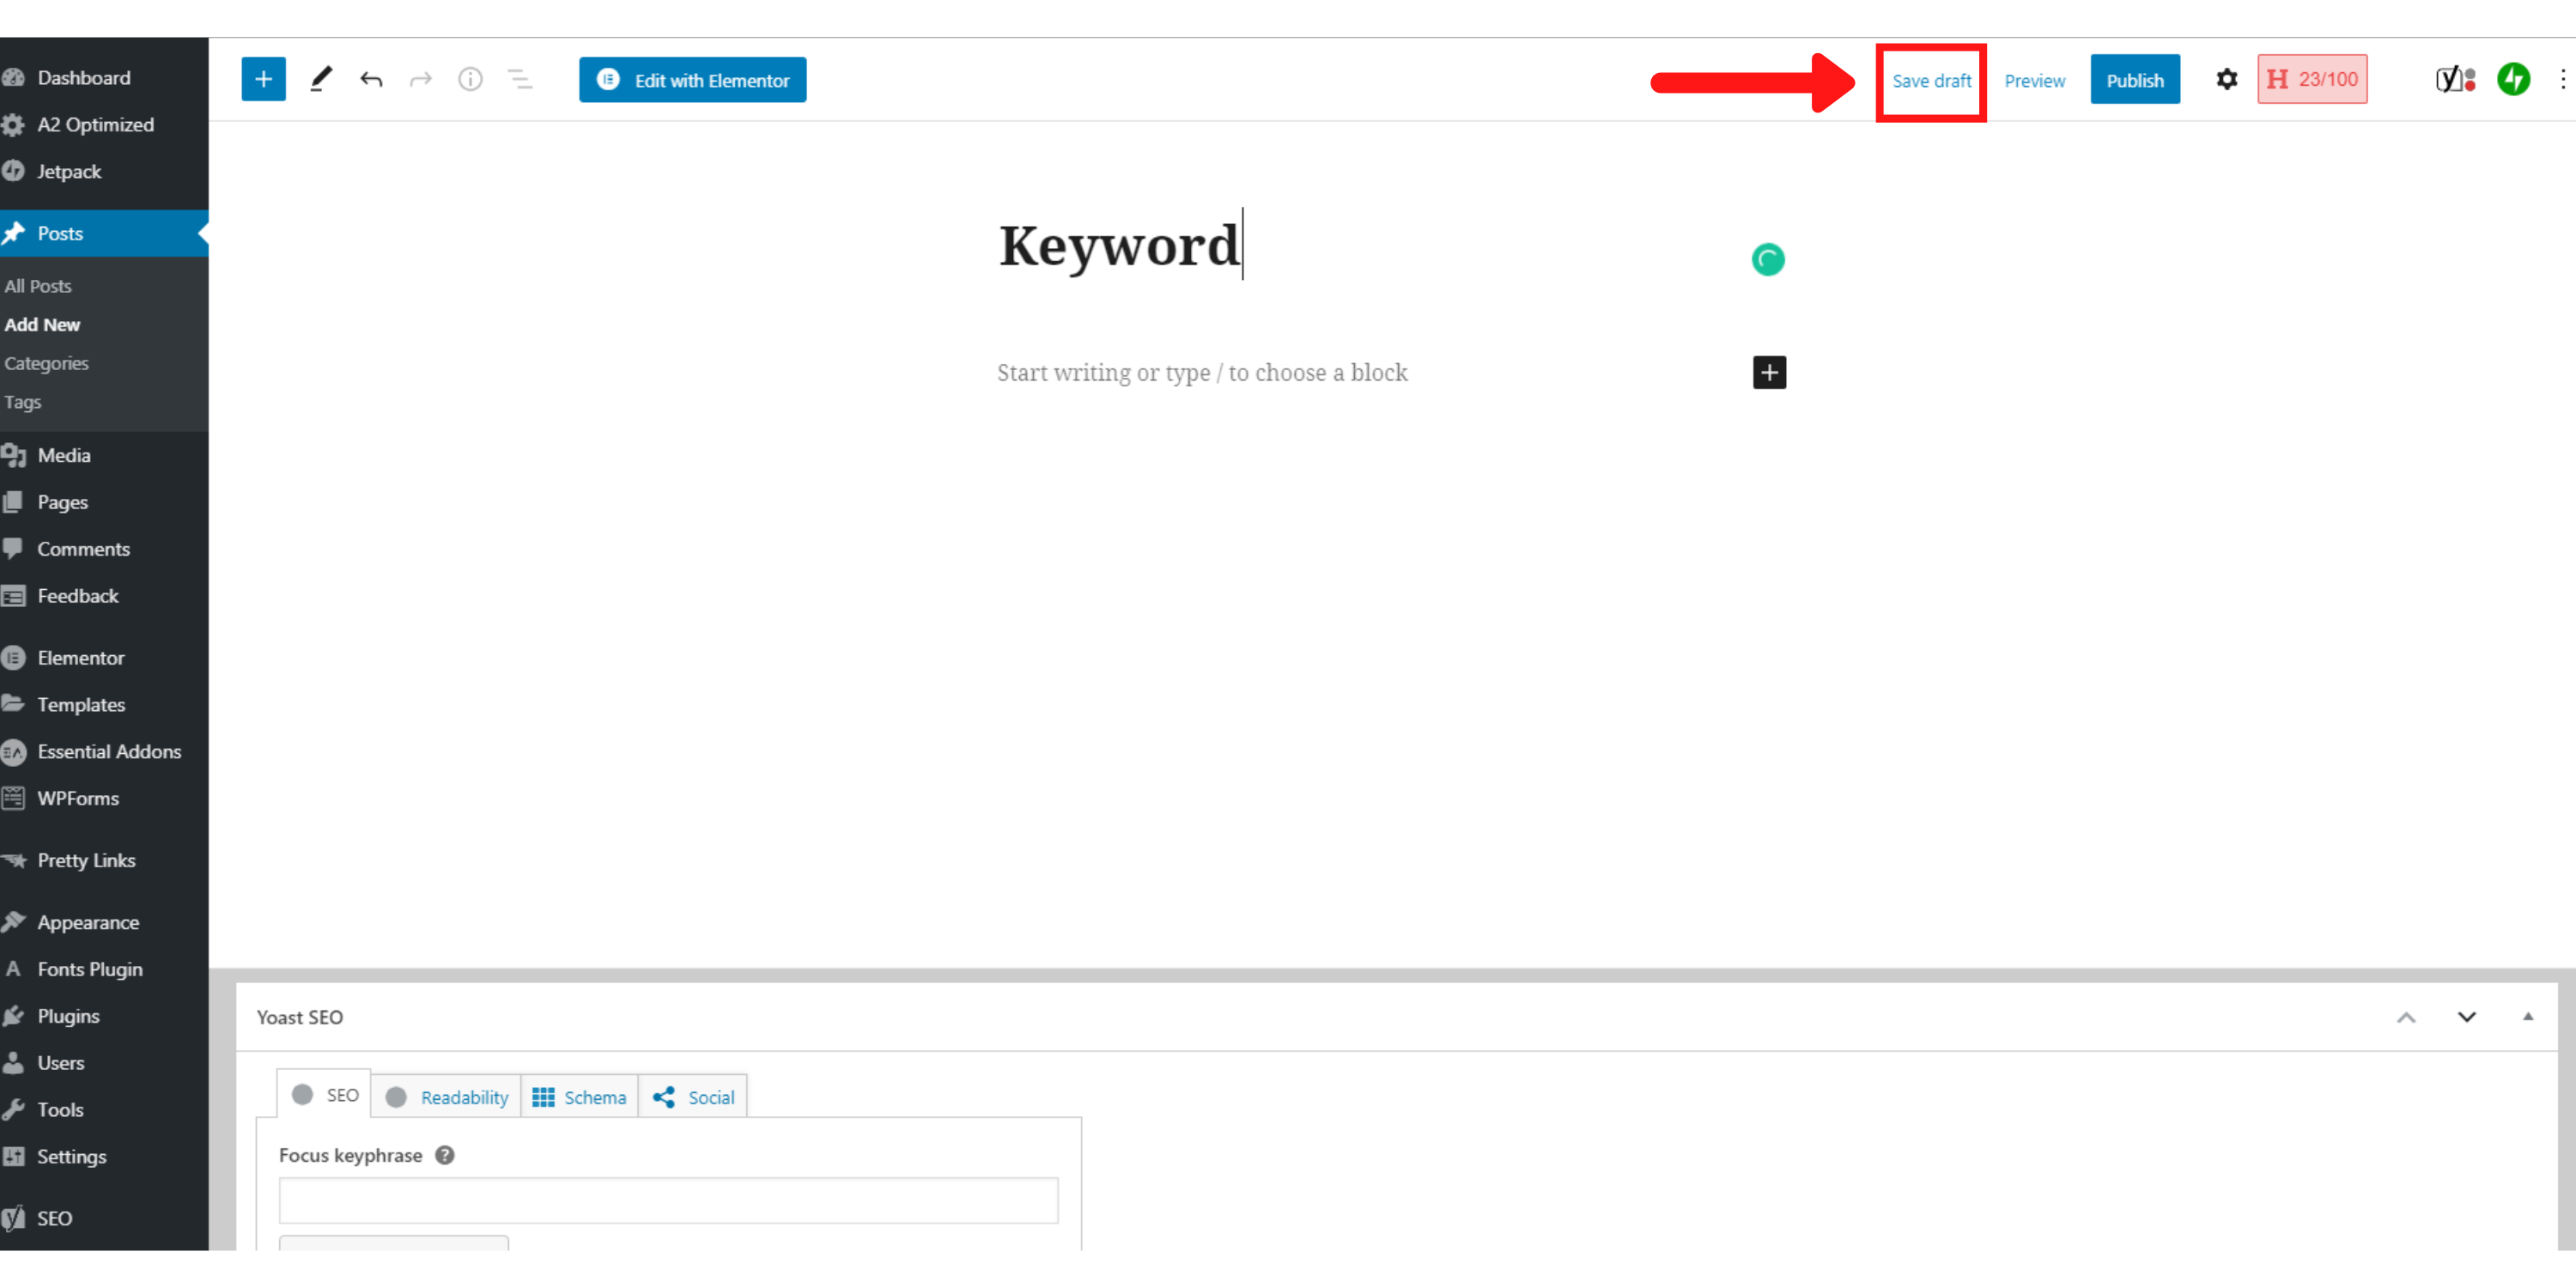
It’s good practice to save from time to time, but don’t worry if you forget! WordPress will occasionally autosave your post (or page).
Now comes the fun part:
You can get started on writing a killer post…
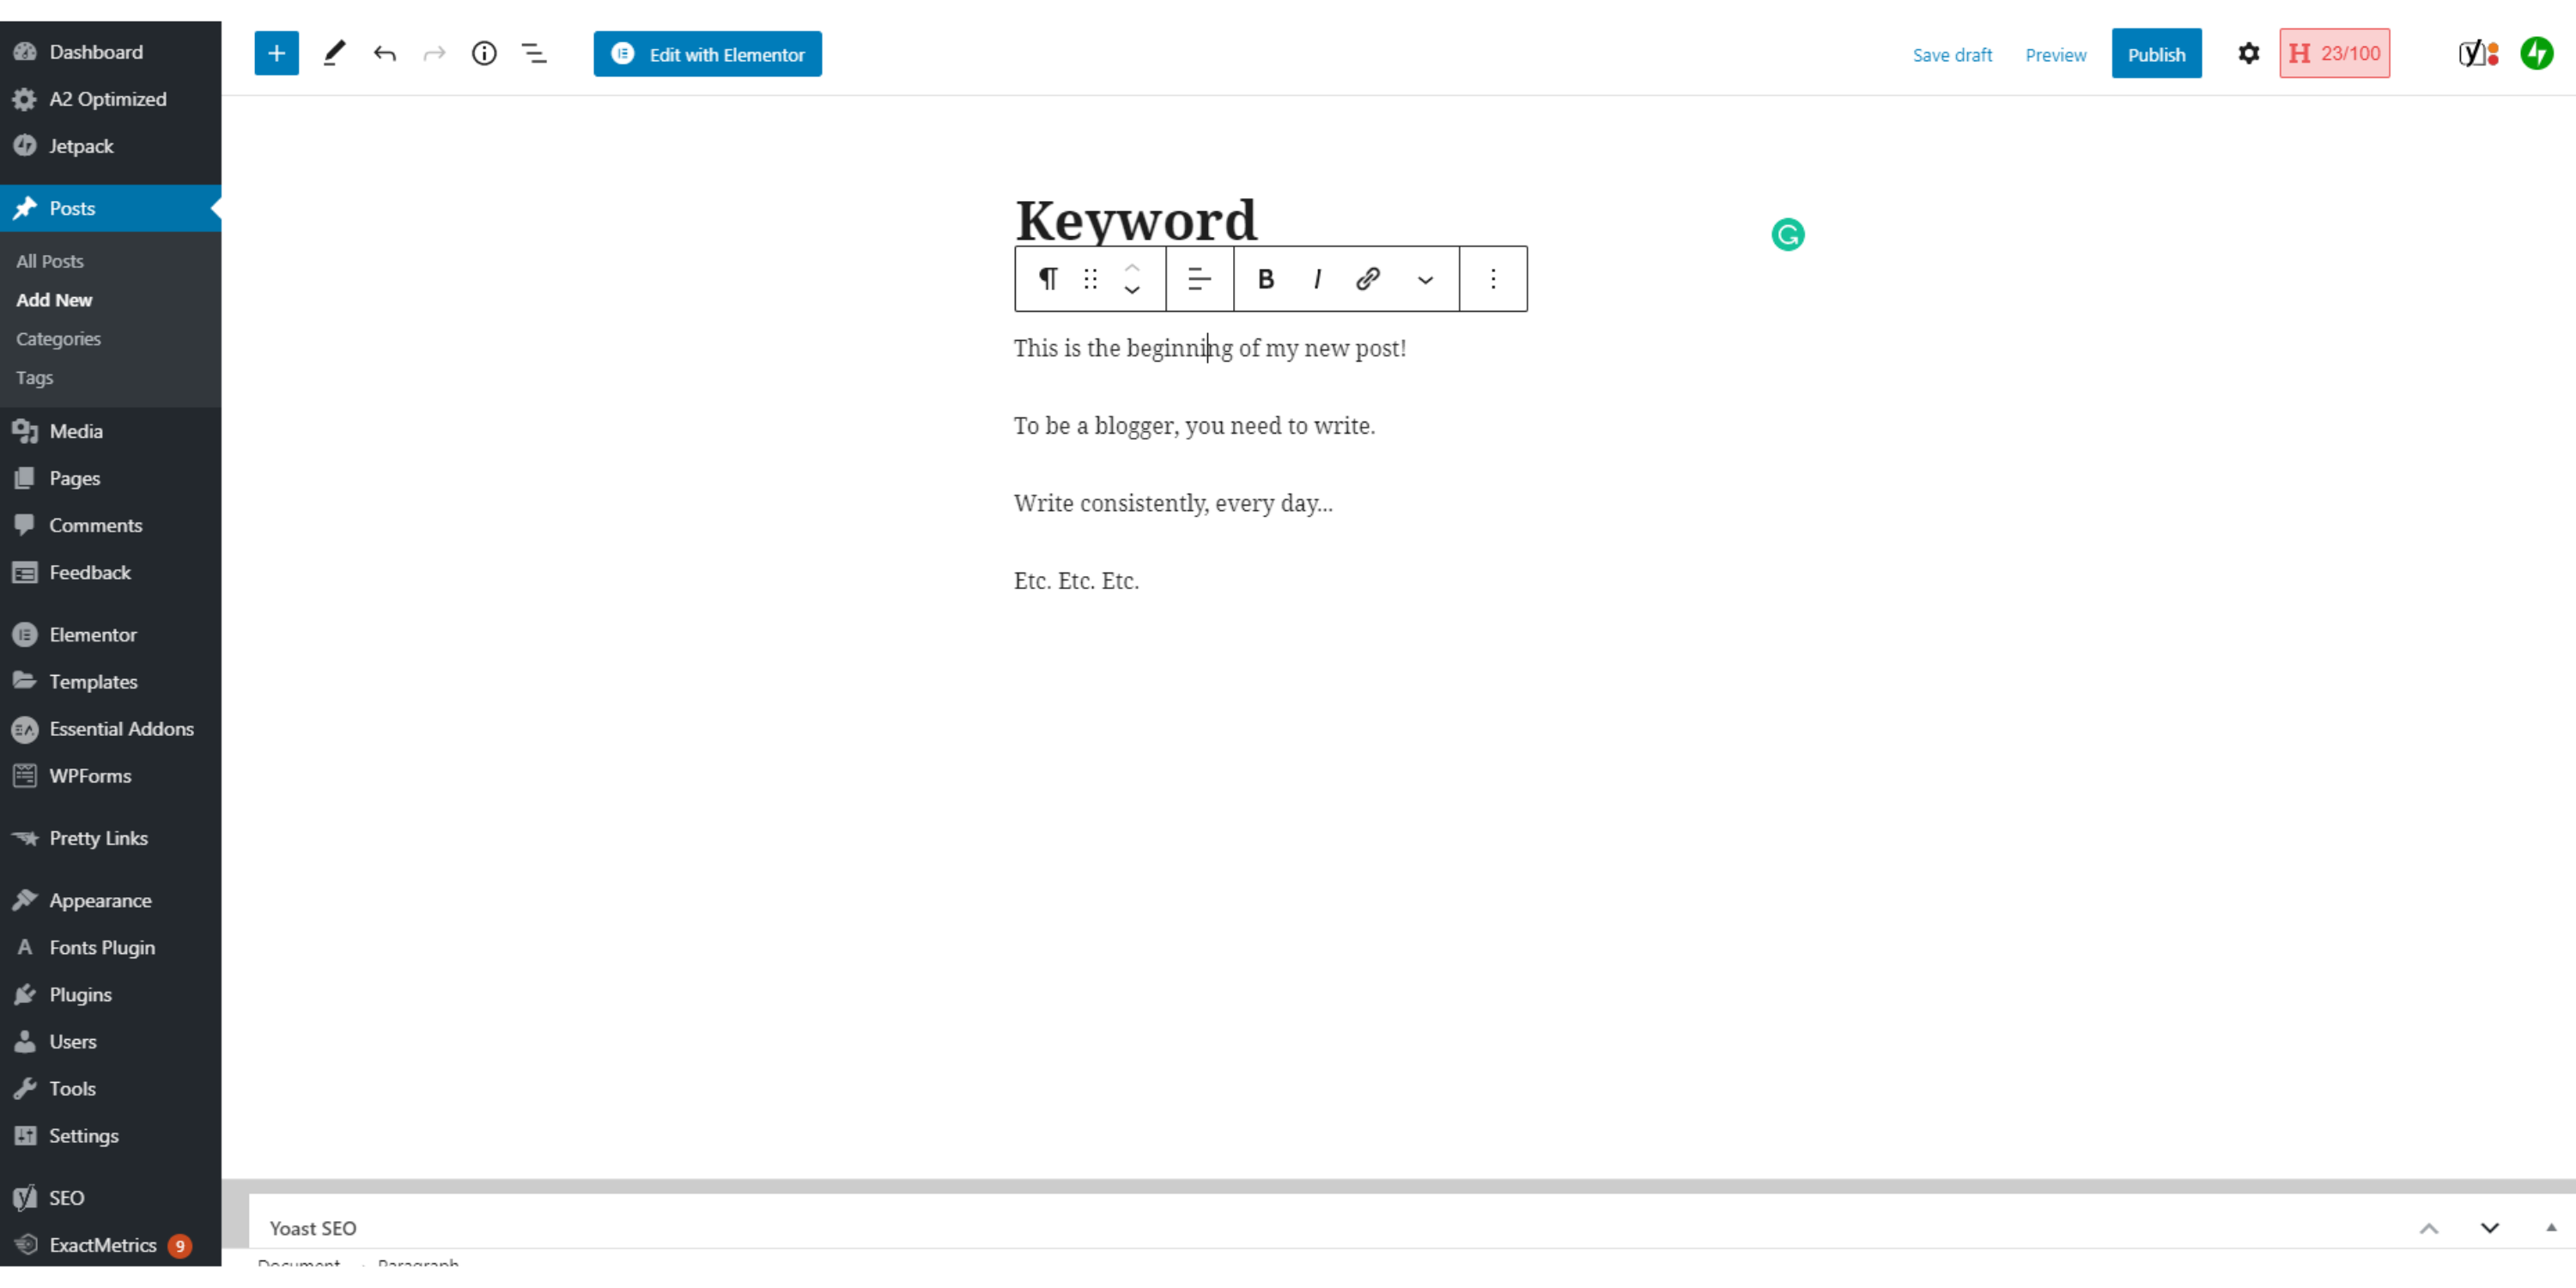
Simply type your article out in the editor, like this:
Expert tip:
Many pros prefer to write posts in Word or in a Google doc, and then copy & paste them back into their WordPress pages.
Why?
Because it minimizes the on-screen distractions and makes it easier to edit your article.
Give it a go and see if it helps you write your content faster!
Now keep typing until you’ve finished your draft post…
Once you’re done, you’re ready for step 2!
P.S. Struggling to write an SEO optimized article?
Don’t panic; click here to learn how to write amazing blog content for your audience!
Step 2: Edit Your Post
You have a diamond in the rough…
You need to polish it, shine it, and transform it into an attractive post that will captivate your readers’ attention!
This is how:
Tidy up the Formatting
At least half of the power of your message lies in how you write your content:
Your blogging style is paramount to your success!
No matter how great your content is, people won’t read a messy, boring article!
You need to write in a simple, easy-to-understand manner that’s also pleasant on the eyes. This allows your readers to quickly skim through your post and pick out the most important parts.
So how should you format your WordPress posts?
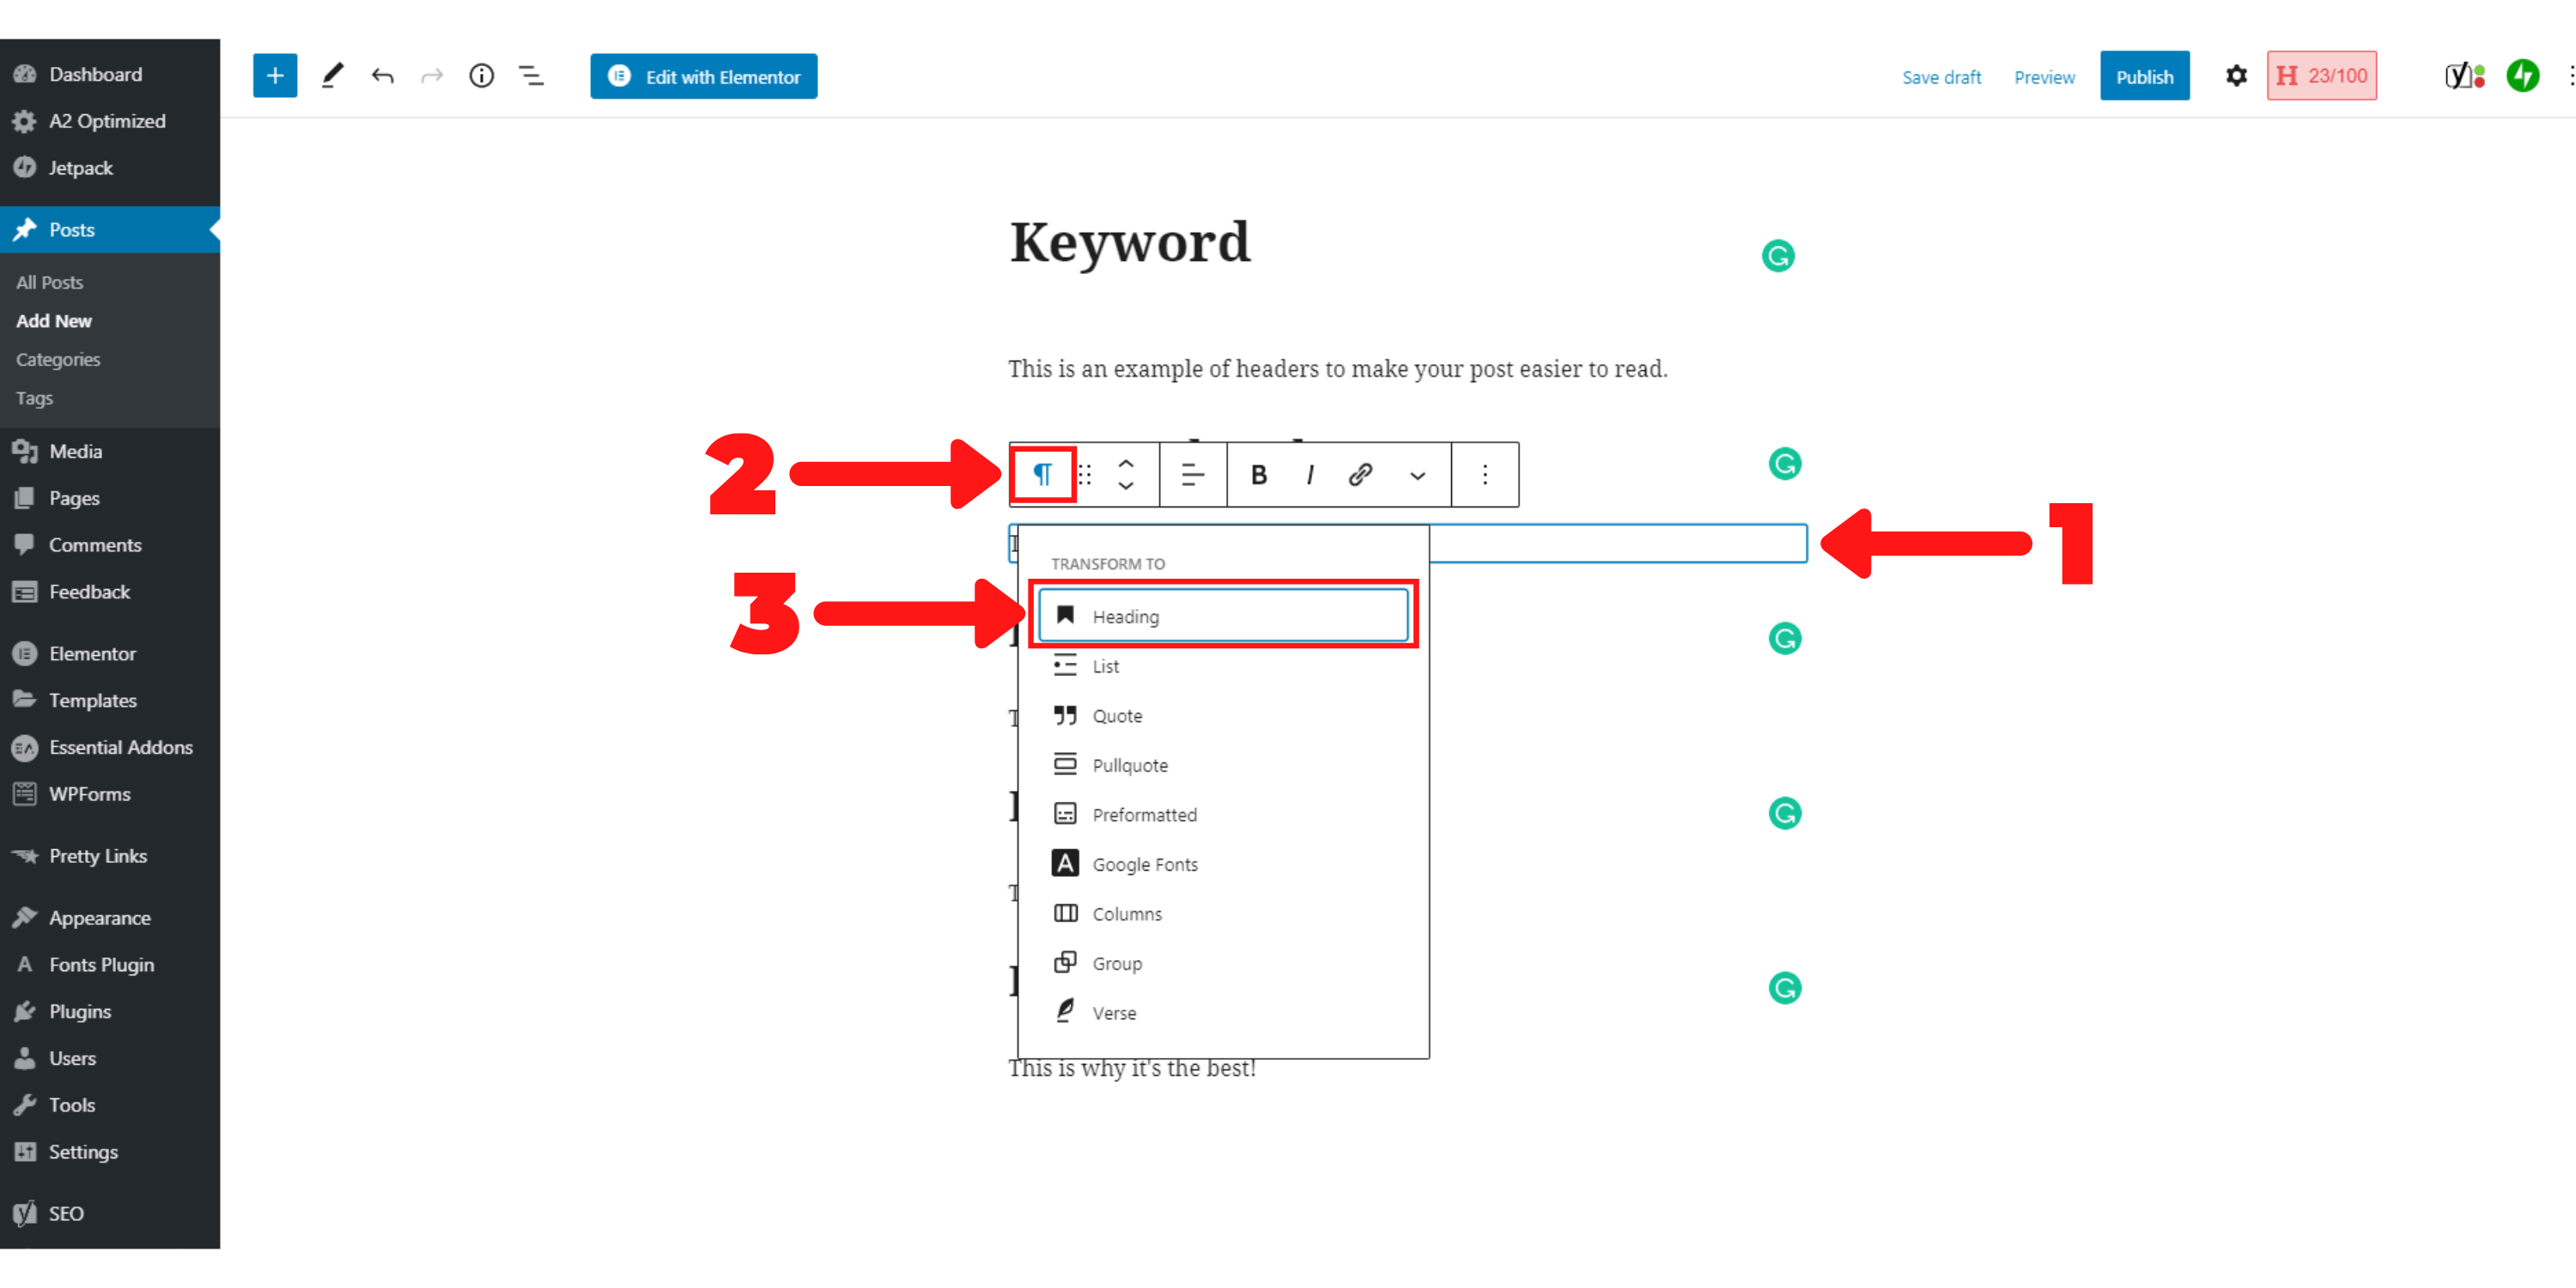
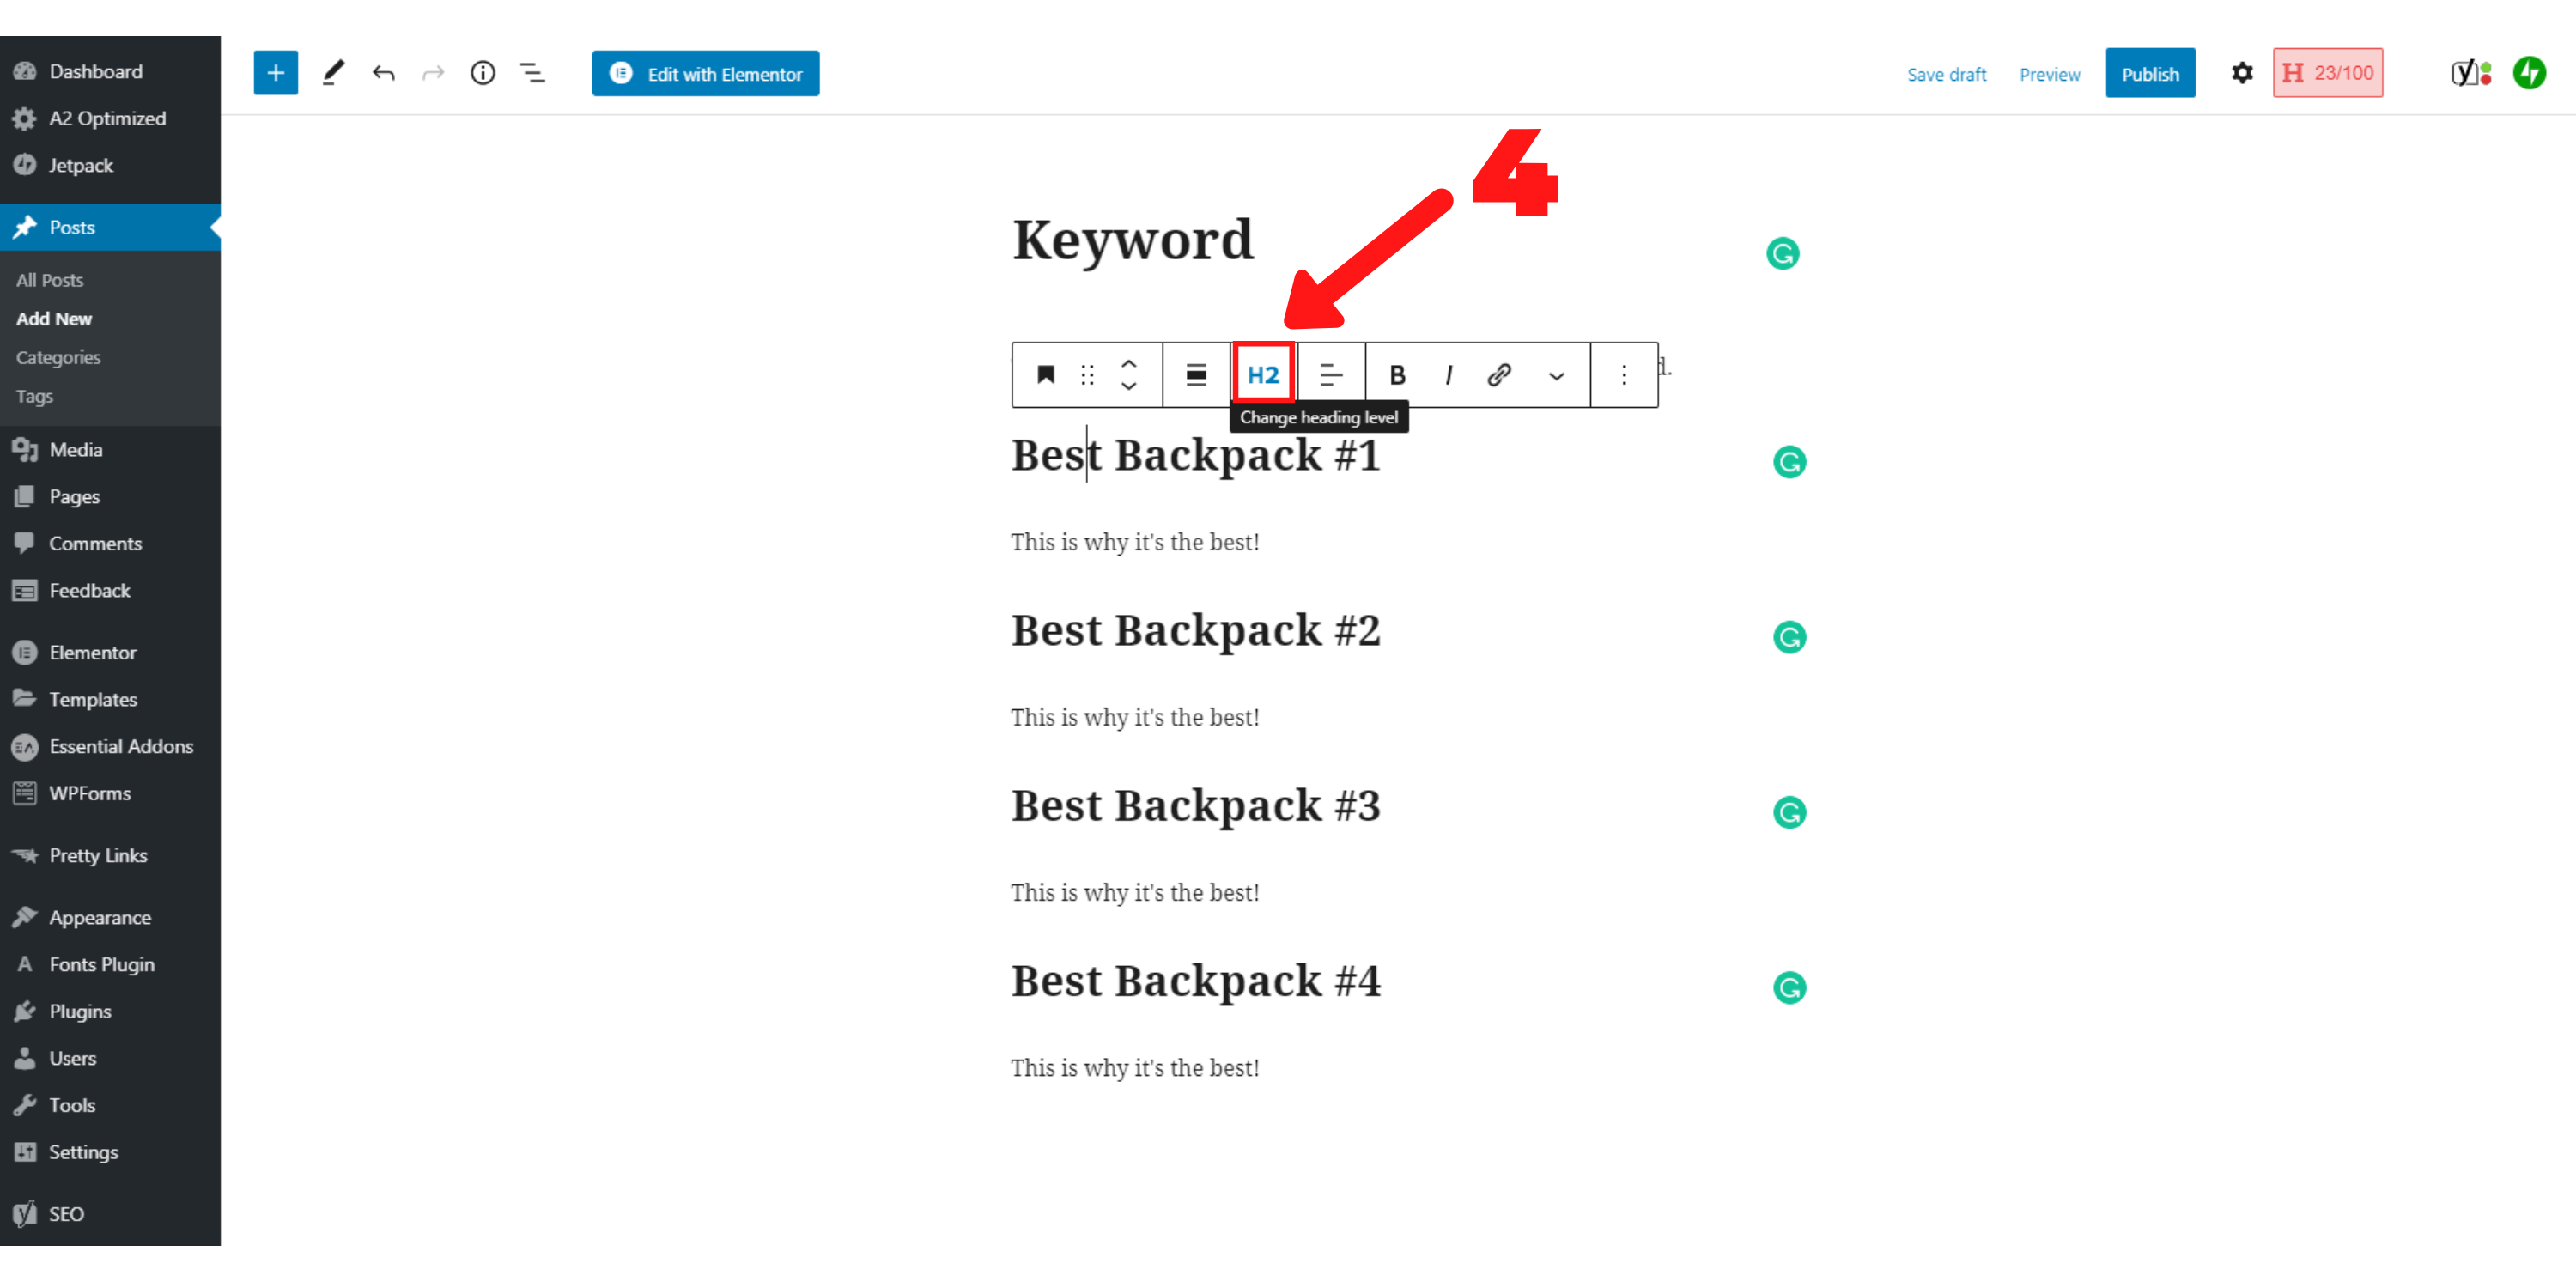
• Take advantage of headers to divide your content into logical, easily-scannable bits. Something like this:
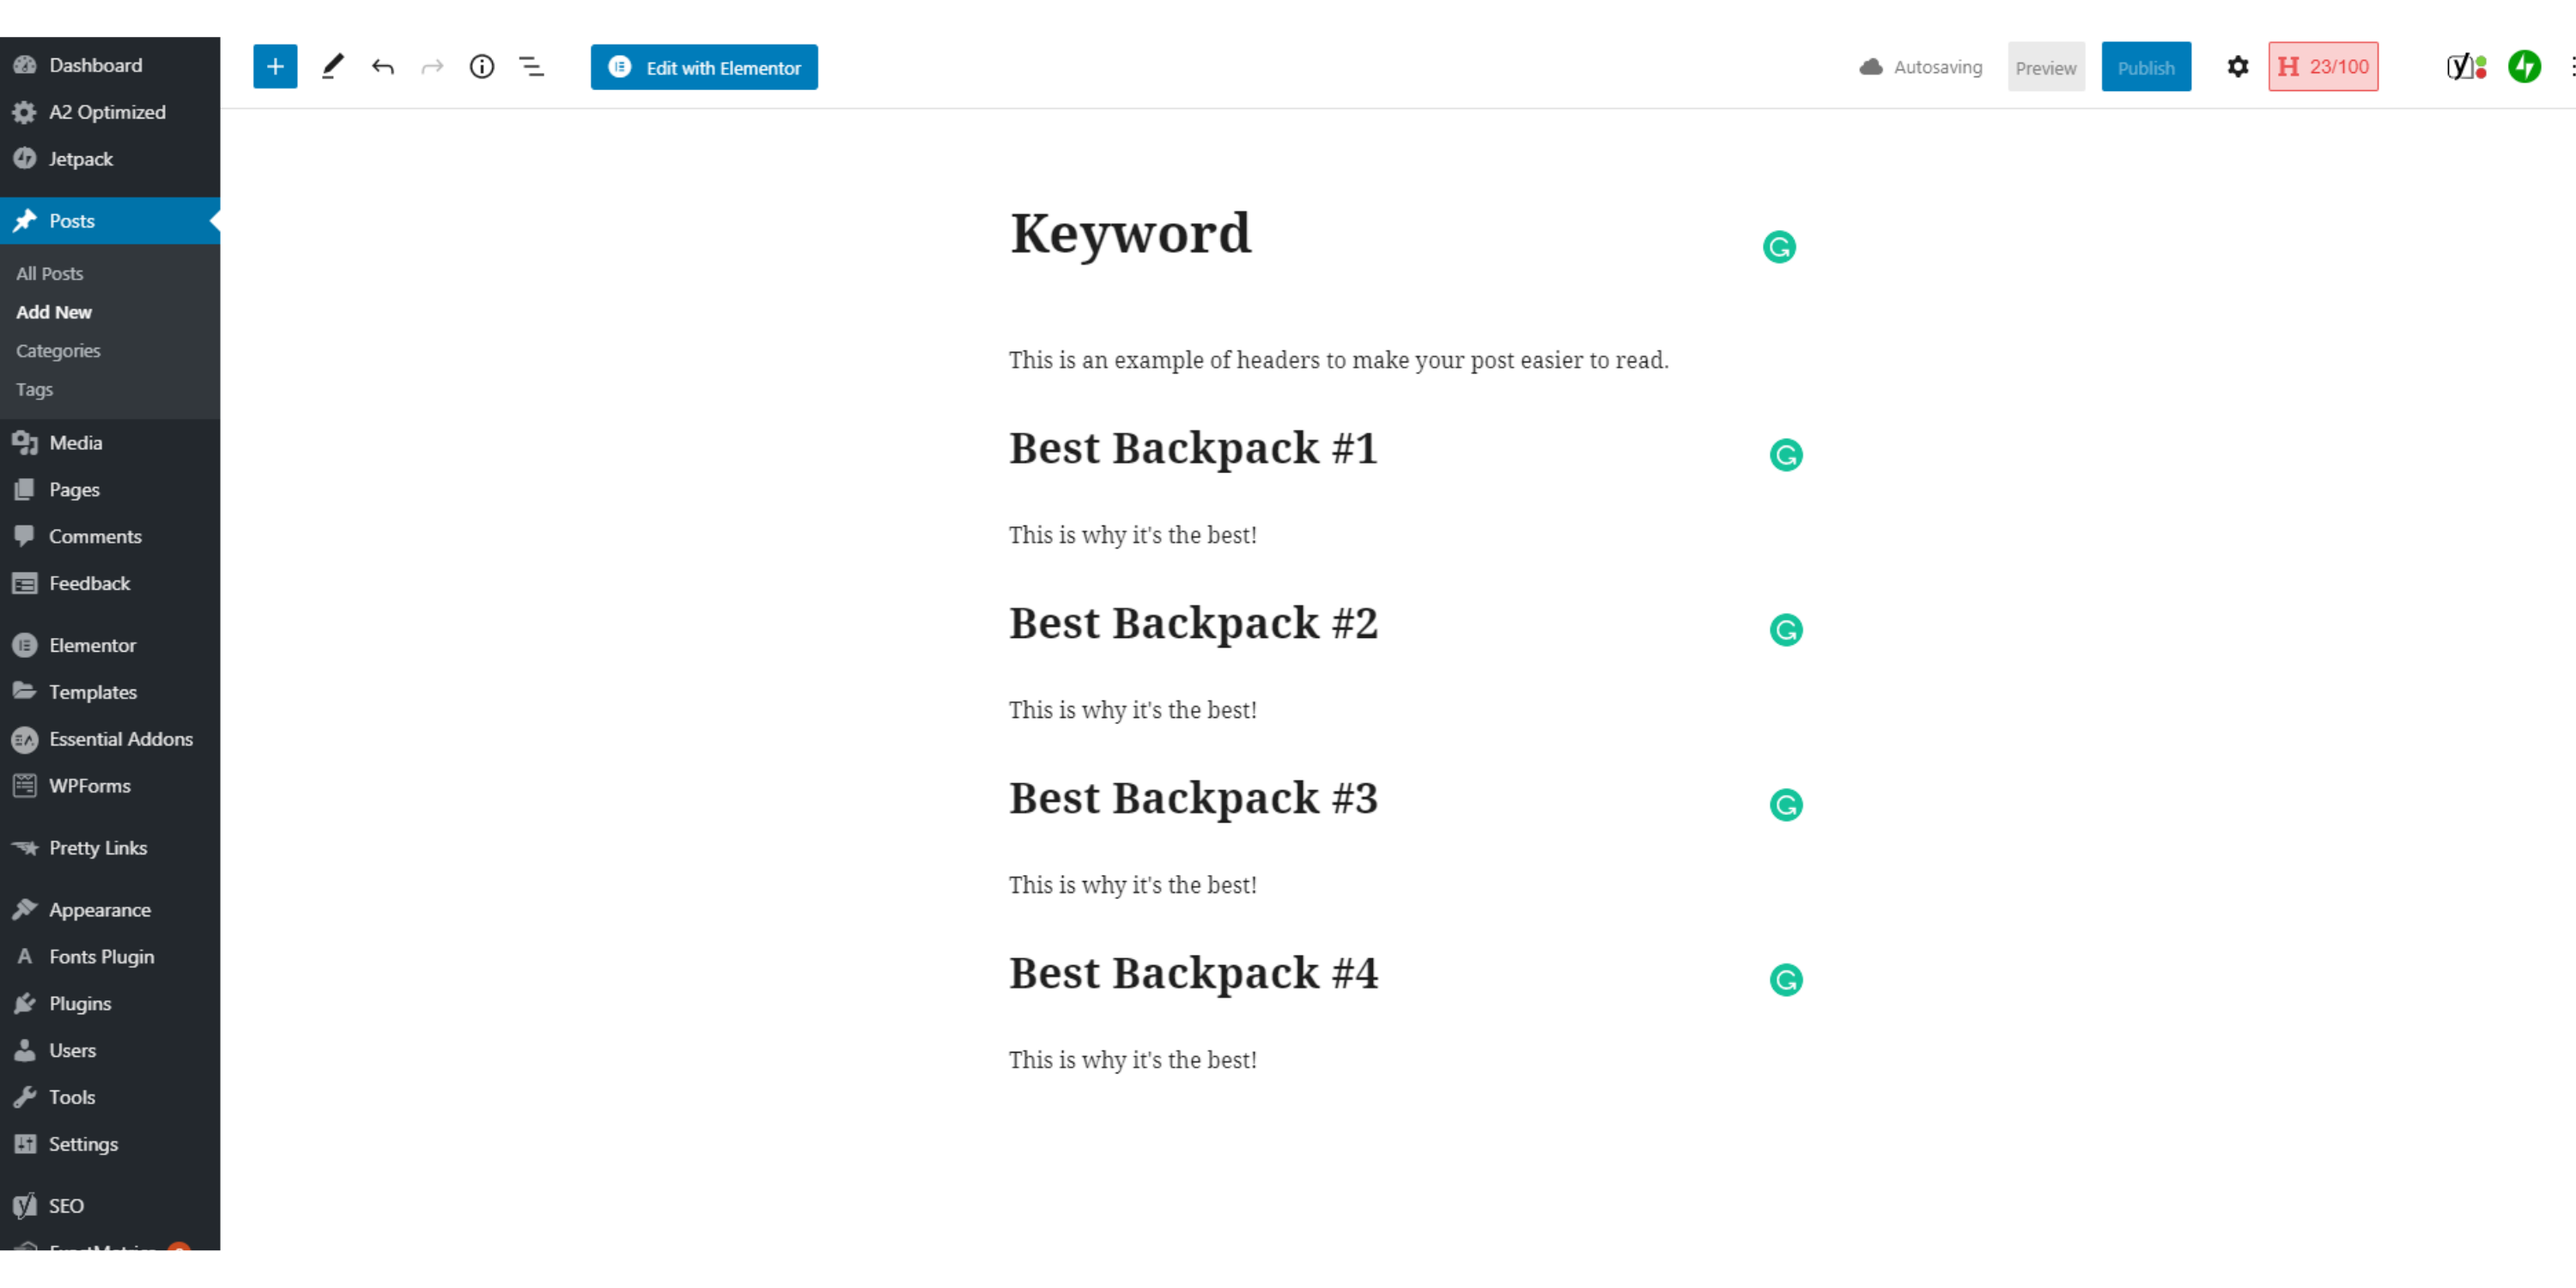
But how do you get your headers to look so nice?
Easy!
- Select the ‘block’
- Click the little ‘Change blog type or style’ icon in the pop-up bar
- Pick the ‘Heading’ option
- Set your size using the pop-up bar
Here’s a screenshot if you’re a visual learner:
• Add bold text to highlight important words and phrases
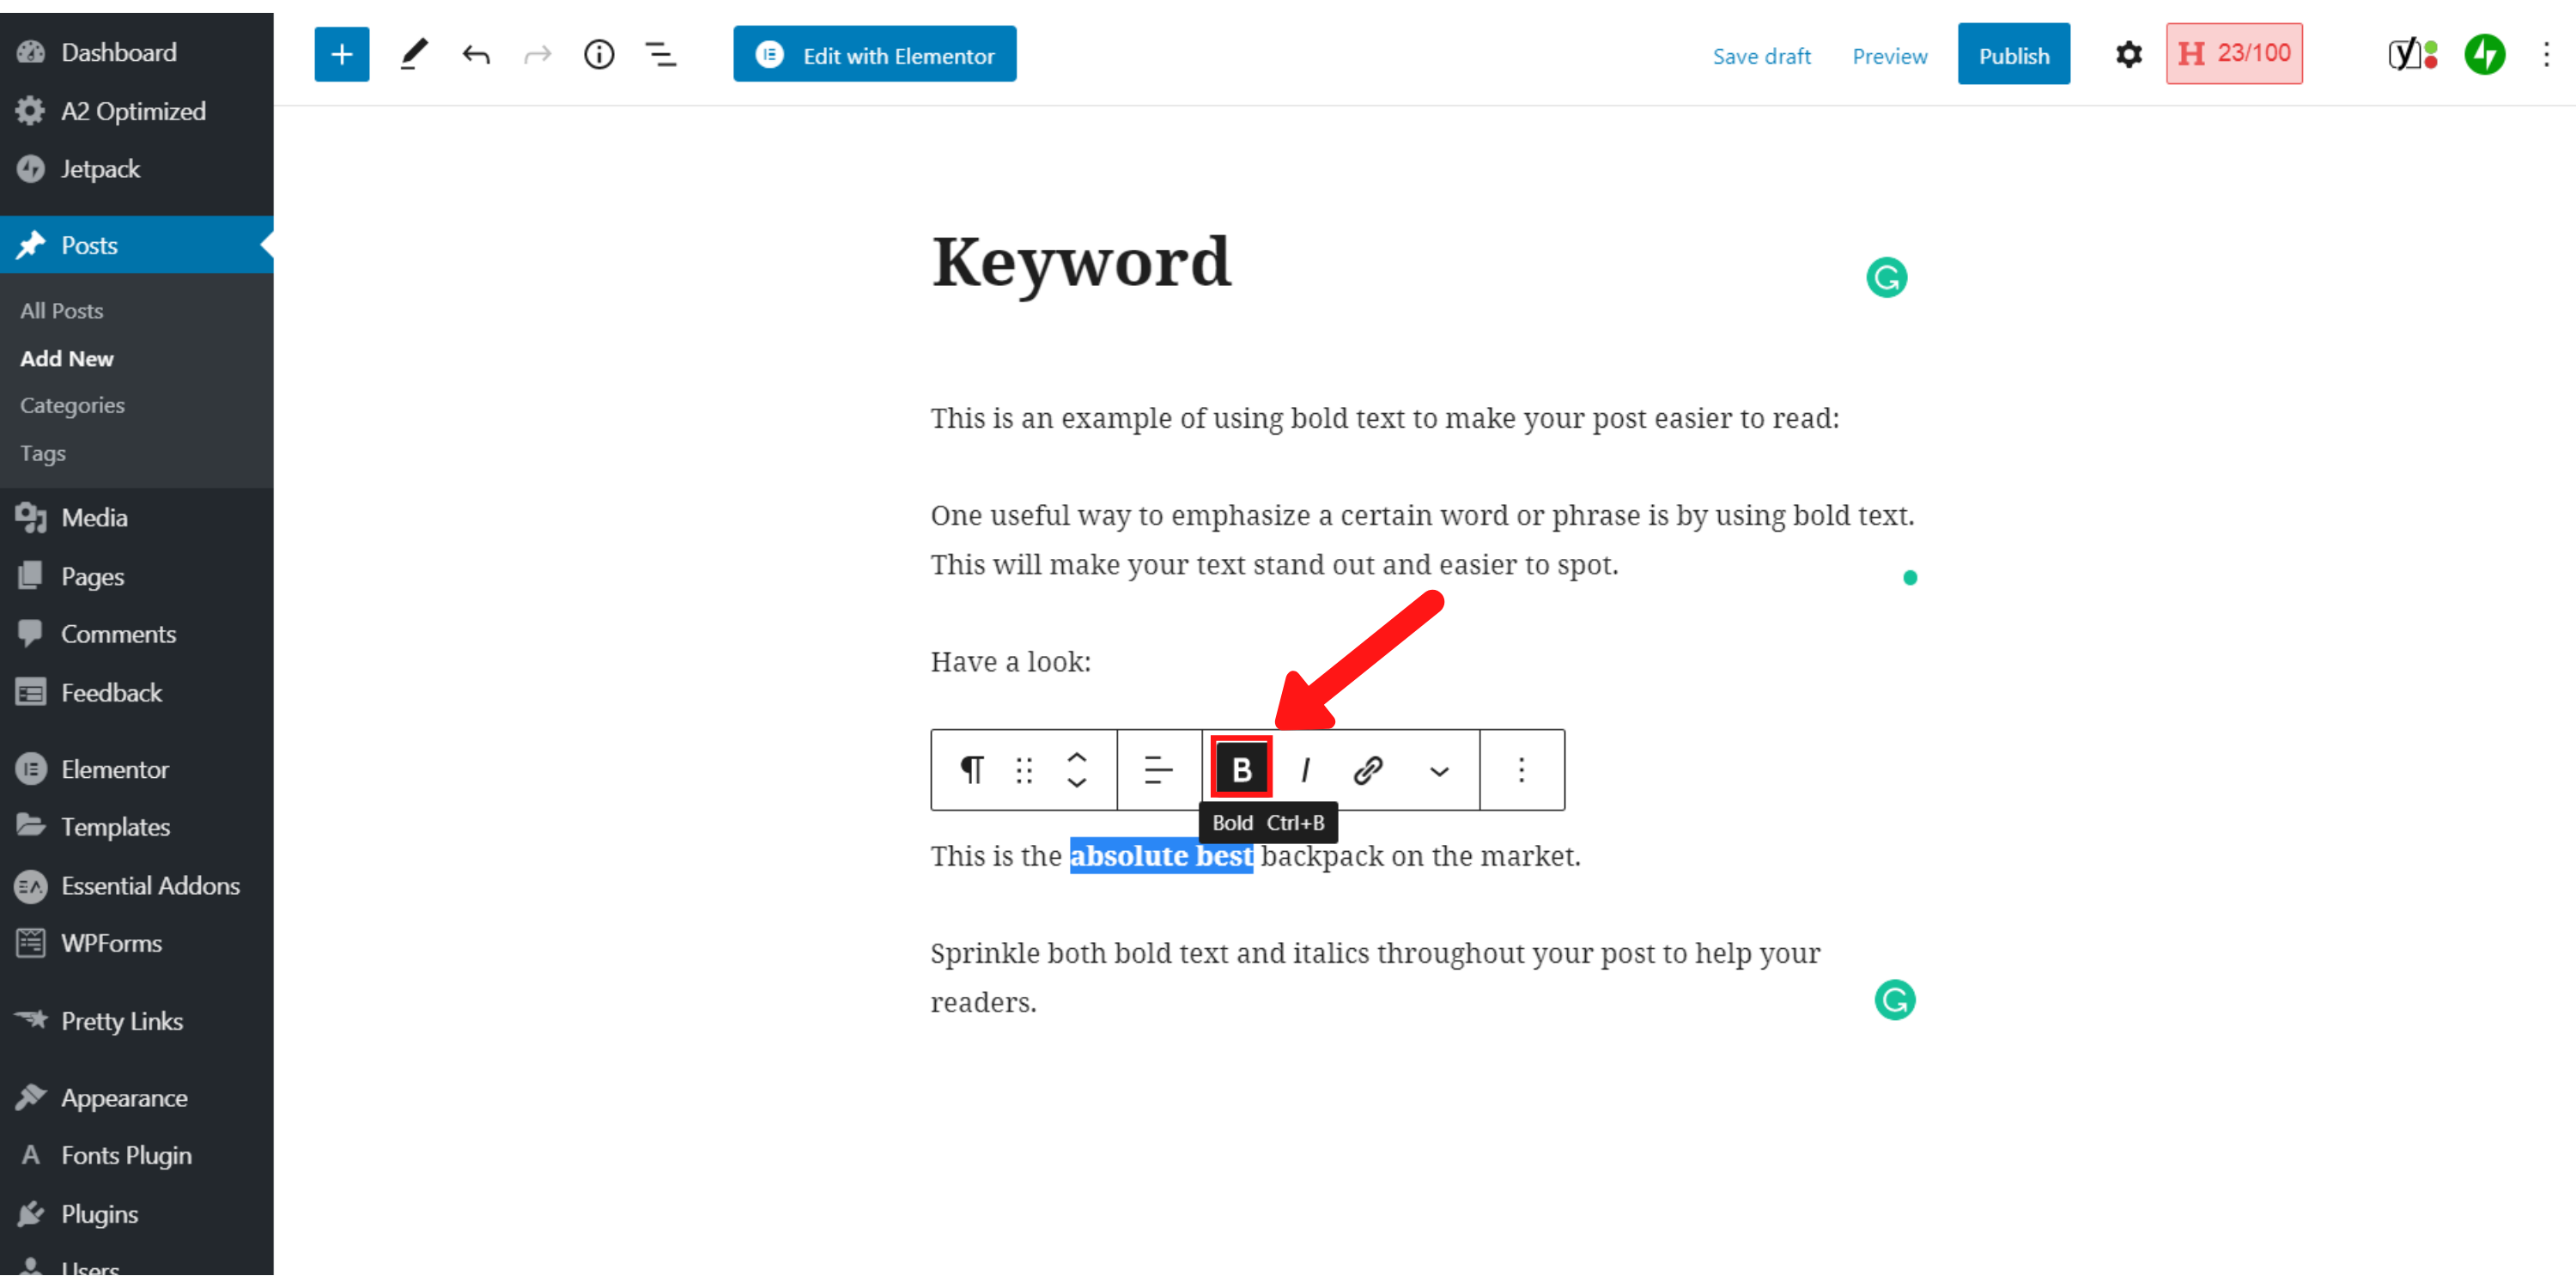
• Use italics to subtly highlight essential words and expressions.

• Whenever possible, choose bullet point lists rather than blocks of text.
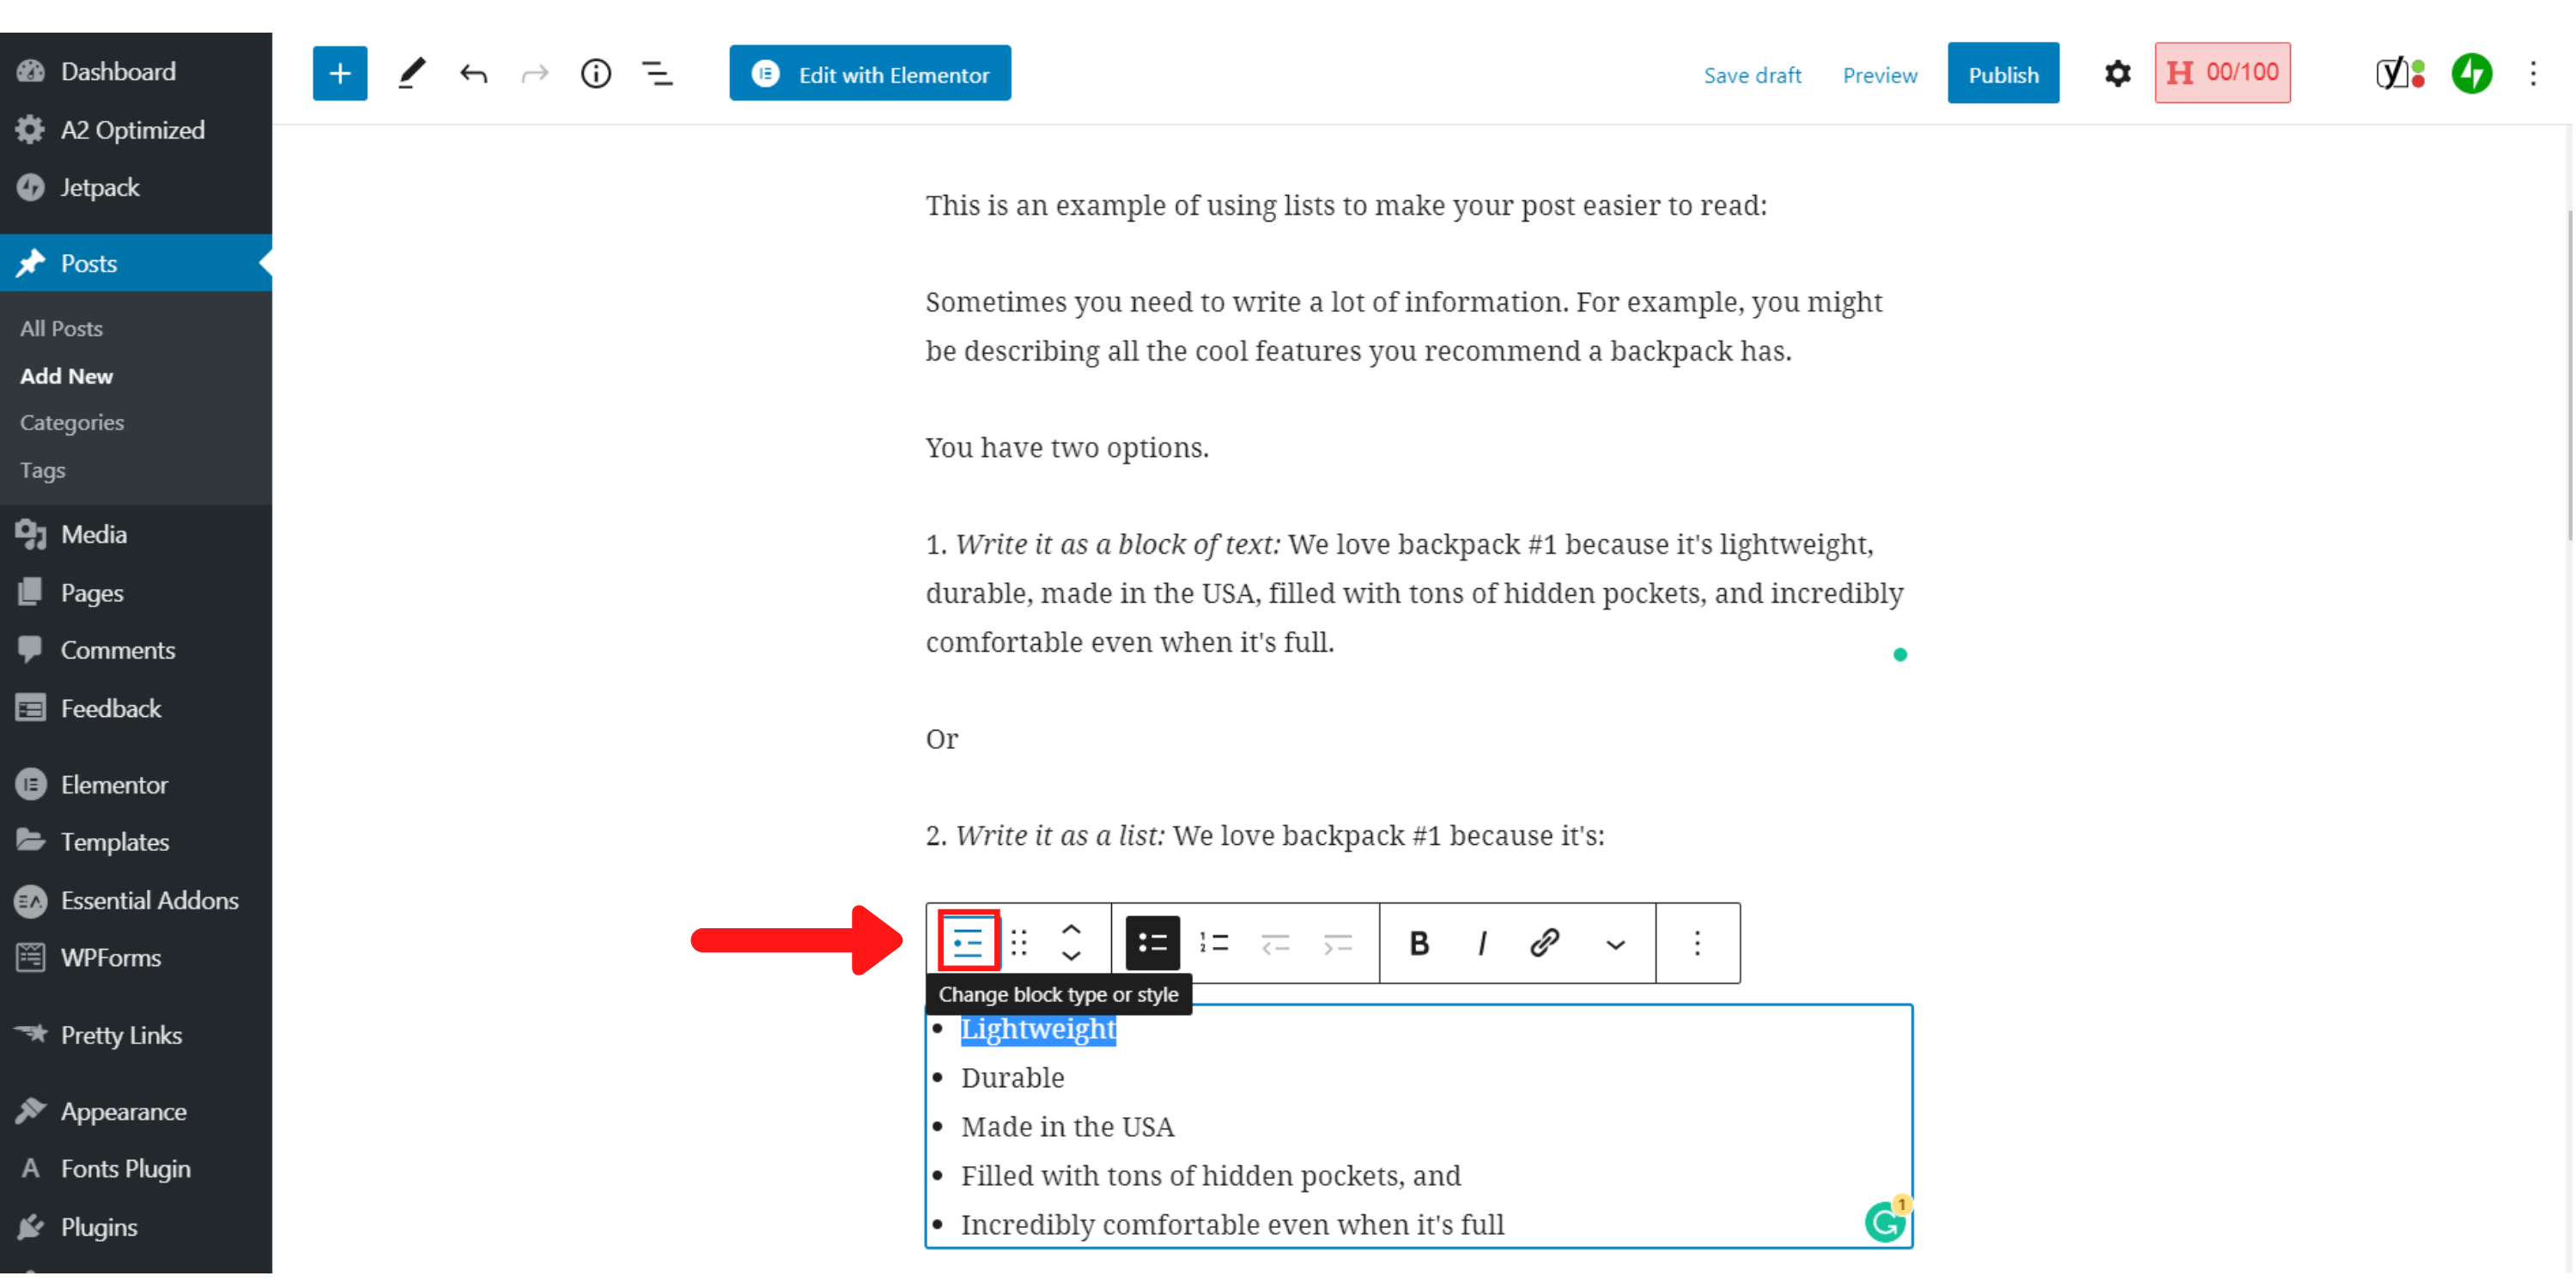
Remember to use numbered lists to the right of the bullet icon if their order matters!
• Keep your paragraphs to a maximum length of 3 lines on the computer — they’ll be much longer on mobile!
Adds Links to Your Content
This strategy leverages the so-called ‘Wikipedia effect’ to get your readers even more engaged with your blog content.
There are three main types of links:
- Internal links to other posts and pages on your WordPress site
- External links to other relevant pages across the web
- Affiliate links to goods and services that you’re recommending as part of your monetization efforts
Always add links to specific words (known as anchor text) rather than having loose URLs in your post — this makes for a much better reading experience!
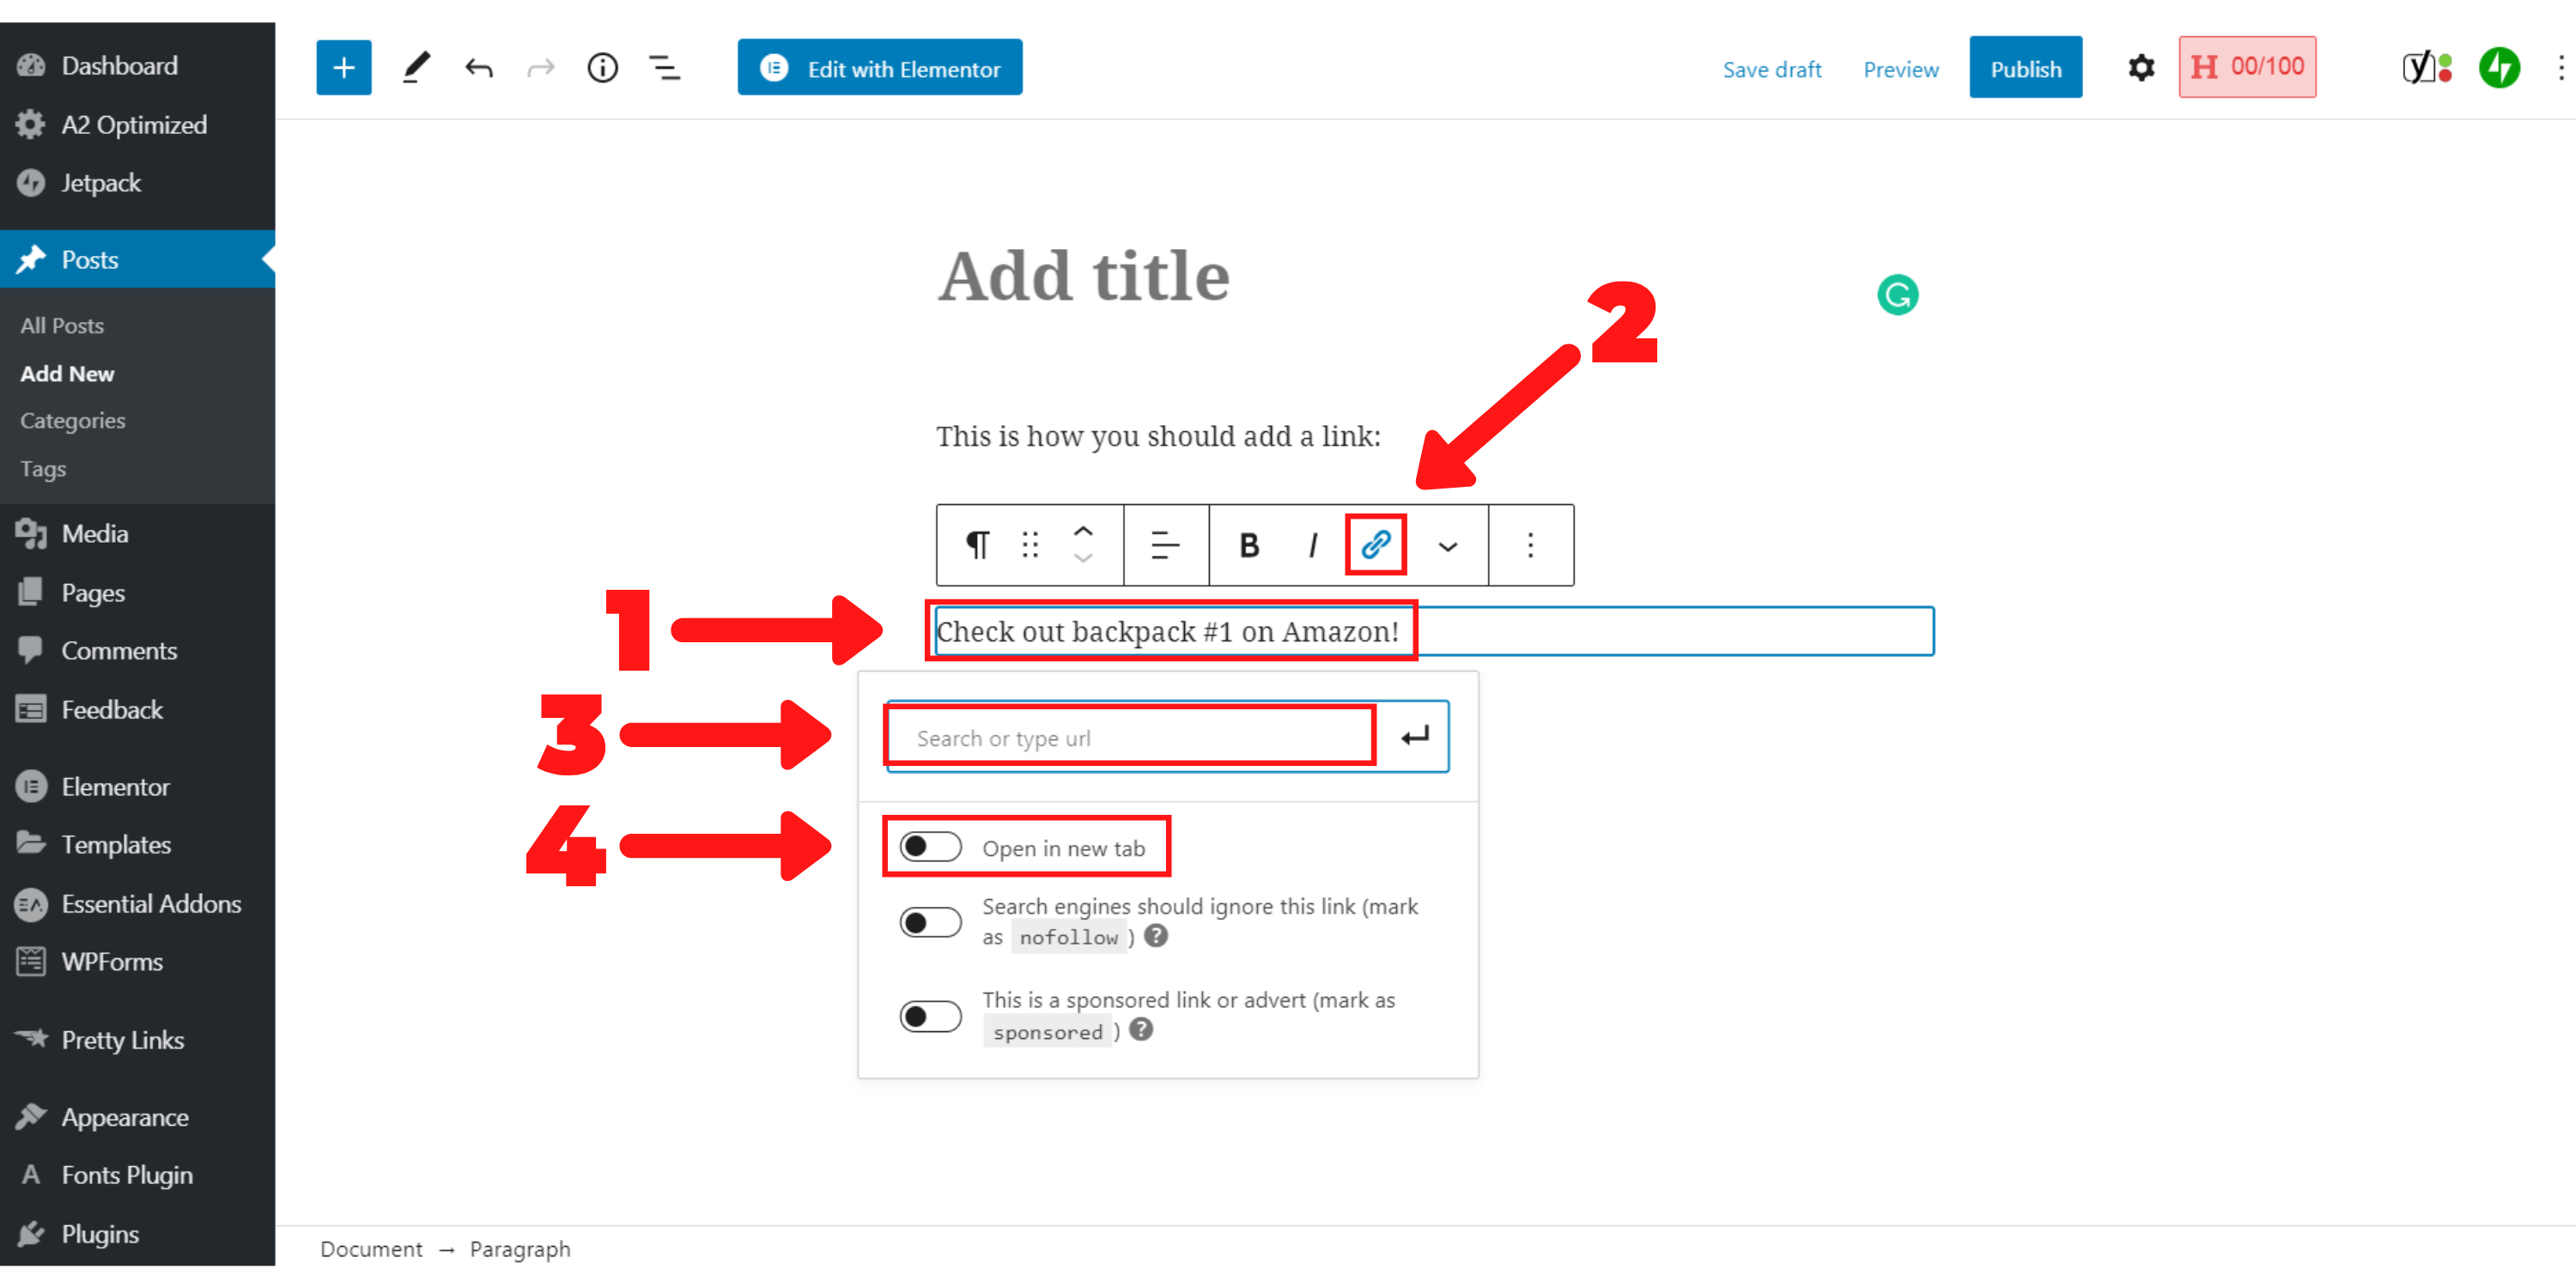
This is really straightforward to do in WordPress:
- Highlight the text you want to link from
- Push the ‘link’ button in the pop-up control bar
- Paste the link you want to link-to into the link space
- Turn on the ‘Open in new tab’ button
Insert and Optimize Images
By this point, your post should be reading great… but it’s probably still a bit boring to look at!
You’ll want to use images to break up your content and add some emotion.
But before adding a new image to WordPress, you should understand the importance of these two points:
- Words
- Size matters
Words:
When you download a free stock photo or take a screenshot, the filename is usually a random string of numbers… okay, but who cares?
But Google does, which means you should too!
Like you and me, Google learns by reading and interpreting words. But there’s one major difference:
It can’t look at images and visually understand what’s happening in a picture.
So, suppose one of your filenames isn’t descriptive — Google won’t have a clue about what’s going on… and it won’t link your image correctly to your topic and keyword!
You have to take control and write a description in the filename, title, and alt text fields for each image you upload. It really counts for SEO!
Size matters too:
And it really does…
If you add a large image to your WordPress posts and pages, these will slow down your site like crazy, and users will get annoyed and leave!
So what can you do about it?
- Pick smaller photos for your website, or
- Use a photo editor to compress large photos!
Not sure about photo editors?
Don’t sweat it — just download GIMP here (it’s 100% free) and follow this official tutorial to learn how to reduce an image’ file size before you upload it!
All clear? Great!
Here’s how to upload the two types of images you’ll be using on your WordPress blog:
Add A Royalty-Free Featured Image
The first image to think about whenever you write a new post is the ‘Featured Image.’
This is your post’s cover photo and preview thumbnail.
Pick an attractive picture that’ll drive clicks to your post and capture your readers’ attention, but be very careful in where you get the picture from:
Only ever use your own pictures or royalty-free ones from a site like Pixabay!
Why?
If you make the mistake of pulling a picture directly from Google or using a stock photo you didn’t buy, it could cost you THOUSANDS!
There are huge law teams out there scouring the internet looking for bones to pick… so do yourself a favor and stay clear from it!
And oh yeah:
Don’t even think about using a picture from Amazon as your featured image — that’s a fast track way to get your affiliate contract canned!
Now that you’ve been warned, let’s show you just how simple it is to add a featured image in WordPress:
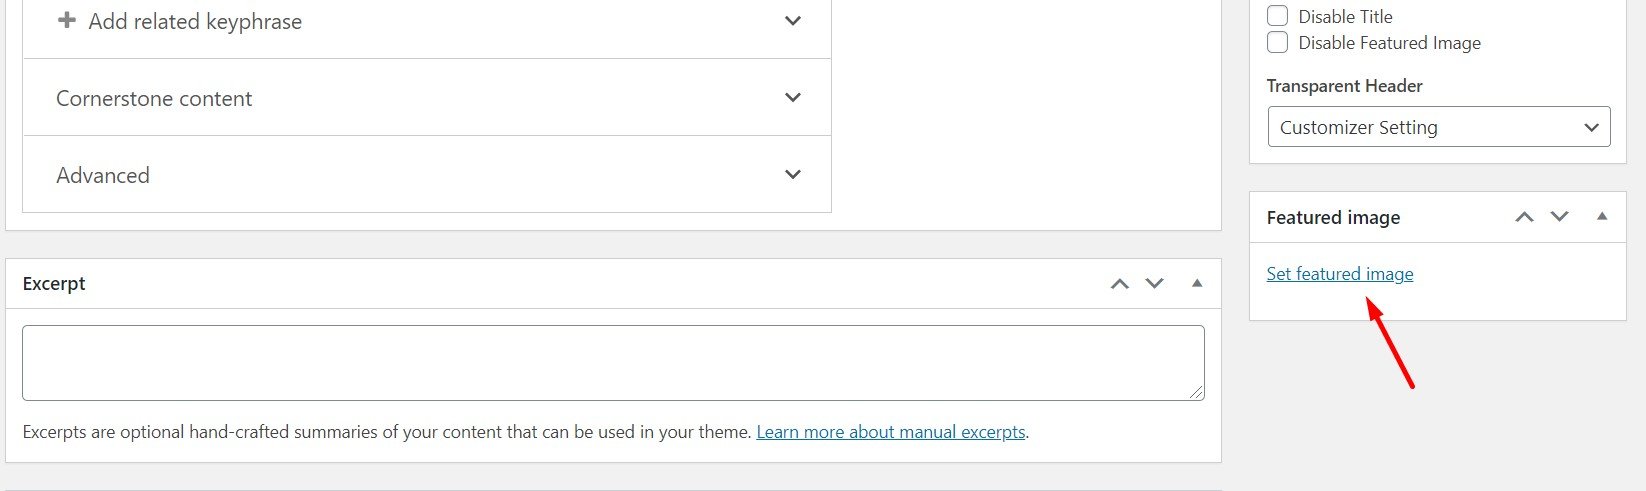
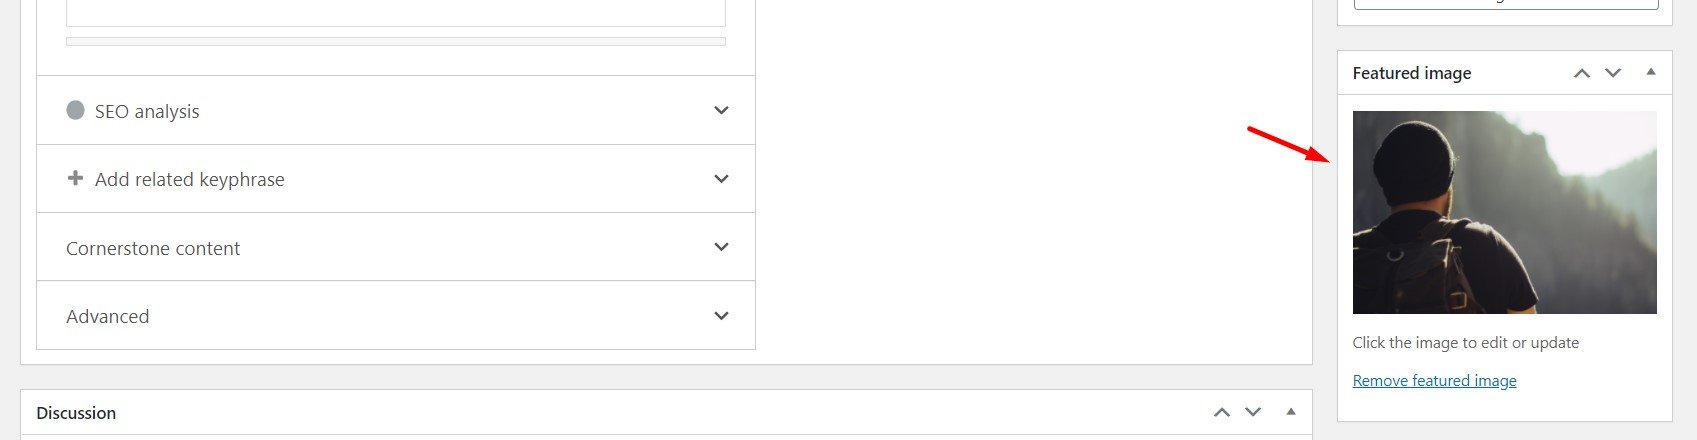
- Scroll down on the editor page until you see a box called ‘Featured image’ on the right-hand side.

- Click the ‘Set featured image’ link:
- Upload an image from your computer or pick one from your WordPress gallery.
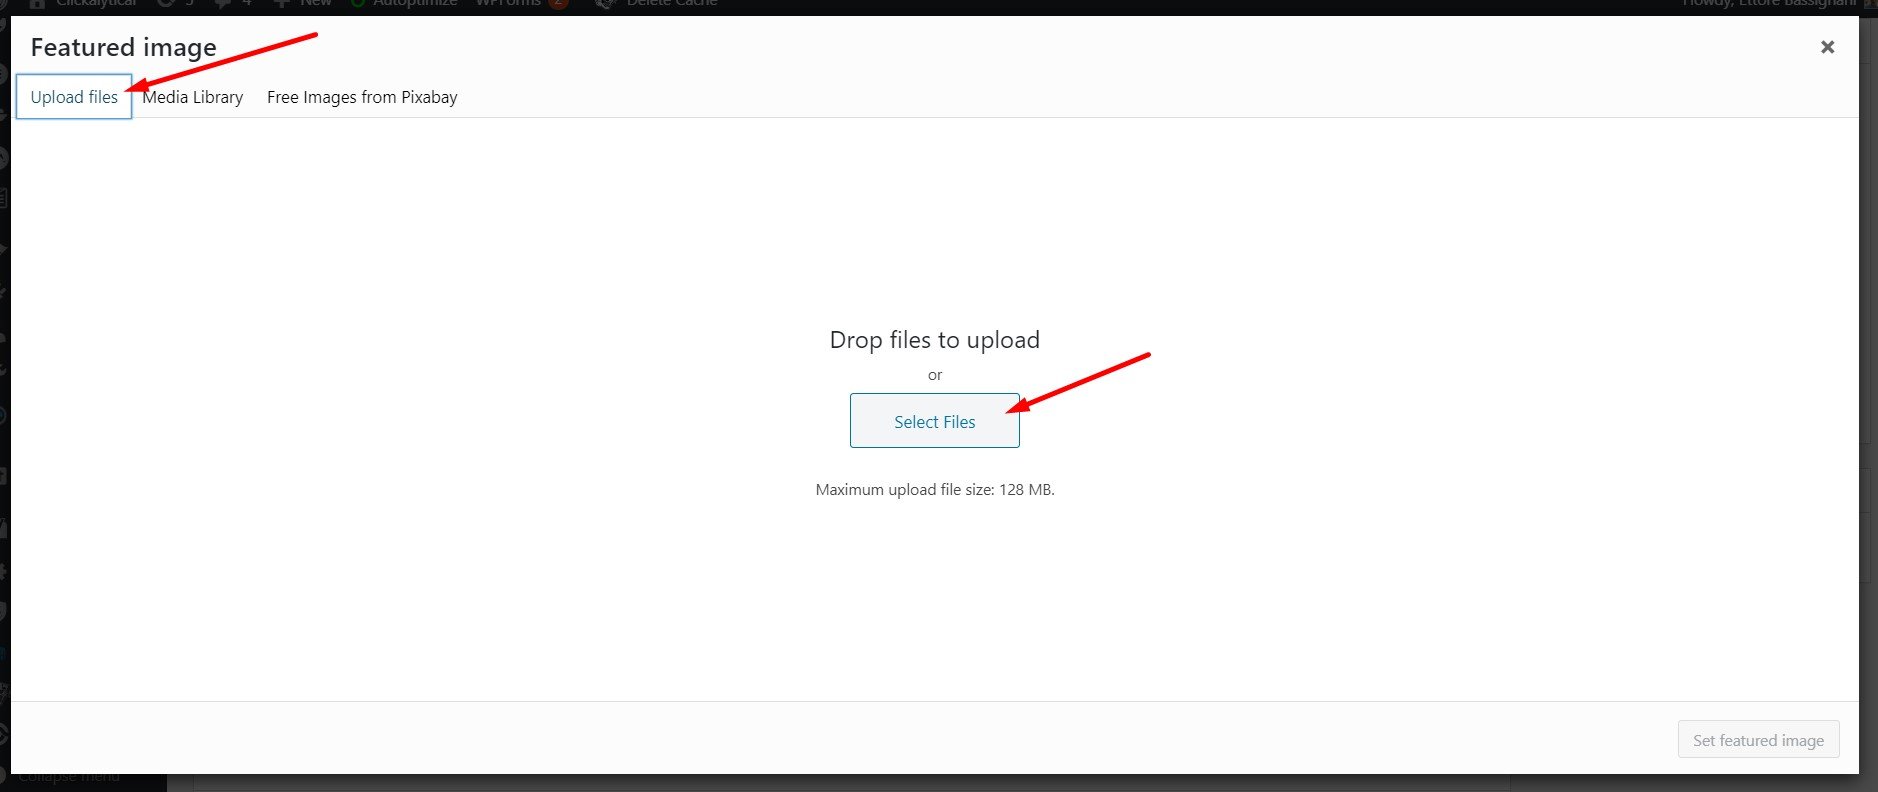
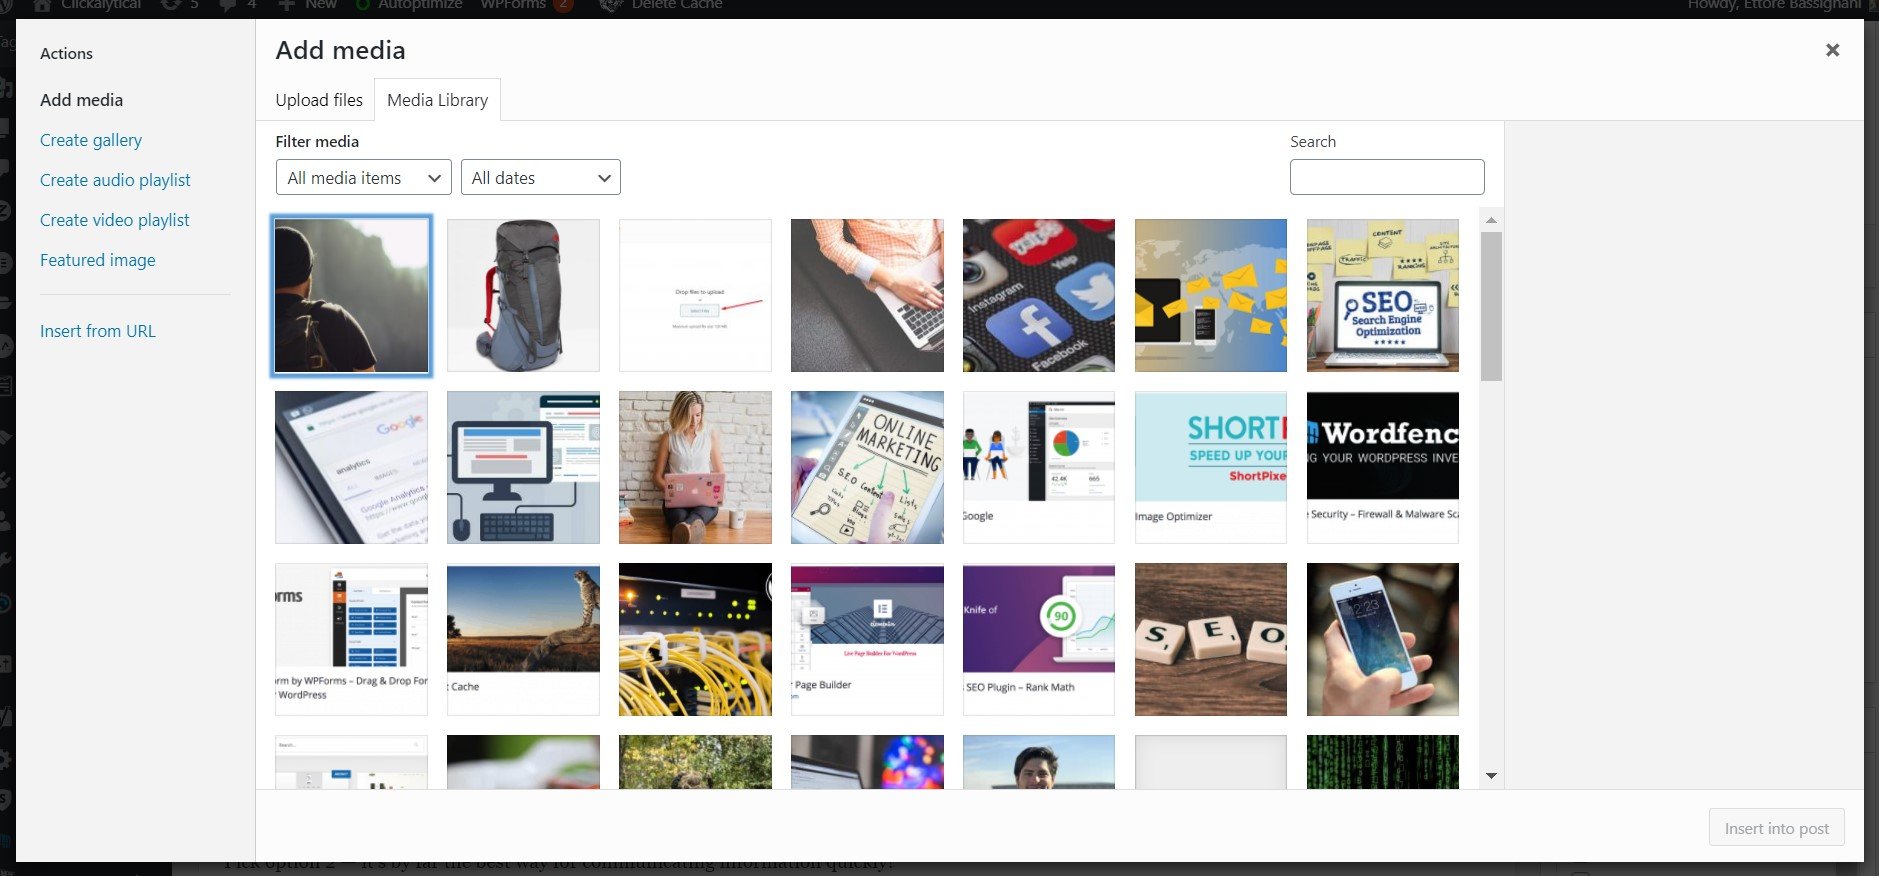
Here’s how to upload an image:
Click ‘Upload files’ at the top of the page and then the central ‘Select Files’ button.
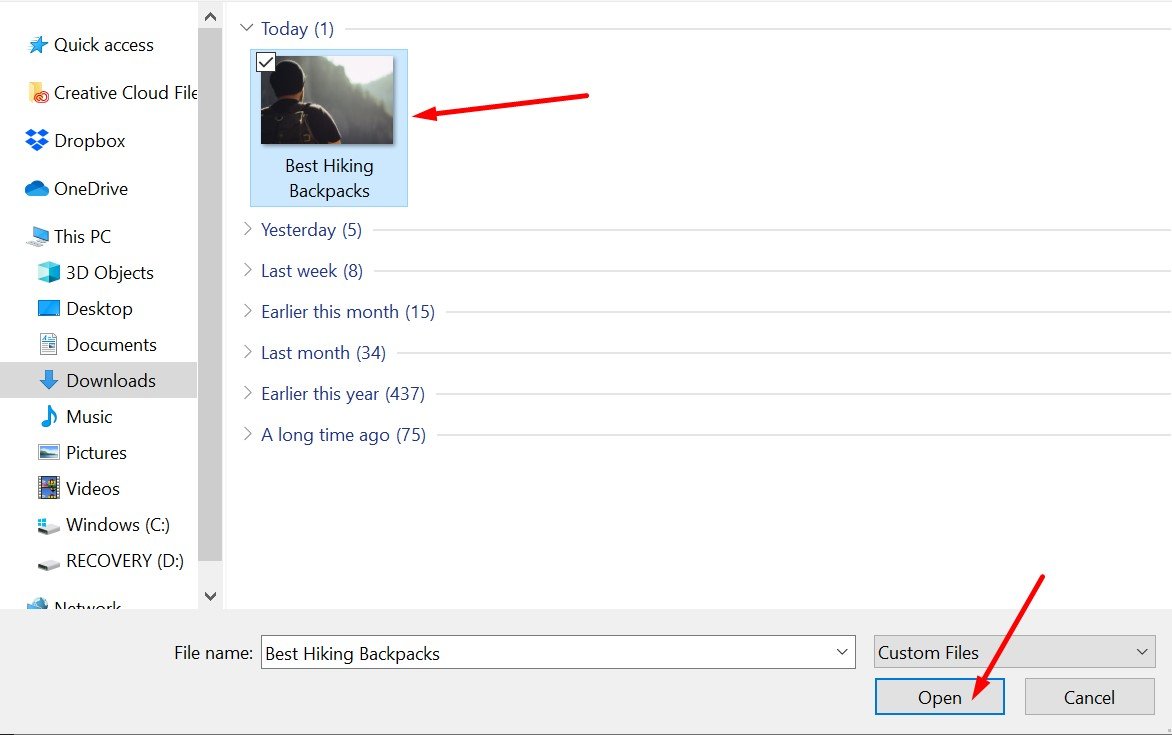
Now pick the picture you want to upload from your computer (remember to add your main keyword in the picture’s filename!).
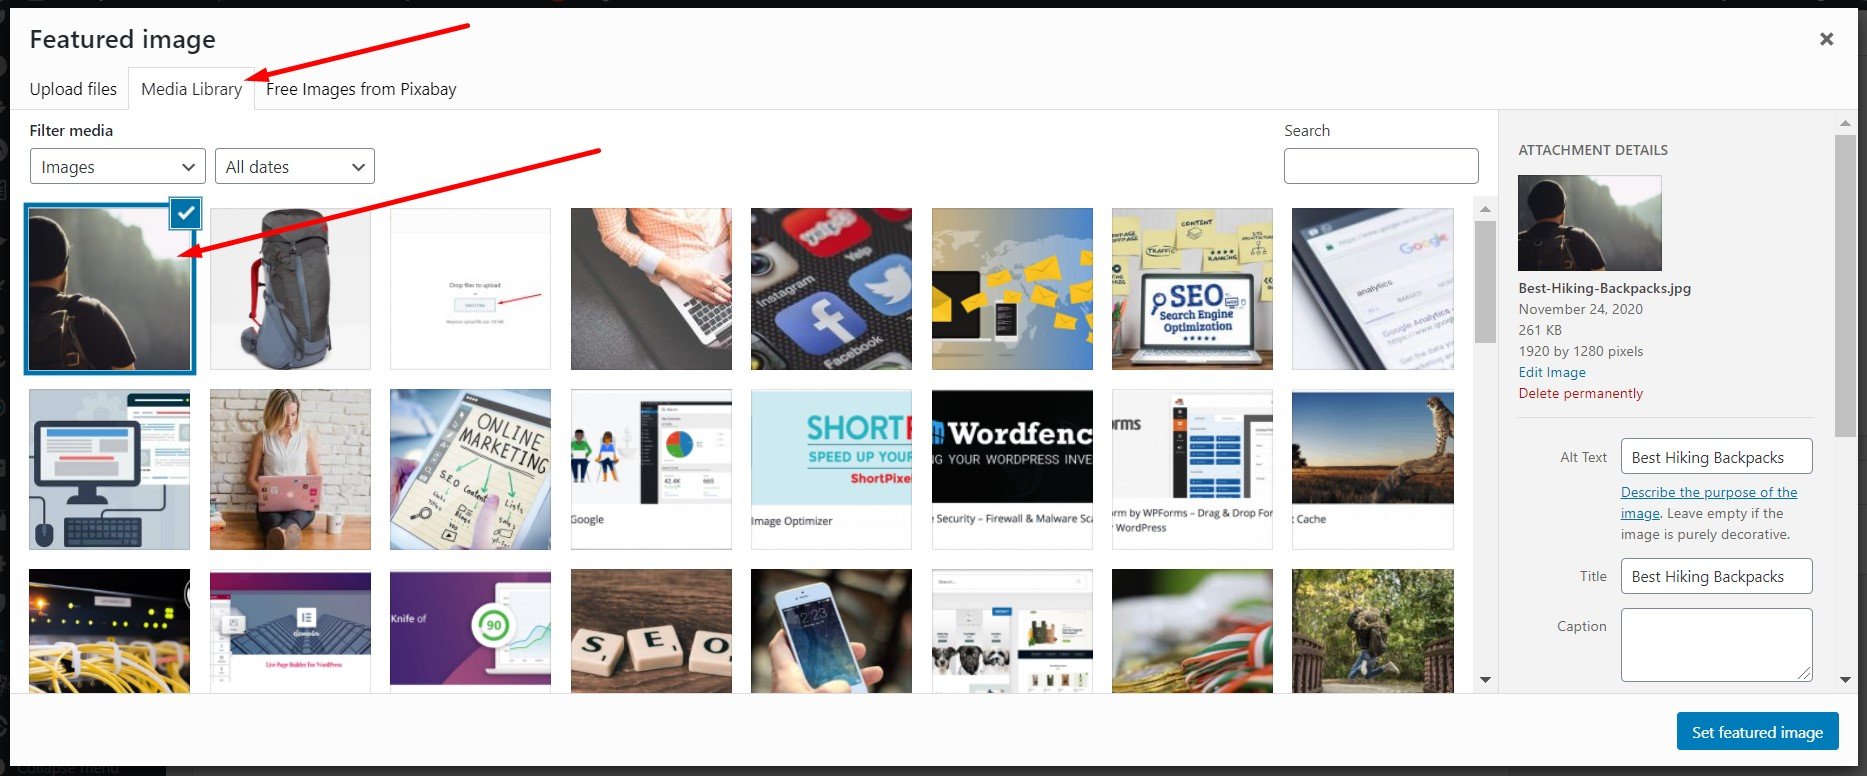
Here’s how to pick one from your gallery:
Click ‘Media Library’ at the top of the page and then select the image you’d like to use.
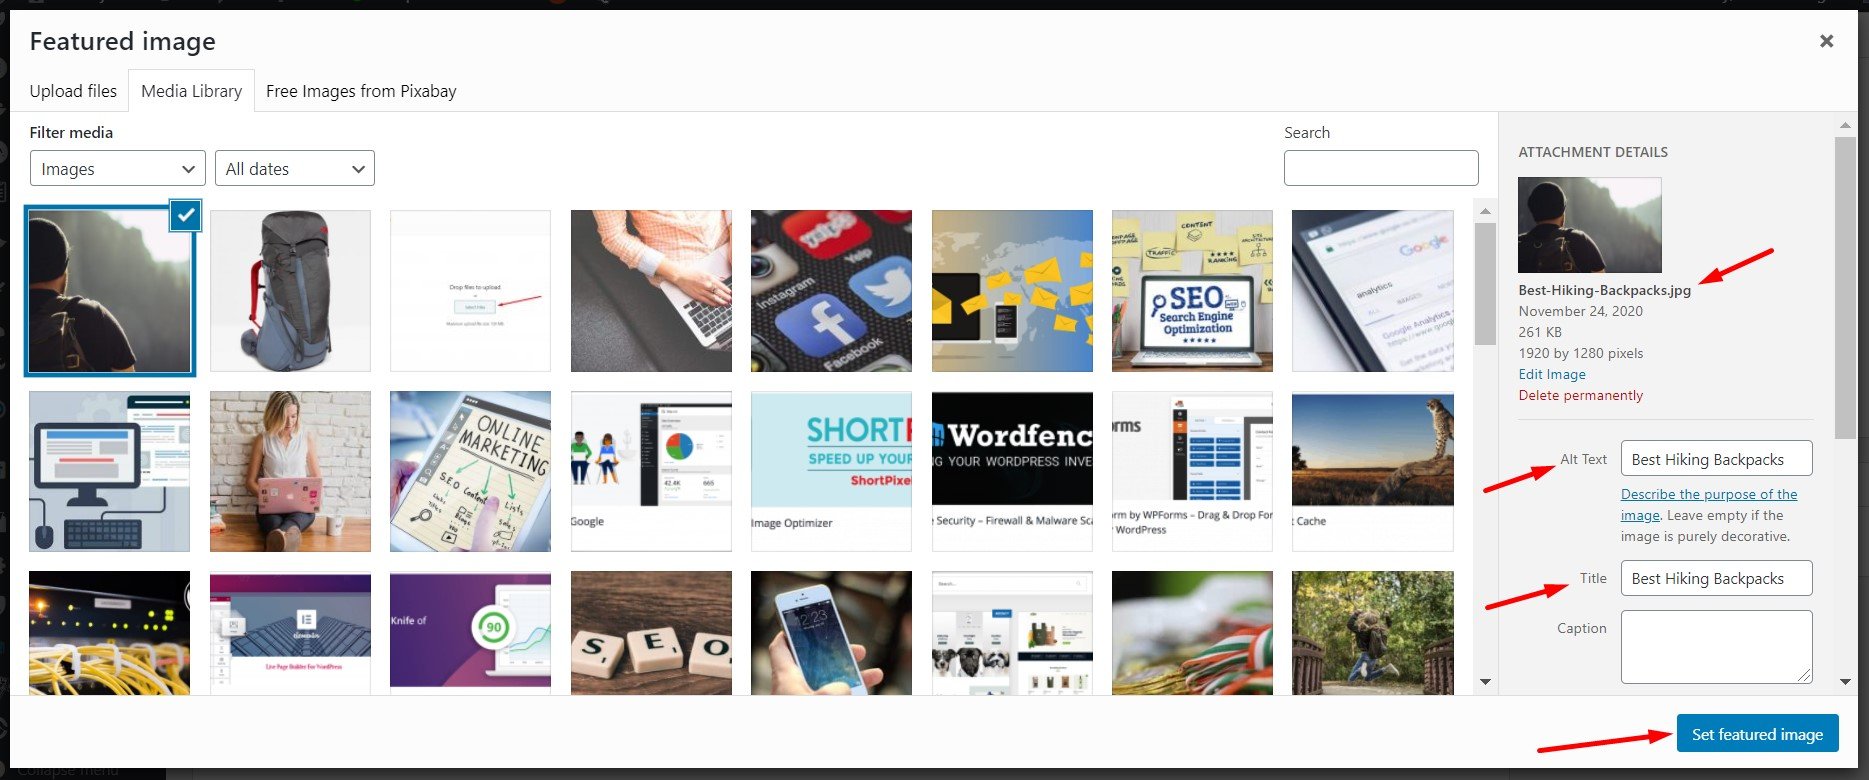
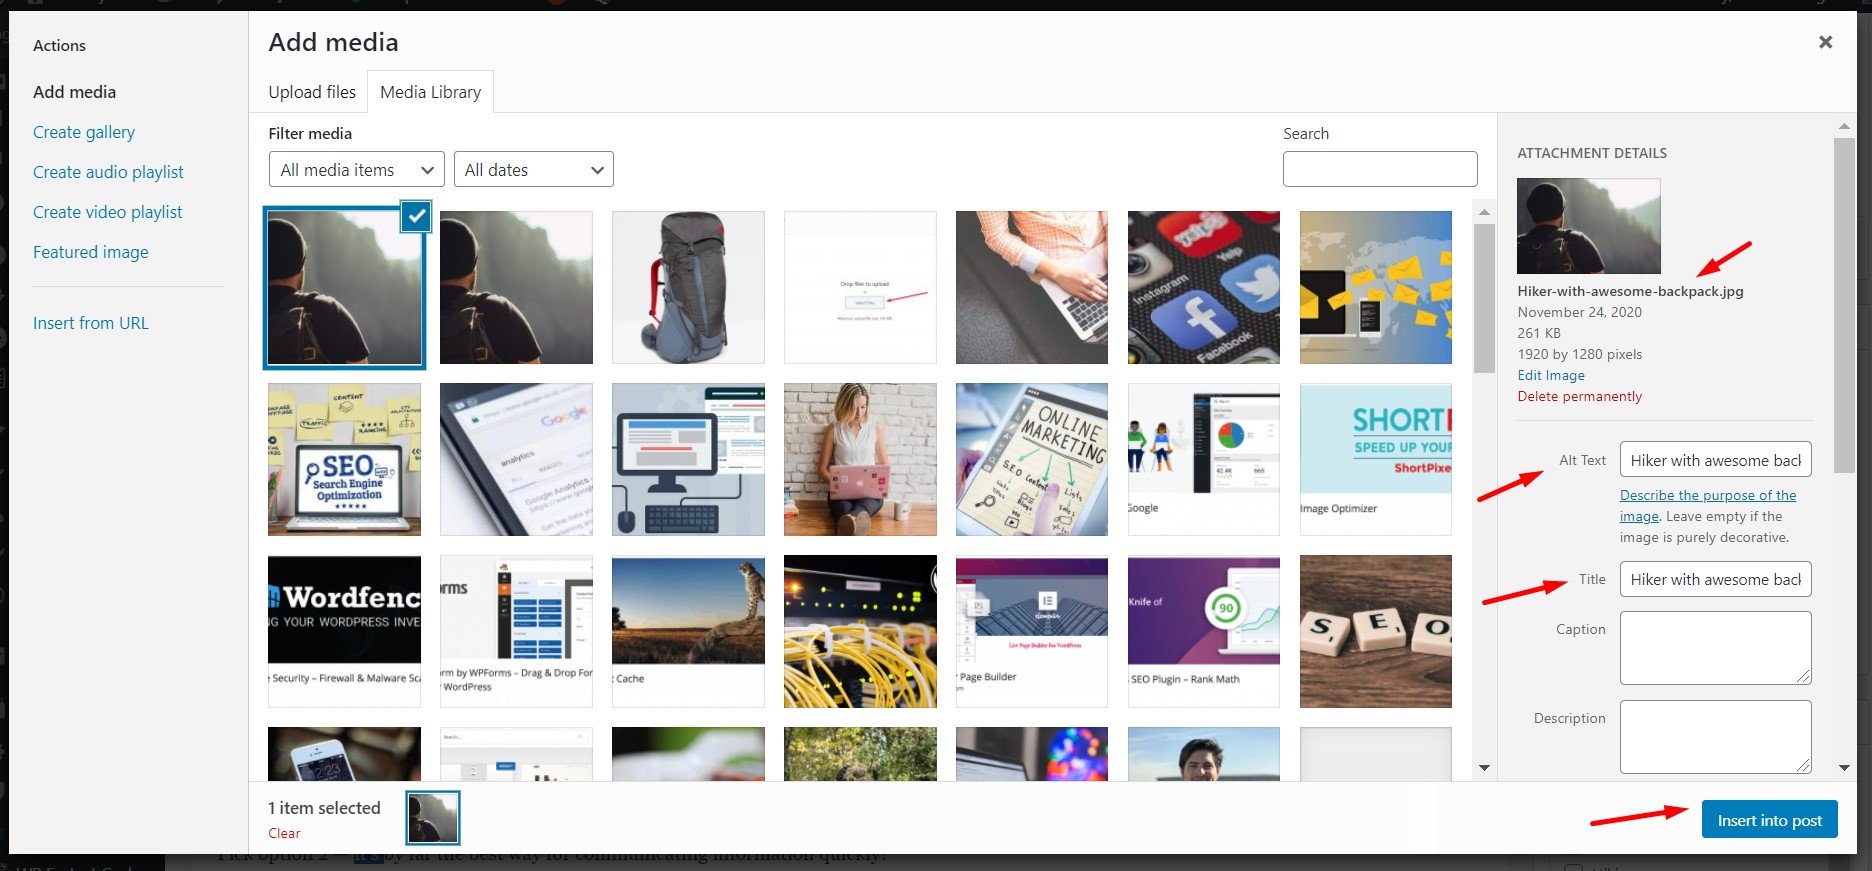
- Now update the title and alt-text with your primary keyword, and then click the blue ‘Set featured image’ button to publish your choice!
- You’re all set!

Up next:
Upload Royalty-Free Images Within Your Content
This is how to add new photos to your website content:
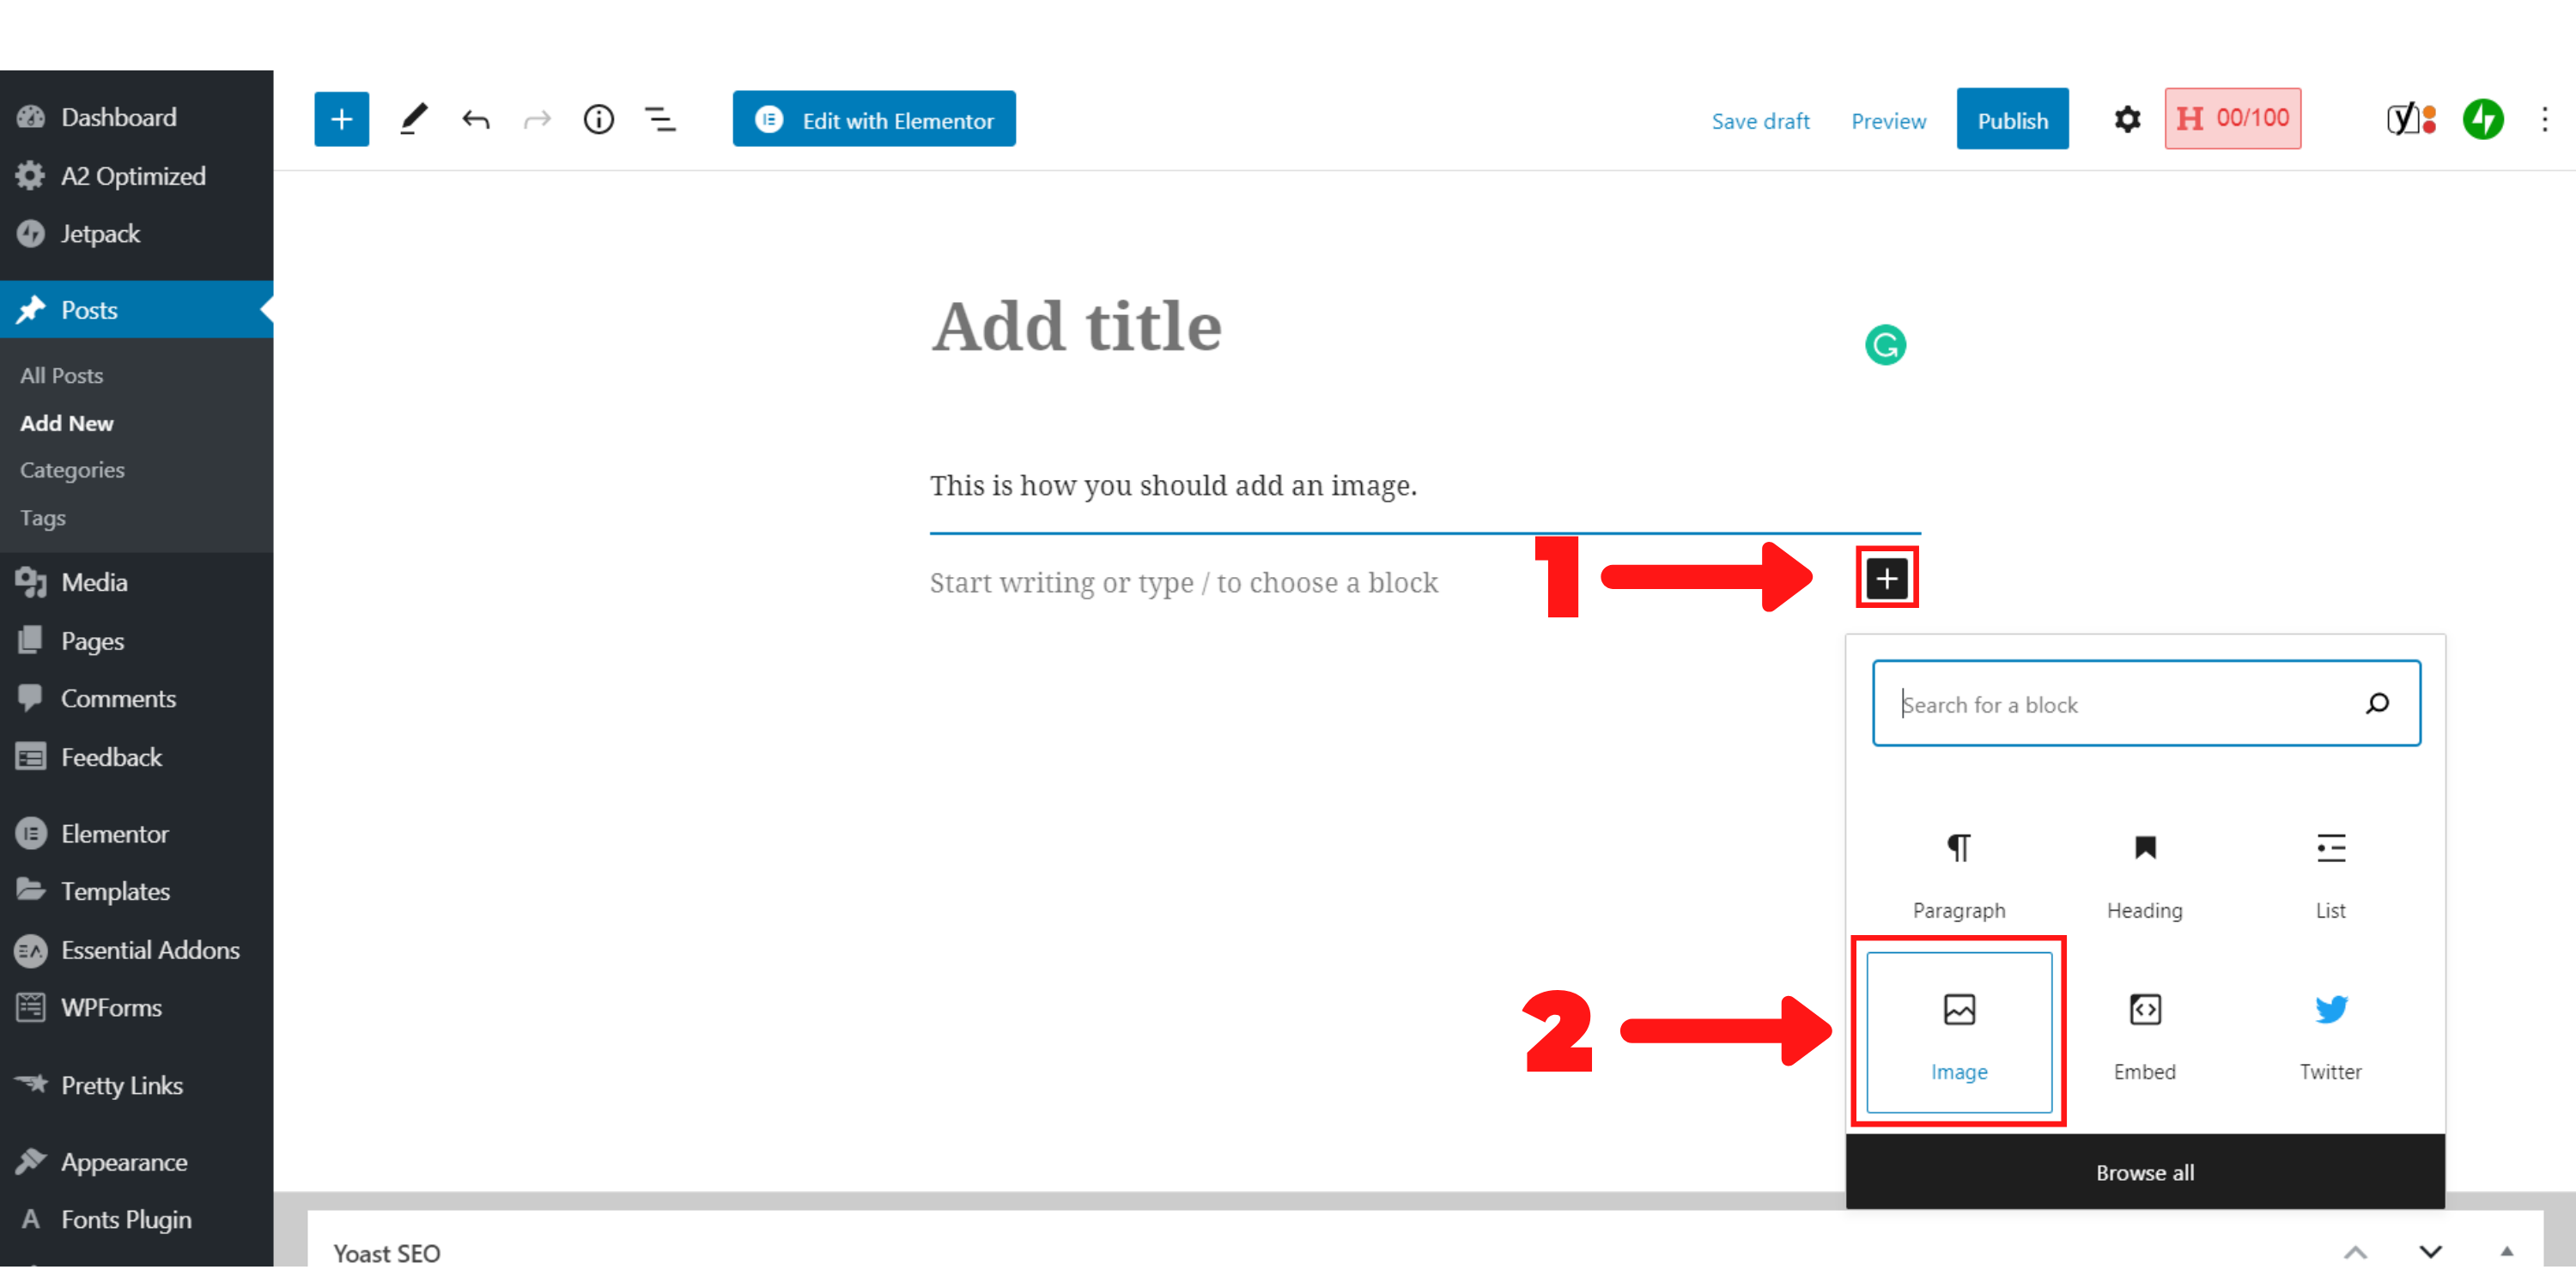
First, click on the block where you want the image to be placed in your article.
- Find the ‘Add Block’ button to the right side of the post page; click it.
- Click on the ‘Image’ tab within the pop-up menu
- You’ll see a pop-up (identical to the one you just used for adding a featured image) that allows you to upload pictures.
- Follow the same method as before to upload a new image from your computer or pick one from your WordPress gallery.
Click here to jump back to the instructions, you know, just in case you forgot!
- Update the title and alt-text with some descriptive text (we’ve used ‘hiker with awesome backpack’ in our example) — this’ll let Google know exactly what’s going on in your picture. Now insert away with the blue button!
- Repeat this process until you’ve added all the images you want.
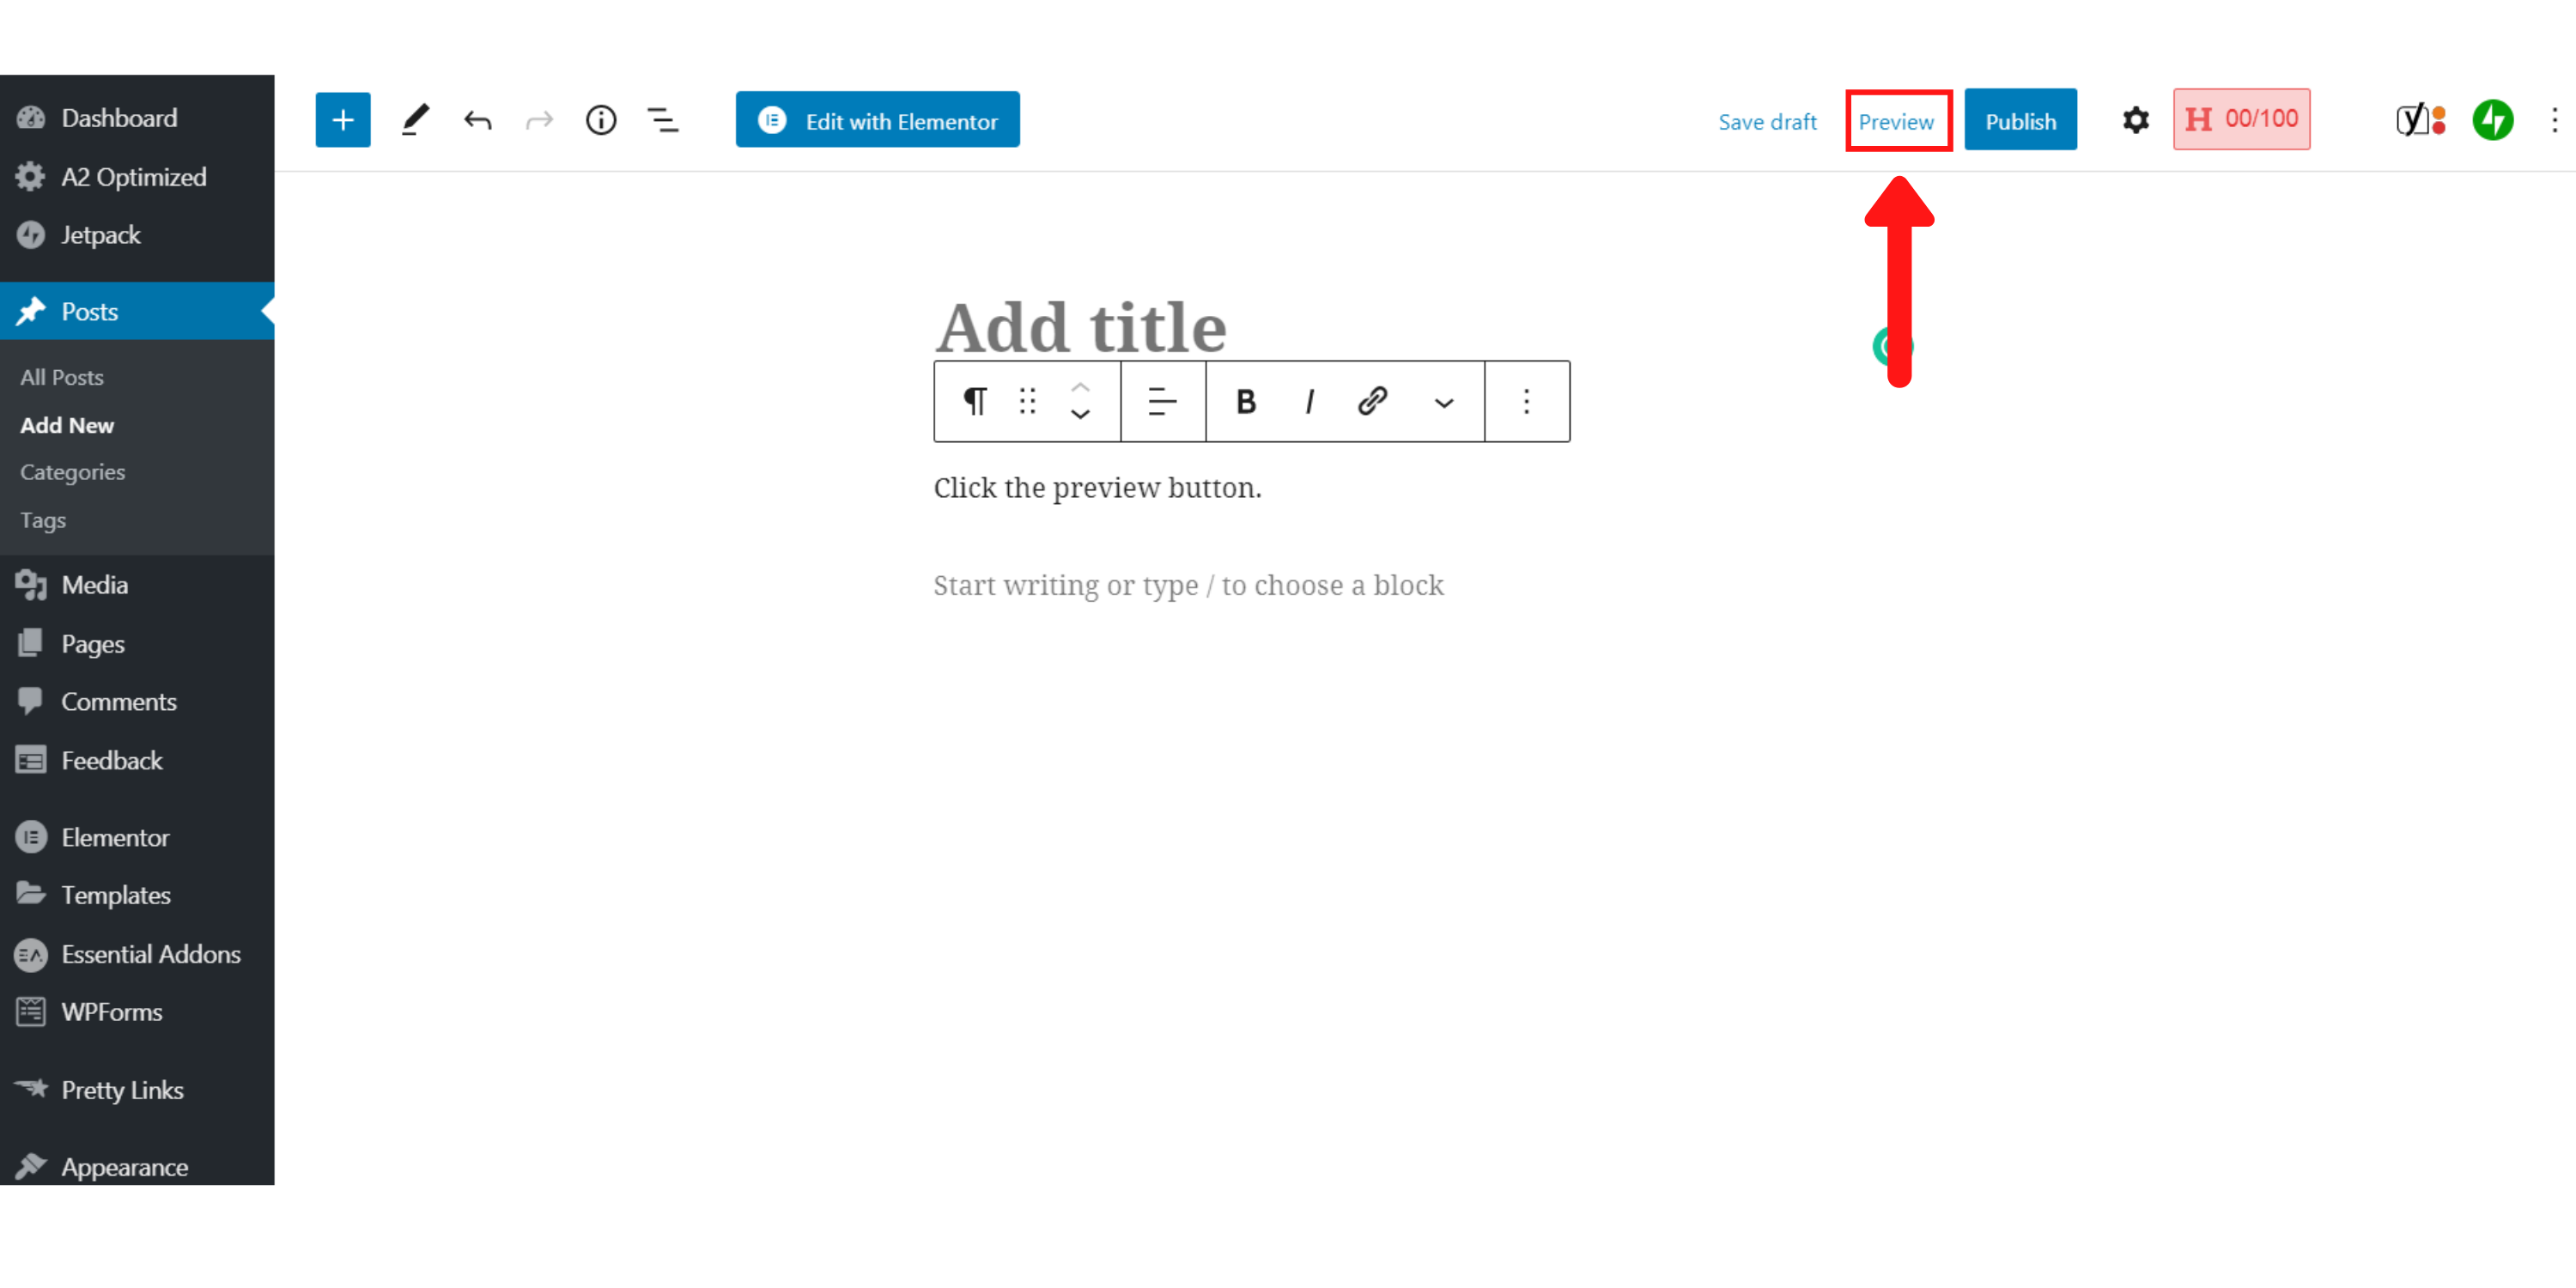
Happy with your work? Think you’re done with editing?
Awesome; click the ‘Preview’ button and take a look at your page’s sneak preview.
Look good?
No — fix it up by using what you’ve just learned! Or:
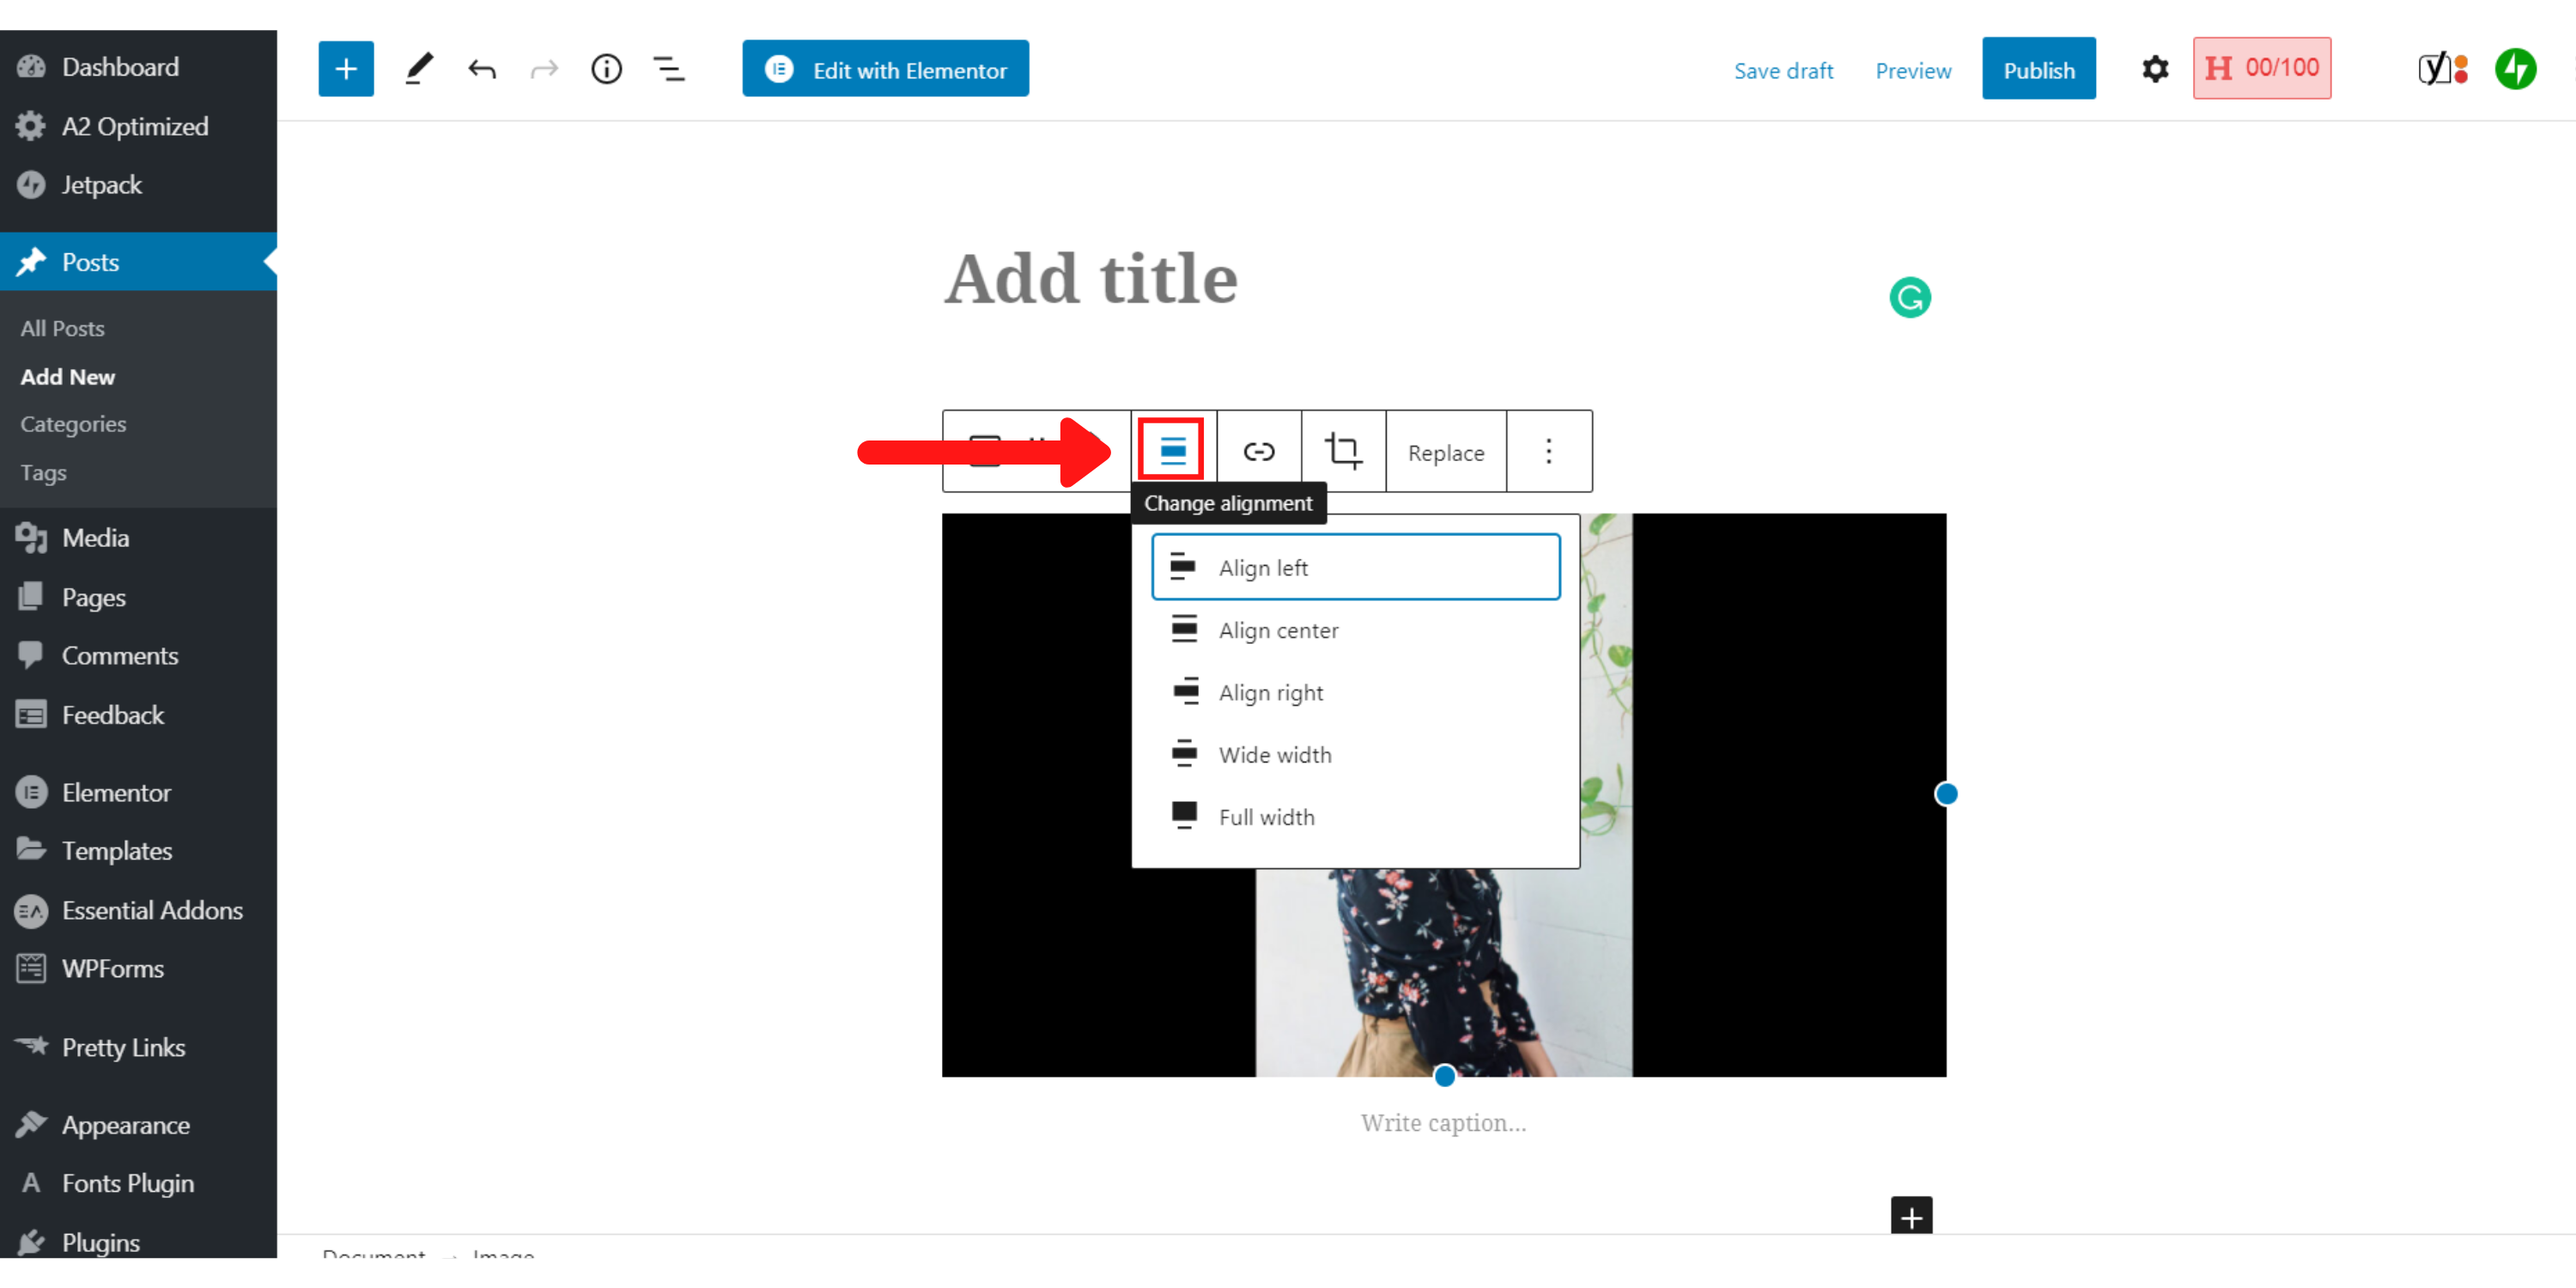
Play with the alignment of your texts and images to make it look better.
This is what you’ll need to click to change the alignment options:
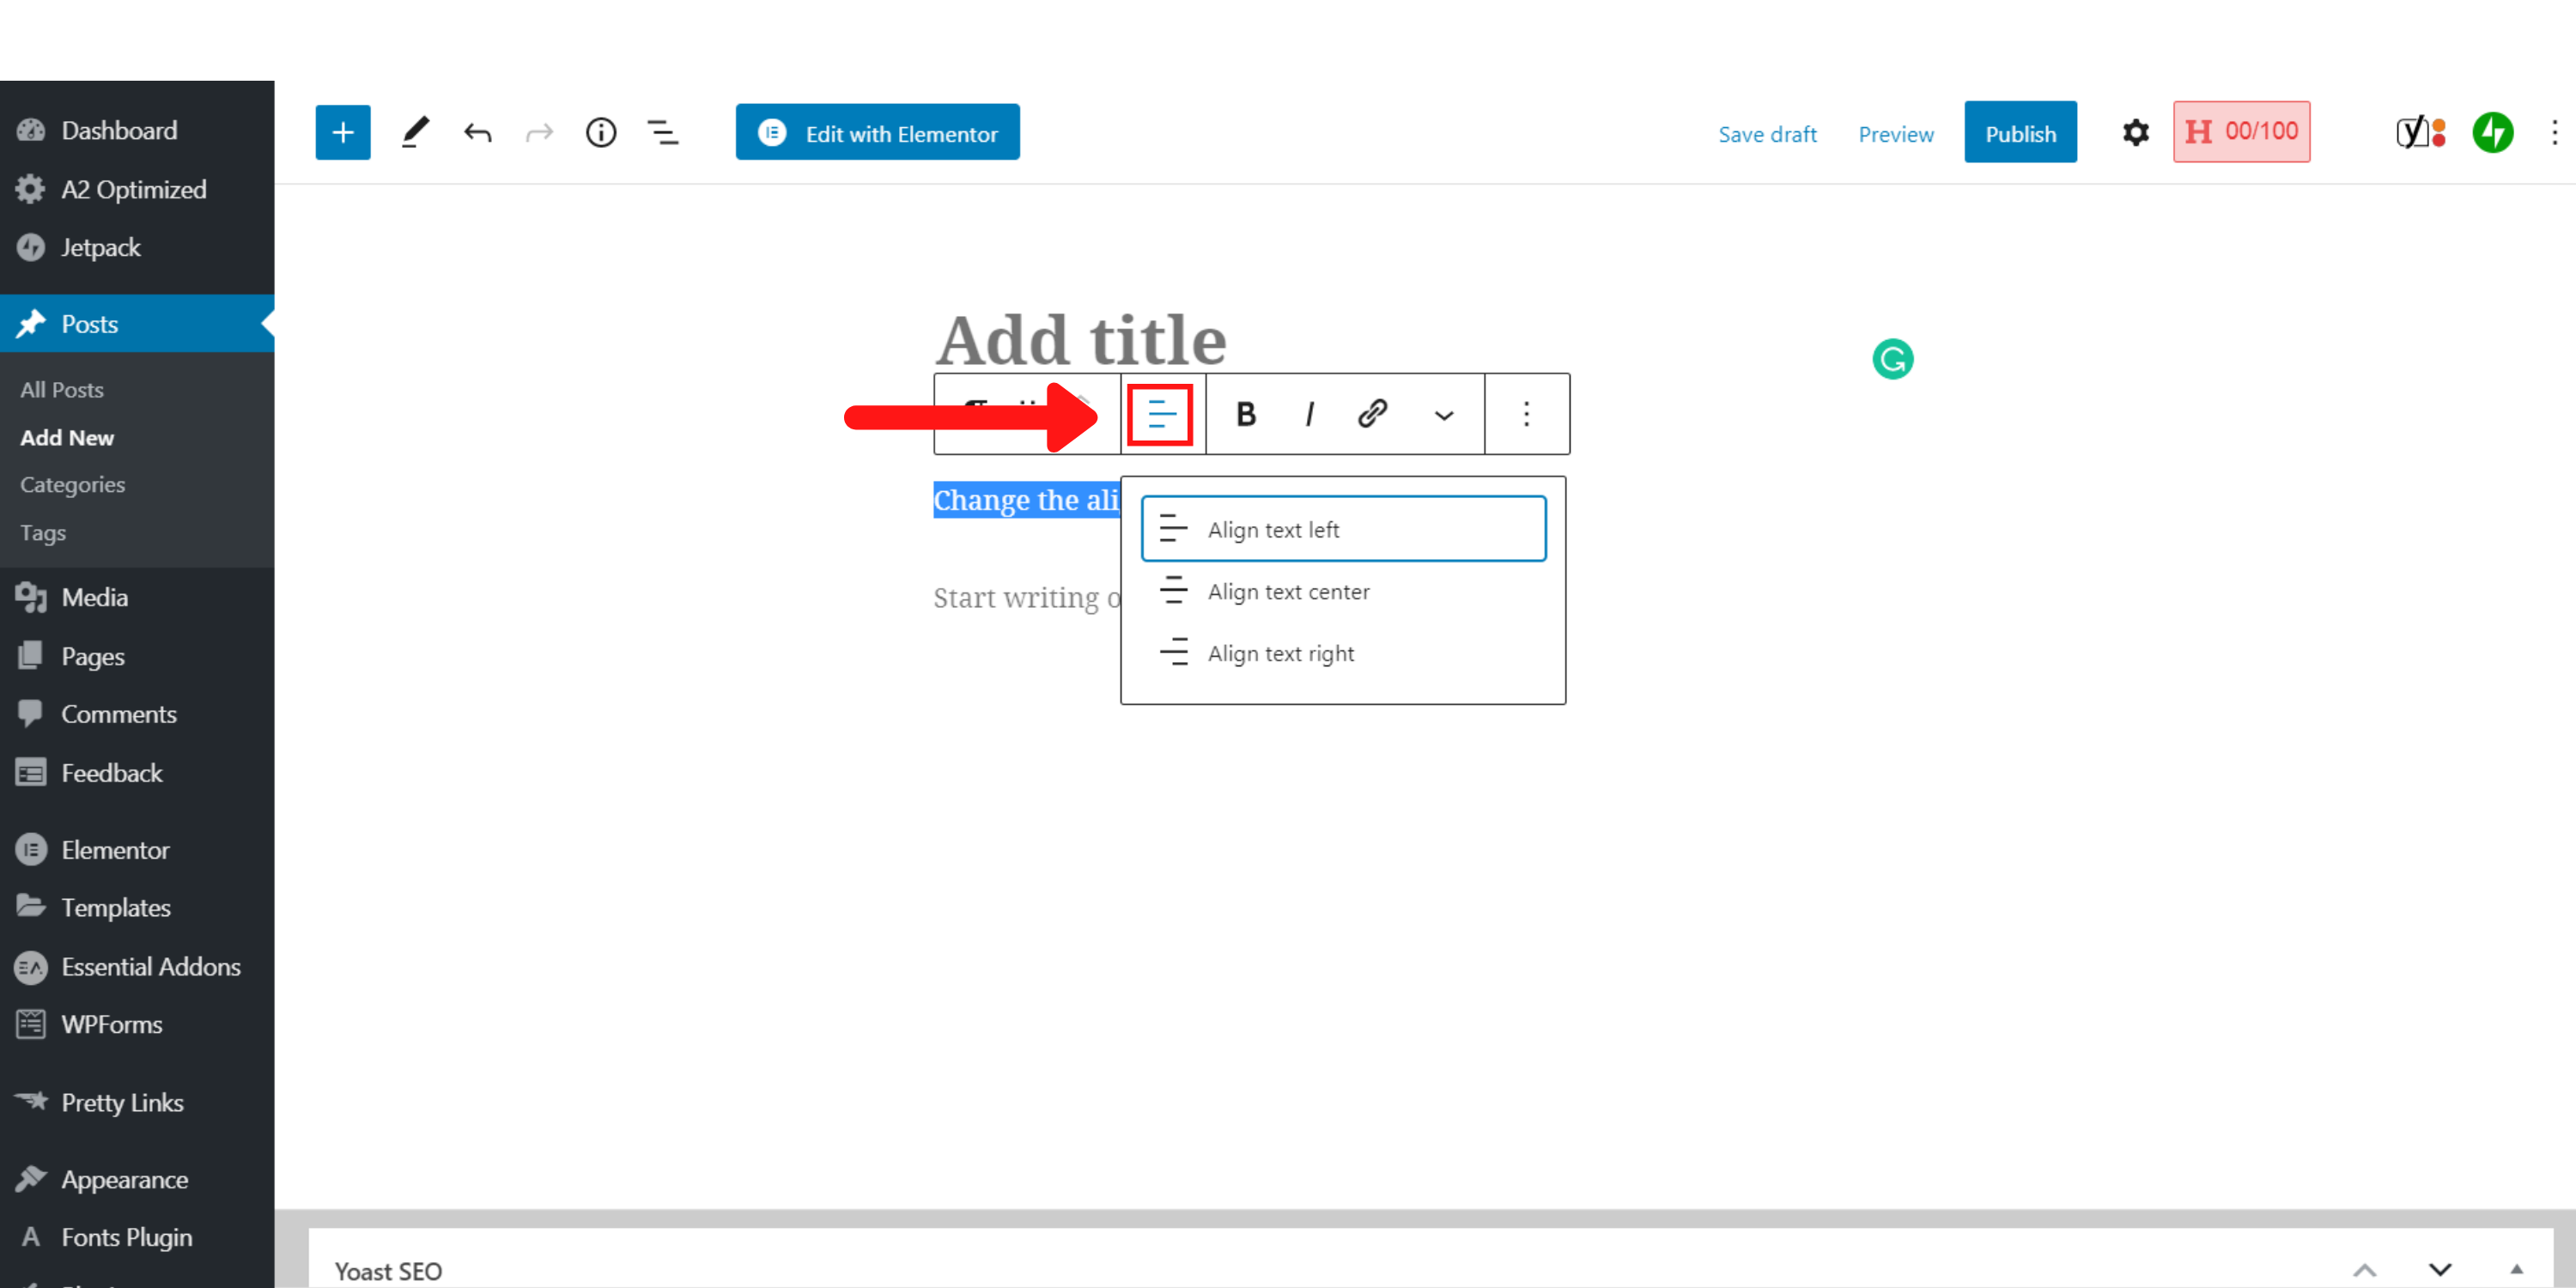
Yes — onwards and upwards to:
Step 3: Publish and Optimize Your Post
First things first, let’s click the ‘Publish’ button in the top right box:
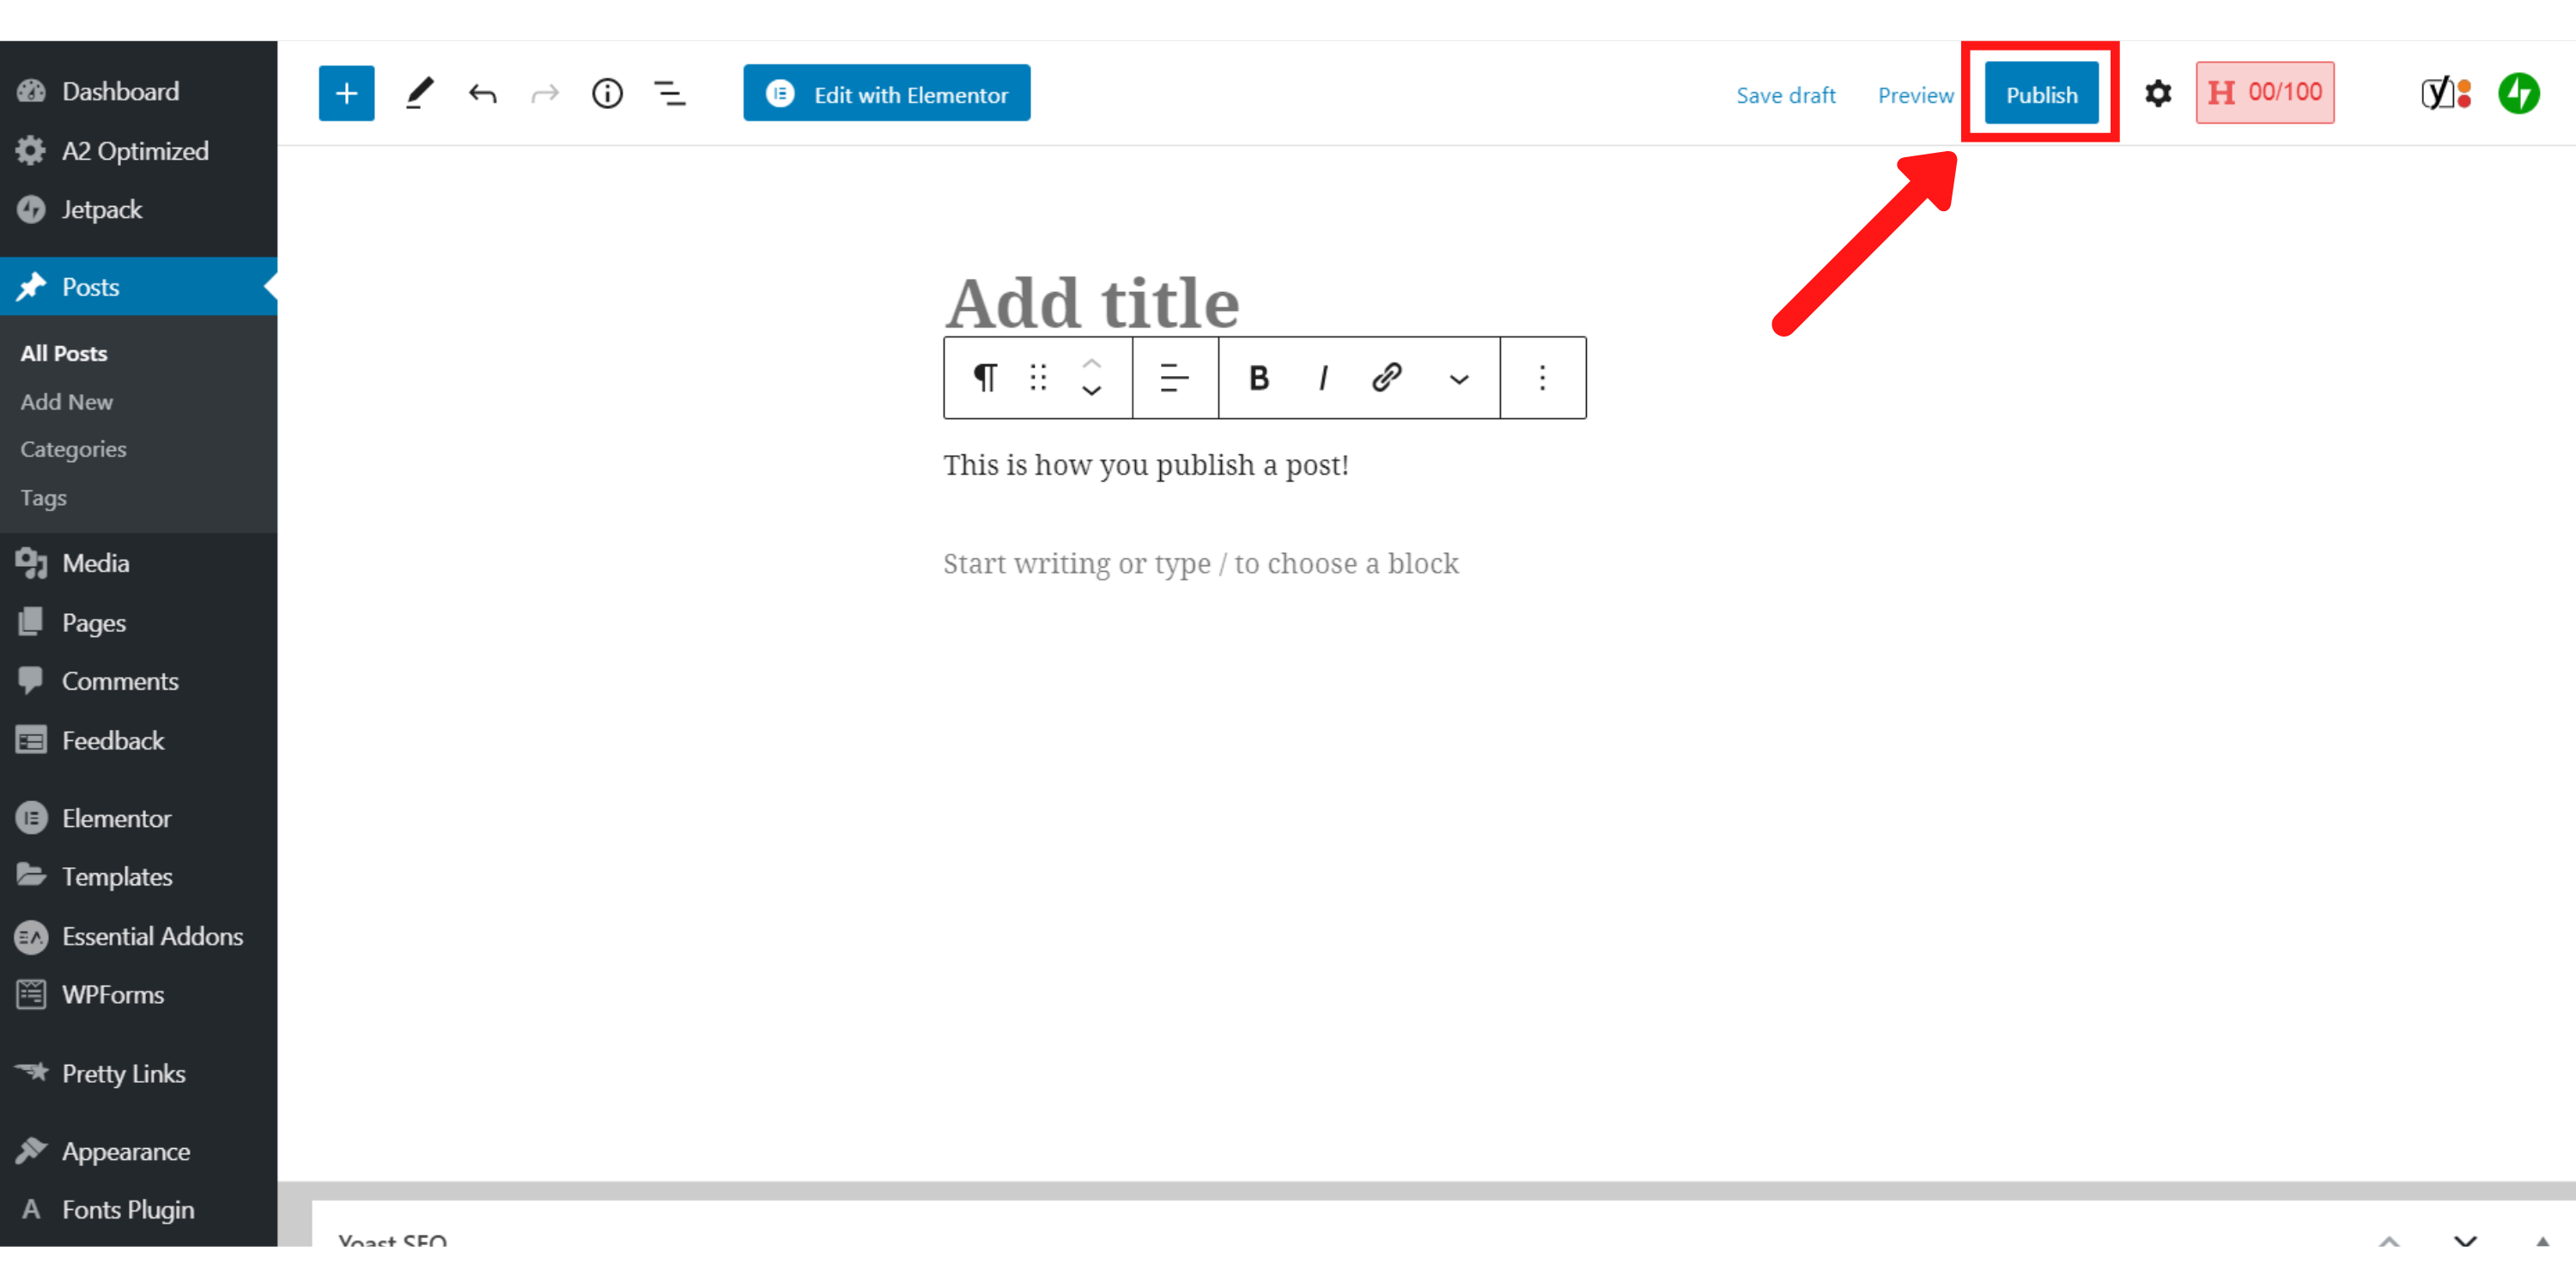
Your post is now live on your WordPress website! Woohoo!
And, since new posts are listed in reverse chronological order, it will show up first on your blog…
But before you panic that we haven’t finished yet, trust us, there’s a method to this madness:
Publishing your post now makes sure that your keyword is the post URL — a super important SEO best practice.
If you’re happy with your post being live, skip to the next header; if not, read on…
When should I post on WordPress? And can I schedule a post on WordPress?
WordPress gives you tons of control over when you can post — from the past to the future!
All you need to do is click on the ‘Publish’ button, then open up the ‘Publish’ dropdown menu to assign this post an auto-publish date:
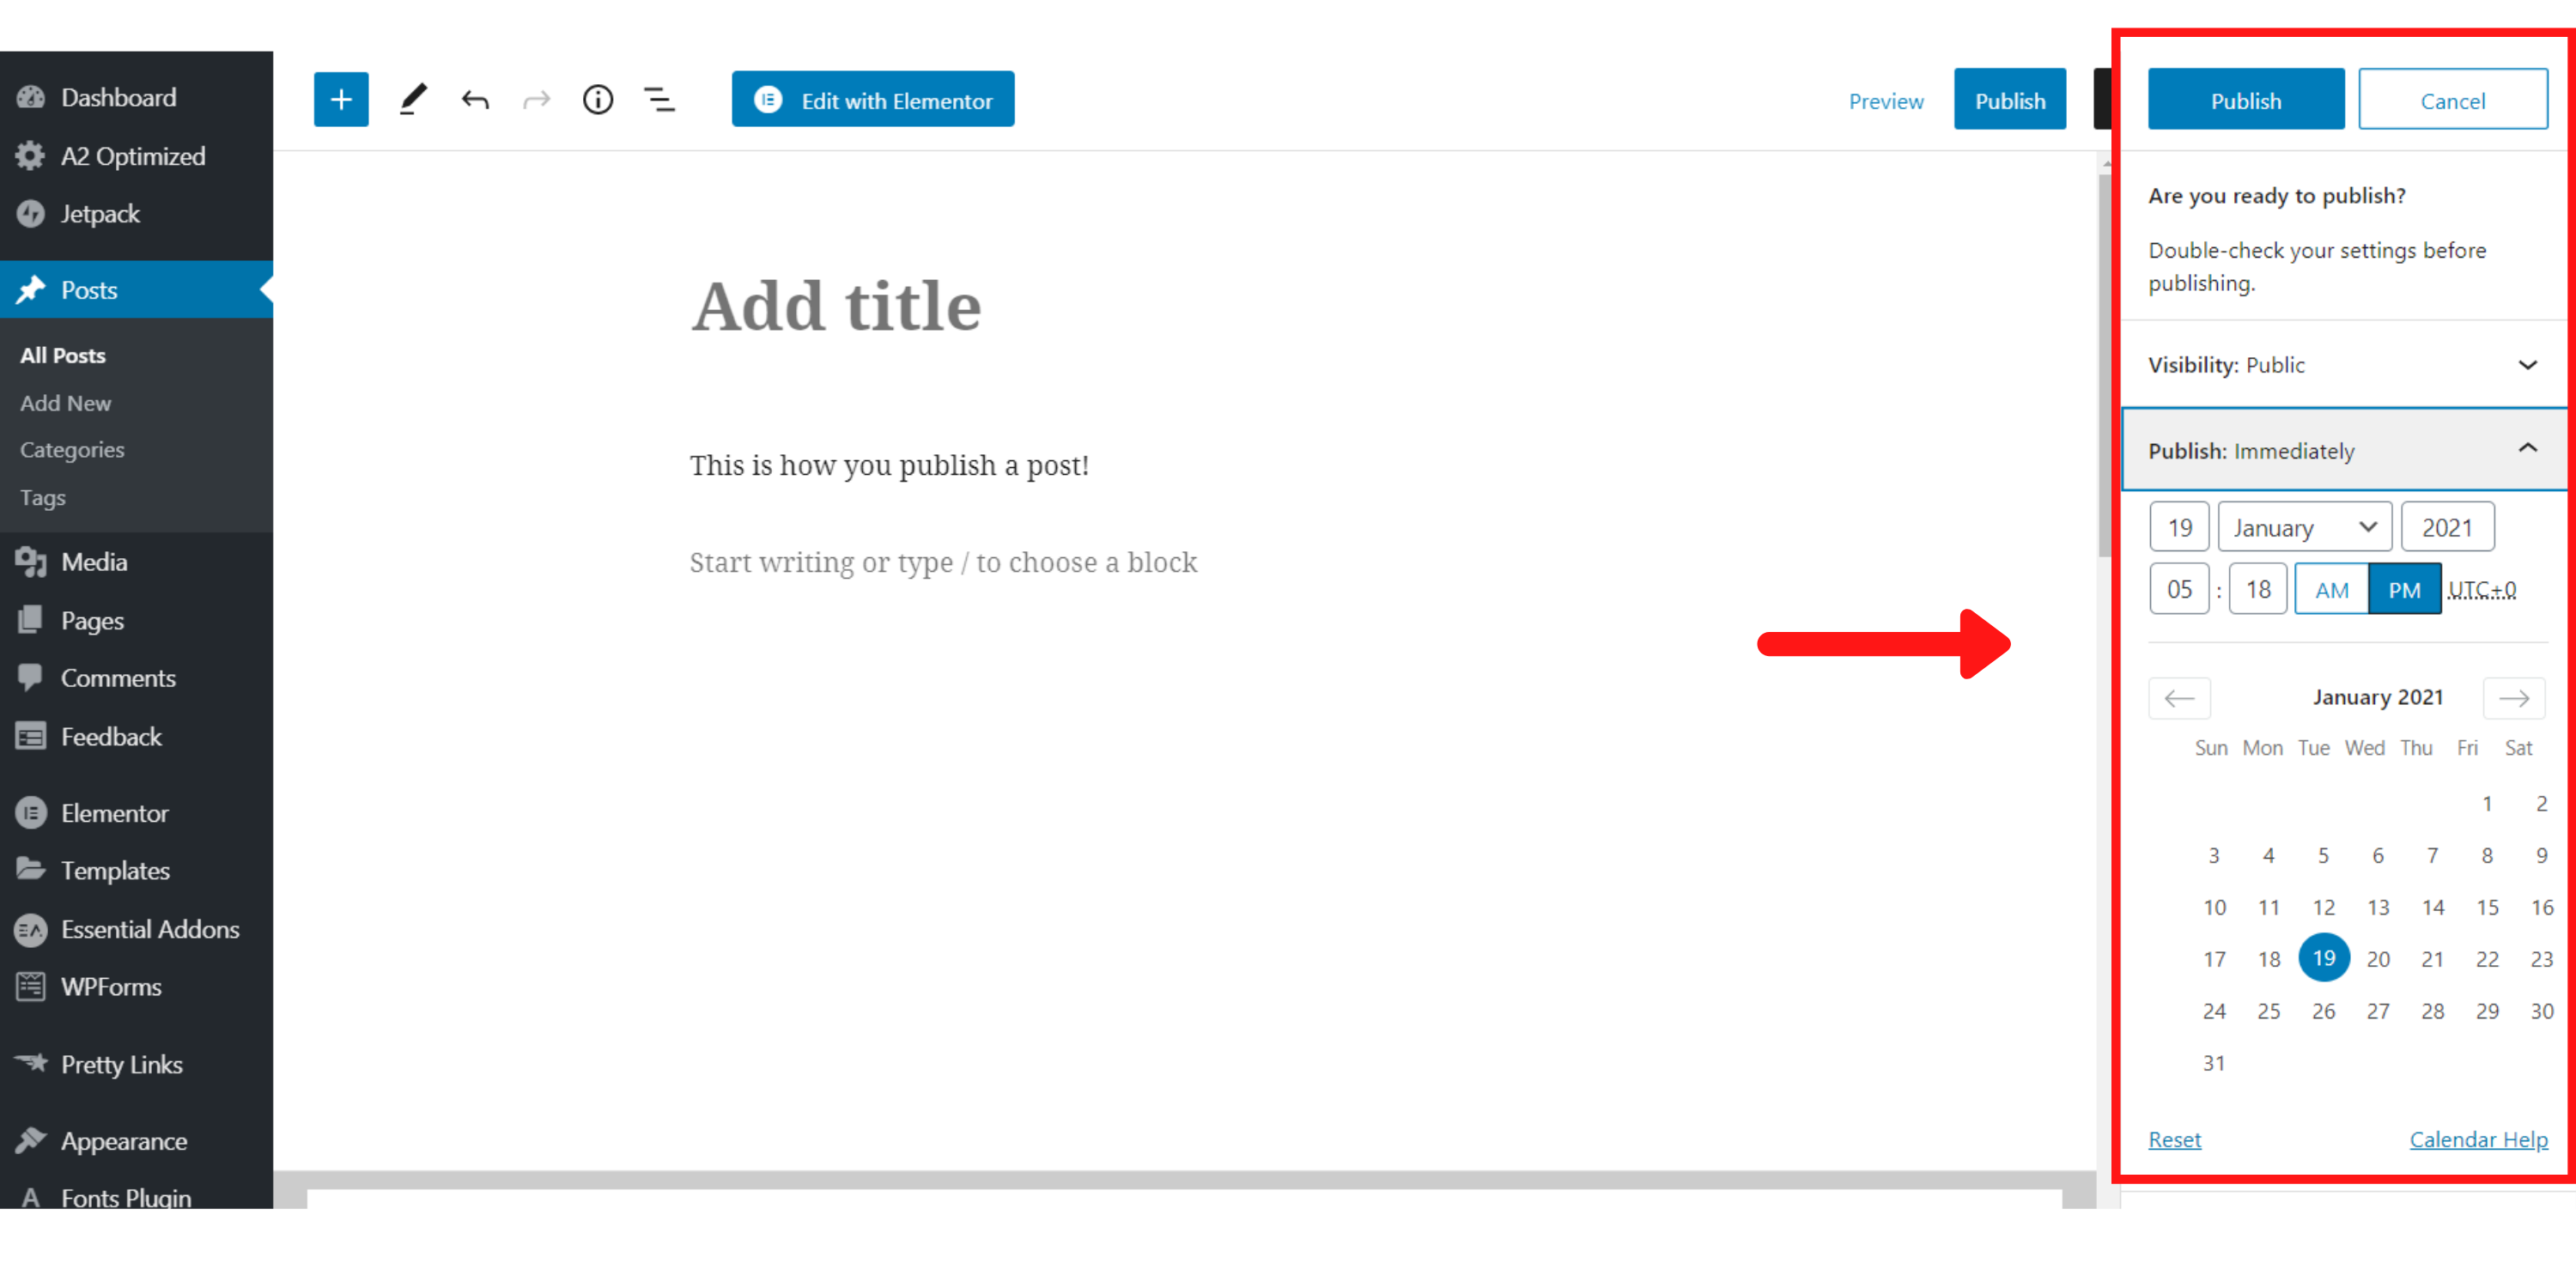
Here you’ll see an editor tool for selecting any time and date you desire — the choice is up to you!
WordPress will simply update the ‘Date published’ field if you pick a date in the past, but it’ll unpublish your post and schedule it if it’s in the future. Handy!
Now it’s time to:
Finish Optimizing Your WordPress Post
Four easy-peasy edits and you’re home free:
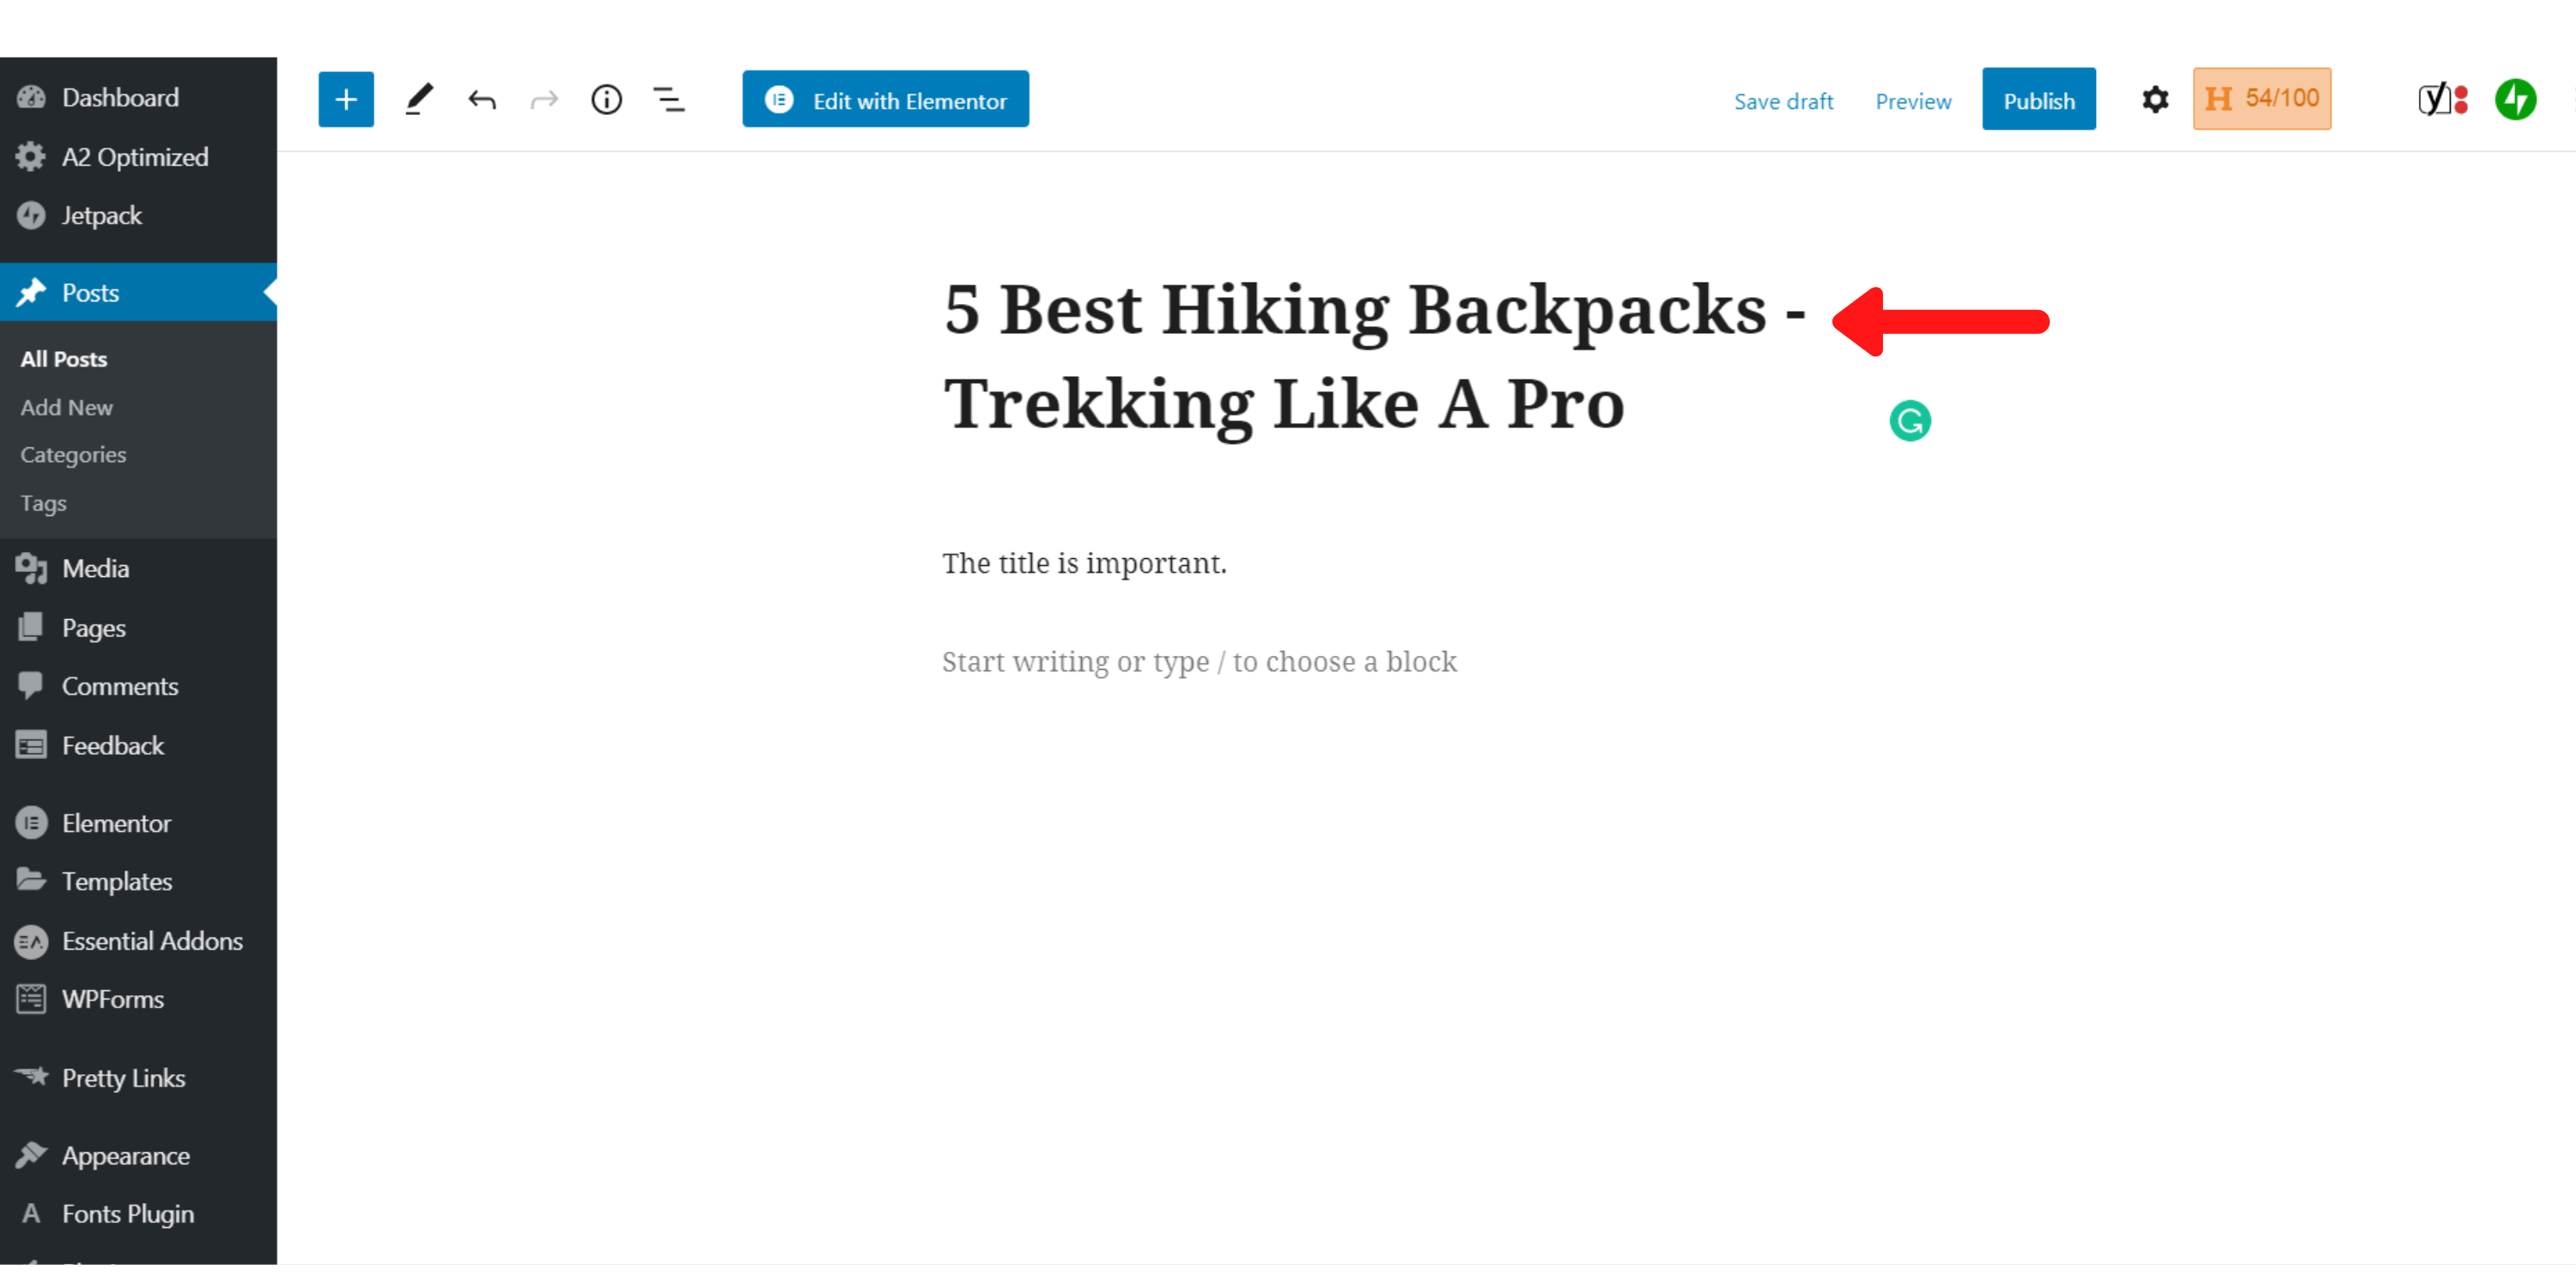
Make Your Post’s Title Catchy
No one will ever read your post if you leave your boring keyword post title — only Google loves it!
So you need to strike a balance:
Keep your keyword in the title and integrate some supporting text to make it sound more appealing to your target audience!
Here’s an example:
Add Categories and Tags To Your WordPress Post
You may be tempted to add lots of categories and tags because it’s easy to confuse them with hashtags on social media.
DON’T!
Each category and tag creates a new URL that gets indexed by Google and makes your blog look UGLY when you don’t have many posts under each category/tag.
You’ll end up having way more categories/tags than you do blog posts… and you definitely don’t want that!
Best practice for newbies is:
- One blog category, and
- Zero tags
Here’s how you add them to your blog post:
- Open the ‘Settings’ menu
- Scroll down to the ‘Categories’ section
Here you can pick from existing categories or create a new one, and then completely ignore the tag box. Done in under 20 seconds!
Want to learn more about this important topic?
Click here to read our in-depth post about WordPress categories and posts!
Check the Author of the Post
Do multiple authors work on your site?
No — skip this point!
Yes — scroll down towards the bottom of the post editor page until you see a box called ‘Author.’ Here, you’ll be able to assign the article to anyone in your team!

Step Your SEO Game up With Yoast
The very last task (we promise!) is sorting out your basic SEO settings.
Yoast will help your blog page look more professional when it shows up on Google search result pages, hence getting you more clicks and traffic!
This is what you want to do:
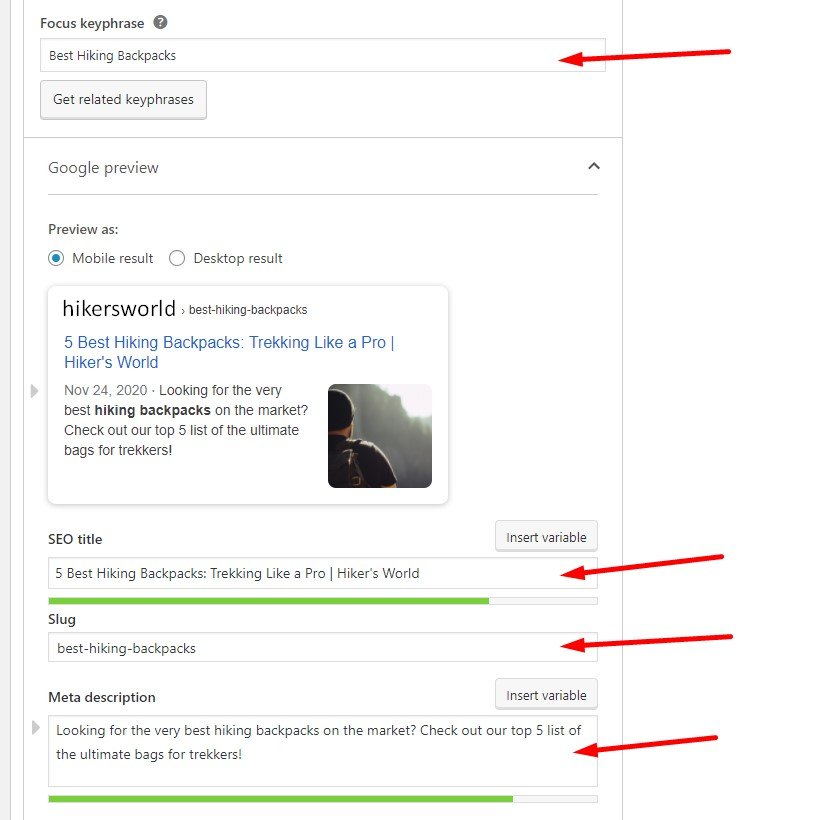
- Add your primary keyword as the ‘Focus keyphrase.’
- Ensure the Google preview looks good – if not, edit the ‘SEO title,’ ‘Slug,’ and ‘Meta description’ fields.
Here’s an example:
Conclusion
Now, all that’s left to do is:
- Double-check your work by clicking the ‘preview’ button, and
- Once you’re happy with your article, click publish (or schedule) one last time to make sure your changes are live (or saved to go live at your chosen date)!
You’ve successfully created and published a new post to your WordPress site, congrats! 🥳
But don’t celebrate too much: it’s already time to put your learning to good use and repeat this process.
Do it a hundred times over, and you’ll turbocharge your journey to becoming a professional blogger! ⌨️💸